 |
VOOZH | about |
|
VOOZH | about |
Editor’s note: This guide to using Tailwind CSS in React and Vue.js was last updated on 6 March 2023 to reflect the most recent changes to CSS, add interactive code examples, and add sections on when to use and not use Tailwind CSS.
👁 How to Use Tailwind CSS in React and Vue.jsIn recent years, CSS libraries like Tailwind CSS have become essential to web development and offer developers a faster and more efficient way to style their web applications. Tailwind CSS, in particular, has gained significant popularity among developers due to its utility-first approach, which allows for easy and rapid prototyping.
Throughout this tutorial, we will explore when you may or may not want to use Tailwind CSS, how to integrate it with Vue.js and React, and how to optimize your Vue, React, and Tailwind CSS applications.
To follow along with this article, you will need Node.js v10x or higher and Yarn/npm v5.6 or higher installed. You will also need a basic understanding of JavaScript, Vue, React, CSS, and atomic CSS architecture.
Jump ahead:
The Replay is a weekly newsletter for dev and engineering leaders.
Delivered once a week, it's your curated guide to the most important conversations around frontend dev, emerging AI tools, and the state of modern software.
Tailwind CSS is a utility-first CSS library used to build custom designs. It offers no pre-configured styles and components to build with; instead, it offers a set of unopinionated building blocks known as utility/helper classes to help you style your components.
According to its official documentation:
Tailwind CSS is a highly customizable, low-level CSS framework that gives you all the building blocks you need to build bespoke designs without any annoying opinionated styles you must fight to override
Tailwind CSS is great for rapid prototyping. You can quickly mock up your application components with Tailwind CSS’s utility classes and not worry about writing custom CSS or overriding existing styles. This allows you to concentrate on the layout and functionality of your page.
Tailwind CSS is also great for creating consistent designs. You can ensure your design is consistent across your project without having to remember or look up the values of different properties, as you can just use the same class names everywhere.
While Tailwind CSS can be a great tool for rapid prototyping, there are instances where you should avoid using it. Here are a few of them:
bg-blue-500 or text-xl and may prefer using more meaningful class names that reflect the content or purpose of the element. There have been numerous heated discussions about Tailwind CSS semantics over the yearsUltimately, whether or not to use Tailwind CSS is a matter of personal preference and project requirements.
There are many options to choose from when creating a new Vue application. However, the most recommended way is using the Vite-powered create-vue package. Regardless, if you’re using a different installation method, the preceding Tailwind CSS installation method should also work for you.
First, create a new Vue 3 project with the following command:
npm create vue@3 vue-tailwind
Running this command gives you an interactive scaffolding experience, allowing you to choose the packages your app will need. You can also save the configuration as a preset for future projects. Next, change the directory to the project folder, and install the necessary dependencies with the command below:
cd vue-tailwind
npm install
Then, spin up the development server in the browser for the newly created app by running one of these commands:
npm run dev
# OR
yarn dev
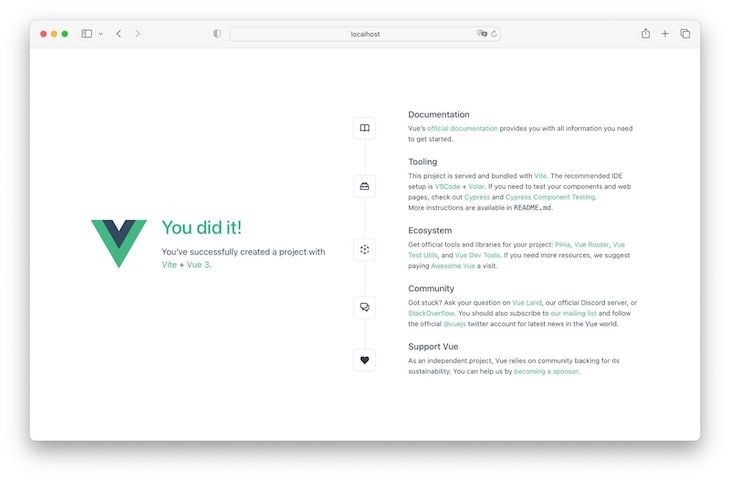
Your app should now be running on http://localhost:5173 by default and look like this:
Next, install Tailwind CSS and its peer dependencies with the command below:
npm install -D tailwindcss postcss autoprefixer
To proceed, we must also run the following command to generate the configuration files required for Tailwind CSS to work:
npx tailwindcss init -p
The above command creates two new files, tailwind.config.js and postcss.config.js. These two files house all Tailwind CSS and PostCSS default configurations.
Open the tailwind.config.js file and update its content export, so the entire file looks like this:
module.exports = {
 content: ["./index.html", "./src/**/*.{vue,js,ts,jsx,tsx}"],
 theme: {
 extend: {},
 },
 plugins: [],
};
Here, we updated the configuration file so that Tailwind CSS will work within the default index.html and all .vue, .js, .ts, .jsx, and .tsx files.
Finally, open your project’s default CSS file and paste the following code at the top of this file:
// src/assets/main.css

@tailwind base;
@tailwind components;
@tailwind utilities;
After following all these steps, Tailwind CSS should work perfectly with your Vue application. Paste the following code inside the default src/App.vue file to try things out:
<template>
 <div class="p-4 m-auto border-2 rounded-lg bg-slate-800 text-white">
 <h1 class="text-3xl font-bold">Hello world!</h1>
 <p class="mt-5">
 Lorem ipsum dolor sit amet consectetur adipisicing elit. Numquam qui
 minima autem nobis animi perspiciatis deleniti quaerat, recusandae
 officiis ea totam quisquam repellat quidem perferendis ad! Vel officia
 voluptatibus ipsam.
 </p>
 <button
 class="bg-indigo-600 hover:bg-indigo-800 mt-4 font-bold py-2 px-4 rounded"
 >
 Click Me
 </button>
 </div>
</template>
You should see a styled card rendered, like in the image below:
👁 Example of a Vue.js Styled Card With Tailwind CSS
Following the steps highlighted above, I’ve also created a Vue and Tailwind CSS starter template to help you get started when creating new projects quickly. You can also interact directly here.
To install Tailwind CSS in React, create a new project with Create React App with the npx create-react-app react-tailwind command. Next, change your working directory to your project folder and install Tailwind CSS and its peer dependencies with the command below:
cd react-tailwind
npm install -D tailwindcss postcss autoprefixer
To proceed, run npx tailwindcss init -p to generate the configuration files required for Tailwind CSS. This command creates two new files, tailwind.config.js and postcss.config.js, which contain Tailwind CSS and PostCSS default configurations.
Now, open the tailwind.config.js file and update its content export so the file looks like this:
module.exports = {
 content: ["./index.html", "./src/**/*.{js,ts,jsx,tsx}"],
 theme: {
 extend: {},
 },
 plugins: [],
};
In the code above, we updated the configuration file so that Tailwind will work within the default index.html and all .js, .ts, .jsx, and .tsx files.
Finally, open the default src/index.css file and paste the following code at the top of this file:
// src/assets/main.css

@tailwind base;
@tailwind components;
@tailwind utilities;
Nice! Tailwind CSS should now work perfectly with our React application. To try it out, paste the following code inside the default src/App.js file:
function App() {
 return (
 <div class="p-4 m-auto border-2 rounded-lg bg-slate-800 text-white">
 <h1 class="text-3xl font-bold">Hello world!</h1>
 <p class="mt-5">
 Lorem ipsum dolor sit amet consectetur adipisicing elit. Numquam qui
 minima autem nobis animi perspiciatis deleniti quaerat, recusandae
 officiis ea totam quisquam repellat quidem perferendis ad! Vel officia
 voluptatibus ipsam.
 </p>
 <button class="bg-indigo-600 hover:bg-indigo-800 mt-4 py-2 px-4 rounded">
 Click Me
 </button>
 </div>
 );
}
export default App;
The code above is the same card component we created in the Vue installation process earlier, and if your run your React app, you should see the same output as well:
👁 Example of a Tailwind CSS, Vue.js, and React Styled Card
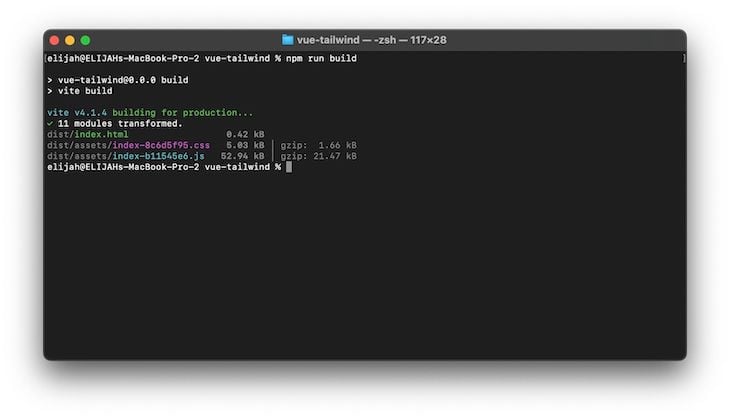
By default, Tailwind CSS will generate the CSS code only for the utility classes you use in your project. To see this in action, we can try bundling the vue-tailwind app we created earlier by npm run build. We should see an output like in the image below:
👁 How to Use Tailwind CSS With Vue.js and React Part One
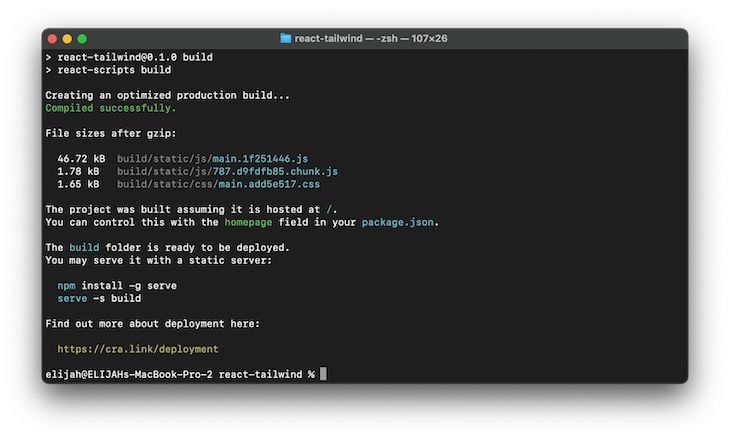
As shown above, the generated CSS file for the card component we created earlier is 1.66 kB after being gzipped, which is fairly reasonable. The React example also produces a similar output, with the CSS file at 1.65 kB, after being gzipped, as shown below:
👁 How to Use Tailwind CSS With Vue.js and React Part Two
However, minifying your CSS with a tool like cssnano in production is recommended for the smallest possible production build. To do this, we must first install cssnano with the command below:
npm install cssnano
Because we’ve installed Tailwind CSS as a PostCSS plugin, we can conditionally add cssnano to our production build by updating the postcss.config.js file, like so:
module.exports = {
 plugins: {
 tailwindcss: {},
 autoprefixer: {},
 ...(process.env.NODE_ENV === "production" ? { cssnano: {} } : {}),
 },
};
By doing this, our generated CSS files should be smaller in production.
In this article, we’ve learned how to use Tailwind CSS in Vue and React. We also explored how to optimize our application to generate the lowest bundle size possible. You can read more in the documentation here.
Debugging Vue.js applications can be difficult, especially when users experience issues that are difficult to reproduce. If you’re interested in monitoring and tracking Vue mutations and actions for all of your users in production, try LogRocket.
👁 LogRocket Dashboard Free Trial BannerLogRocket lets you replay user sessions, eliminating guesswork by showing exactly what users experienced. It captures console logs, errors, network requests, and pixel-perfect DOM recordings — compatible with all frameworks.
With Galileo AI, you can instantly identify and explain user struggles with automated monitoring of your entire product experience.
Modernize how you debug your Vue apps — start monitoring for free.
Install LogRocket via npm or script tag. LogRocket.init() must be called client-side, not
server-side
$ npm i --save logrocket

// Code:

import LogRocket from 'logrocket';
LogRocket.init('app/id');
// Add to your HTML:

<script src="https://cdn.lr-ingest.com/LogRocket.min.js"></script>
<script>window.LogRocket && window.LogRocket.init('app/id');</script>
Learn how next-browser gives AI agents runtime context for debugging Next.js apps, including React props, hydration, PPR, forms, and performance.
Build dynamic LLM routing in Next.js with OpenRouter, TanStack AI, task classification, model fallbacks, and cost-aware routing.
TSRX adds first-class control flow, conditional hooks, and scoped styles to React via a TypeScript compiler extension — no new framework required.
Learn how to build a full React Native auth system using Better Auth and Expo — with email/password login, Google OAuth, session persistence, and protected routes.
Hey there, want to help make our blog better?
Join LogRocket’s Content Advisory Board. You’ll help inform the type of content we create and get access to exclusive meetups, social accreditation, and swag.
Sign up now