 |
VOOZH | about |
|
VOOZH | about |
React Native uses JavaScript and React to build apps for iOS, Android, and the web from a single codebase. It also allows you to tap into the native features of each device, such as the device’s default themes, camera, geolocation, and push notifications. This means you can use React Native to build a complete mobile app that integrates with iOS or Android’s underlying settings, which makes it simple to implement push notifications, as I will demonstrate today.
👁 ImageIn this article, we will learn how to build a simple React chat application that integrates with Firebase Cloud Messaging and the device’s push notifications to notify a user when they receive a new message.
To follow along with this tutorial, it is essential to have the following:
The Replay is a weekly newsletter for dev and engineering leaders.
Delivered once a week, it's your curated guide to the most important conversations around frontend dev, emerging AI tools, and the state of modern software.
To set up the application, go ahead and create a project folder where you want your project to live, then initialize the application using this npx command:
npx react-native init chat_app_with_fcm
Once the above command is executed, a chat_app_with_fcm directory that hosts your React Native settings will be created. Change the directory path to the newly created chat_app_with_fcm folder:
cd chat_app_with_fcm
Let’s test if the bootstrapped React Native template is working. Make sure you have a connected device or an emulator, and then start the application as such:
npm run android
This will start a development environment that you can use to access the application on the connected device or emulator.
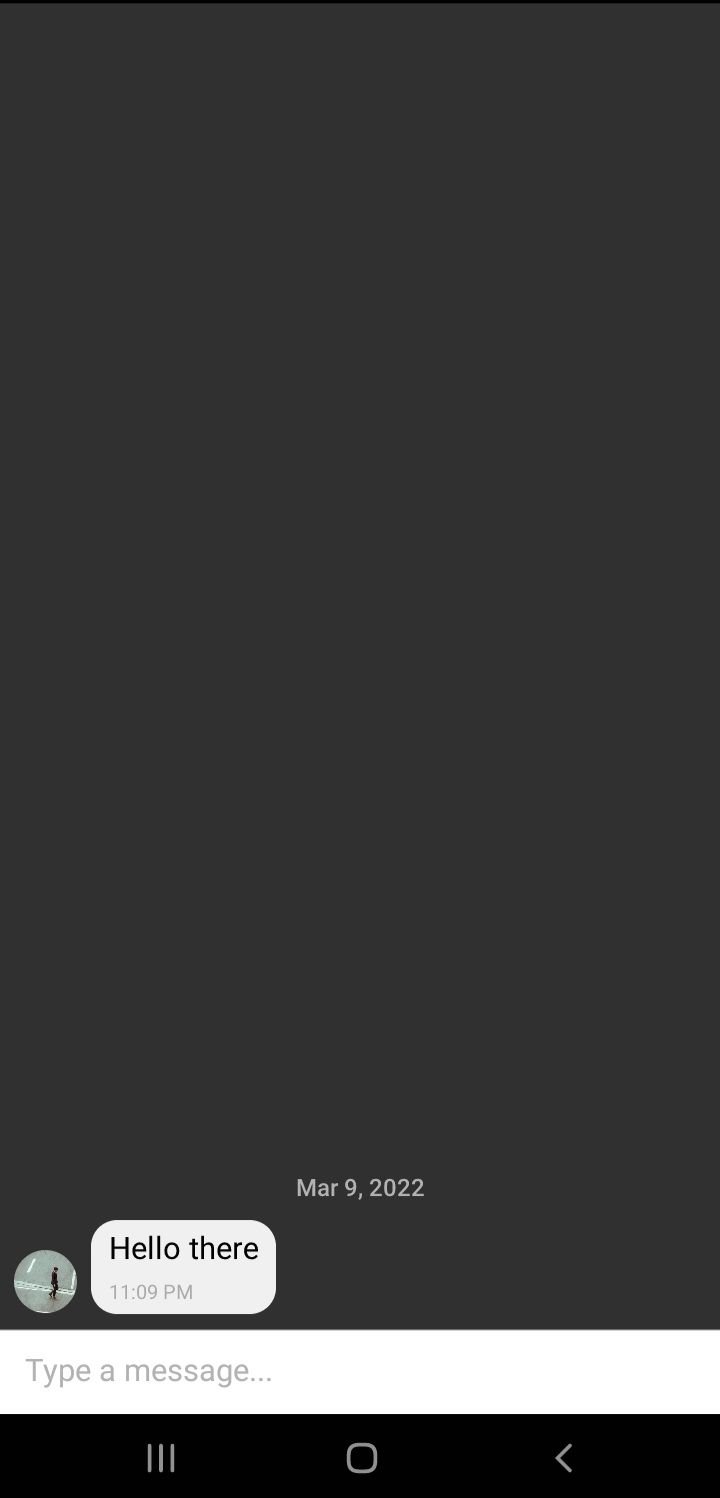
This guide is creating a chat application. To handle the chat functionality, we will use the react-native-gifted-chat package. The package will provide a ready-to-use, interactive UI for the chat application.
To install the package, open your project terminal and run the following command:
npm i react-native-gifted-chat
Once installed, navigate to the App.js file and make the following changes.
First, import the GiftedChat module:
import { GiftedChat } from 'react-native-gifted-chat'
Then, import the following Hooks:
import { useState, useCallback, useEffect } from "react";
Inside the App: () function, define a state for messages:
const [messages, setMessages] = useState([]);
Define a useEffect to set a default message when the application loads:
useEffect(() => {
 setMessages([
 {
 _id: 1,
 text: 'Hello there',
 createdAt: new Date(),
 user: {
 _id: 2,
 name: 'PartyA',
 avatar: 'https://placeimg.com/140/140/any',
 },
 },
 ]);
}, [])
Next, define an onSend event handler for when a user sends a message:
const onSend = useCallback((messages = []) => {
 setMessages(previousMessages => GiftedChat.append(previousMessages, messages)) // append the new message to present messages
}, [])
Finally, replace the rendered view with the GiftedChat component:
return (
 <GiftedChat
 backgroundColor={isDarkMode ? Colors.black : Colors.white}
 messages={messages}
 onSend={messages => onSend(messages)}
 user={{
 _id: 1,
 }}
 />
)
After making the above changes, React Native will use its hot reload features and reflect the changes to your screen.
Let’s now connect this application to Firebase. To set this up, log on to your Firebase account and create a new project using the Add project card. Enter your project name, and then click Continue. Feel free to enable or disable Google Analytics on the next step, and then click Continue.
When your project is ready, click Continue again to go to the project dashboard. On this dashboard, create an Android application using the Android icon present on your project dashboard.
Under Android package name, enter the package name from your app. You can get this package name inside the /android/app/src/main/AndroidManifest.xml file. Finally, hit Register app, download the google-services.json file, and place it under your project’s android/app/ directory.
To connect our React Native application with Firebase, we have to configure the application with the Firebase credentials.
Under android/build.gradle, add the following classpath inside the buildscripts/dependencies tags:
classpath 'com.google.gms:google-services:4.3.10'
Under the /android/app/build.gradle file, add the google-services plugin right below apply plugin: "com.android.application" :
apply plugin: 'com.google.gms.google-services'
Next, install React Native Firebase like so:
npm i --save @react-native-firebase/messaging
These settings are ready. Now, let’s handle how React Native will use FCM to send the chat messages.
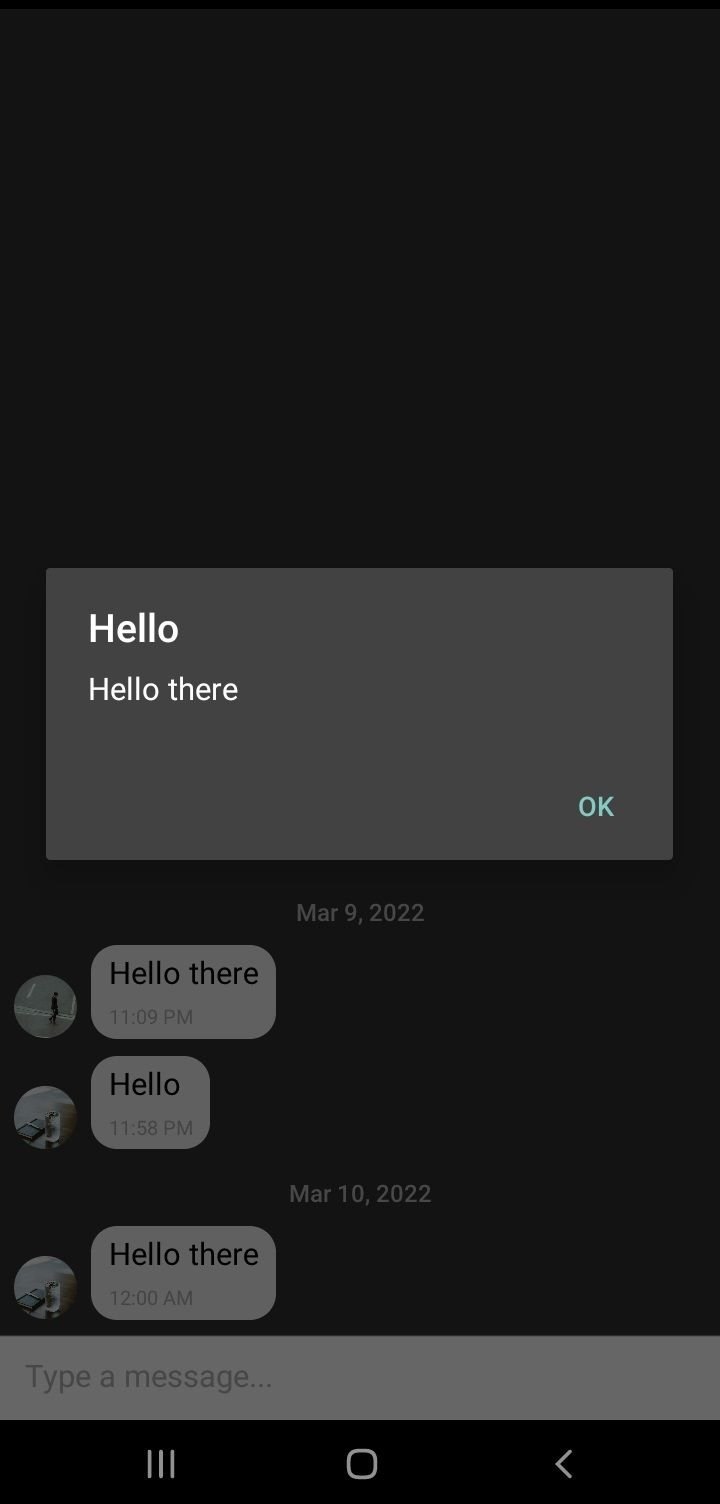
First, create an event handler to handle foreground message notifications. The handler will receive the incoming message, structure it, add it to the message state, and display an alert.
Navigate to the App.js file and import React Native Firebase:
import messaging from '@react-native-firebase/messaging';
Under App(), add a useEffect() Hook, which will listen to any change in the messages state:
useEffect(() => {
}, [messages]);
Inside the useEffect(), add an event handler to listen to notifications:
// Get the notification message
const subscribe = messaging().onMessage(async remoteMessage => {

 // Get the message body
 let message_body = remoteMessage.notification.body;

 // Get the message title
 let message_title = remoteMessage.notification.title;

 // Get message image
 let avatar = remoteMessage.notification.android.imageUrl;

 // Append the message to the current messages state
 setMessages(messages => GiftedChat.append(messages, {
 _id: Math.round(Math.random() * 1000000),
 text: message_body,
 createdAt: new Date(),
 user: {
 _id: 2,
 name: "PartyB",
 avatar: avatar,
 },
 }));

 // Show an alert to the user
 Alert.alert(message_title, message_body);
});

return subscribe;
To test this, go to the Firebase console of the application you created in the previous step. On the left sidebar, under Engage, click Cloud messaging. Then click the button Send your first message.
On the form that proceeds:
Now, under Target, click Select an app and then select your app. Click Next on the next step and then Review. On the resulting popup, click Publish.
On the app, you should receive the following notification.
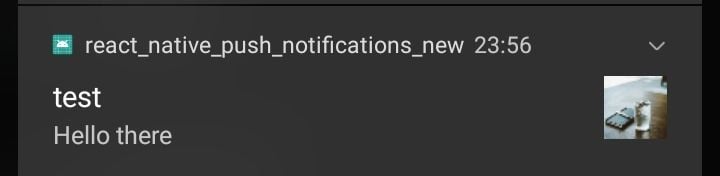
Background message notifications work when the application is closed. Similarly to foreground notifications, we will be adding a handler.
To add the handler, make the following changes on App.js before App():
// Register background handler
// Get the notification
messaging().setBackgroundMessageHandler(async remoteMessage => {
 // Extract the body
 let message_body = remoteMessage.notification.body;
 // Extract the title
 let message_title = remoteMessage.notification.title;
 // Extract the notification image
 let avatar = remoteMessage.notification.android.imageUrl;

 // Add the notification to the messages array
 setMessages(messages => GiftedChat.append(messages, {
 _id: Math.round(Math.random() * 1000000),
 text: message_body,
 createdAt: new Date(),
 user: {
 _id: 2,
 name: "PartyB",
 avatar: avatar,
 },
 }));

 // Send a notification alert
 Alert.alert(message_title, message_body);
});
To test the functionality, you will have to close the application, then send a notification message from the console as in the previous section.
You should receive such an alert like the one below on your phone’s push notification bar.
Notifications are critical to modern mobile applications. I hope this guide has helped you learn the important skill of adding push notifications to React Native apps. As we have seen, Firebase Cloud Messaging and React Native Firebase makes this flow seamless and very easy.
LogRocket's Galileo AI watches sessions for you and and surfaces the technical and usability issues holding back your React Native apps.
LogRocket also helps you increase conversion rates and product usage by showing you exactly how users are interacting with your app. LogRocket's product analytics features surface the reasons why users don't complete a particular flow or don't adopt a new feature.
Start proactively monitoring your React Native apps — try LogRocket for free.
Learn how to use Gemini CLI subagents to delegate frontend, backend, testing, and docs tasks to specialized agents with guardrails and clear ownership.
Learn how next-browser gives AI agents runtime context for debugging Next.js apps, including React props, hydration, PPR, forms, and performance.
Build dynamic LLM routing in Next.js with OpenRouter, TanStack AI, task classification, model fallbacks, and cost-aware routing.
TSRX adds first-class control flow, conditional hooks, and scoped styles to React via a TypeScript compiler extension — no new framework required.
Would you be interested in joining LogRocket's developer community?
Join LogRocket’s Content Advisory Board. You’ll help inform the type of content we create and get access to exclusive meetups, social accreditation, and swag.
Sign up now