
Expedite Your Embedded Linux Web Interface Design
This tutorial shows how to build an embedded Linux device management interface with Mako Server. You will compile the server, start from a ready-to-run dashboard, add Lua logic, expose C functions to Lua, and control real hardware through GPIO.
The goal is to connect the layers that usually make embedded web UI work slow: C/C++ system access, Lua application logic, authentication, menu-driven navigation, WebSocket updates, and browser-based controls. You can run the early steps on desktop Linux or WSL, then move the same approach to an embedded Linux target.
Barracuda App Server
C source code library including the Lua scripting engine
Using Windows and not Linux?
Windows 10 and up can run Linux. You can install the Windows Subsystem for Linux (WSL) and run this hands-on tutorial in the WSL shell.
Prerequisite:
The following tools are required:
Compiling the C Source Code
As mentioned on the main page, the Mako Server requires the Barracuda App Server C Source Code Library. The following instructions explain how to compile the Mako Server, the Barracuda App Server Library, and link the components. The SQLite database engine is also included, but it can easily be excluded from the build if it is not needed.
We provide a ready-to-run script that you can initially use for downloading all required code and for compiling and/or cross-compiling the source code for your (embedded) Linux. Download and (cross) compile the code for (embedded) Linux as follows:
The script will use your default gcc host compiler if you do not set the CC environment variable. As an example, the following cross-compiles the code using Toradex's iMX6 toolchain.
You can rerun the script at any time to compile for a different target. The script downloads the source only if it has not already been downloaded.
If you have cross-compiled the code, you should copy the compiled binary 'mako' and the Mako Server's resource file 'mako.zip' to your embedded Linux system. Alternatively, you can also compile the server for your host computer and use the host version for the tutorials. To do this, compile the code without setting the CC environment variable.
Test the compiled server as follows; press CTRL-C when done testing:
Web-Based Device Management Foundation
The ready-to-use Light Dashboard App is a solid foundation for device management, with its ready-to-use navigation menu engine and authentication logic.
Execute the following to download all examples, including the Light Dashboard app, and to instruct the Mako Server to load the Light Dashboard app.
- You should see printouts from the Mako Server, including the HTTP listening port number. This port number will most likely be 9357.
- Using your browser, navigate to http://localhost:9357/
- You should see a login page
- Authenticate using the username admin and password qwerty (the world's best username/password combo; Yay)
- When done testing, stop the server by typing CTRL-C in the console
The Light Dashboard app acts as a mini content management system, and you can easily modify, remove, and add new pages to the dashboard app. See the tutorial How to Build an Interactive Dashboard App for details.
Interacting with Real World Objects
Server side applications are preferably designed in Lua and a recommendation is to initially check out our Online Interactive Lua Tutorials if you are new to the Lua programming language. The server also provides an extensive C API; however, Lua is what will help you expedite your development 👍
Using Existing Lua APIs
Lua is easy to extend and you can add your own C code to the Mako Server, allowing Lua to call your C code API via a so-called Lua binding. However, on Linux, the Mako Server already includes many APIs that enable you to interact with other Linux processes via files, pipes, sockets, and more. In the following example, we will extract information produced by the Linux kernel without adding additional C code.
The Light Dashboard app includes a JavaScript-powered gauge. We can add new server-side code that sends real-time events to update the gauge running in all connected browsers. The following Lua code starts the 'top' command as a subprocess using the forkpty API and continuously reads the data produced by the 'top' command. The Lua code extracts the CPU usage information and sends it as an event to all connected browsers.
-- pty read callback. Reads data asynchronously from command: top -i -b
local function readTopData(pty)
 -- Wait for 'top' data
 local data = pty:read()
 while data do
 -- Extract data from the line:
 -- %Cpu(s): 0.0 us, 0.0 sy, 0.0 ni,100.0 id, 0.0 wa, 0.0 hi, 0.0 si, 0.0 st
 local us,sy,ni=data:match"(%d+%.%d+)%s+us.-(%d+%.%d+)%s+sy.-(%d+%.%d+)%s+ni"
 if us then
 local total=tonumber(us)+tonumber(sy)+tonumber(ni)
 trace("CPU:",total)
 -- total is between 0 and 100. We need this value to be between 0 and 180.
 angle = math.tointeger(total*1.8)
 smq:publish({angle=angle},"slider")
 end
 data = pty:read()
 end
end

-- Run the Linux command 'top -i -b' as a subprocess
local pty,err = ba.forkpty({async=readTopData}, "/usr/bin/top", "-i", "-b")
if not pty then
 trace("Cannot open 'top'",err)
end

function onunload()
 if pty then pty:terminate() end
end
Example 1: Lua code for continuously reading data from 'top -i -b' and for converting the data to cpu load.
The above Lua code is designed to interact with the existing Lua code in the Light-Dashboard's .preload script, which sets up an SMQ IoT Broker and enables the WebSocket page (the gauge/slider page) to connect to the SMQ broker instance. SMQ uses WebSockets when communicating with browsers. The real-time gauge design follows the design pattern outlined in the tutorial Modern Approach to Embedding a Web Server in a Device.
- Copy the Lua code in Example 1
- Open the following file in an editor: ./LSP-Examples/Light-Dashboard/www/.preload
- Add (paste) the copied code at the end of the .preload script and save the file
- Load the modified dashboard using the Mako Server:./mako -l::LSP-Examples/Light-Dashboard/www
- Using your browser, navigate to http://localhost:9357/ and login
- Go to the "WebSockets" page
- Introduce system load by, for example, running the online benchmark tool.
- You should see the gauge move as the system load changes.
Adding New Lua APIs
In summary, Lua is a compact, embeddable scripting engine that has a flexible extension mechanism, making it easy to add new Lua functions that map to underlying C or C++ functions. This mapping is called a Lua binding and consists of either hand-crafted or auto-generated C/C++ code that interfaces Lua with C/C++ library functions, classes, and methods.
Let's say we want to make a Lua API for the following C function, which calculates the average CPU load by using data from "/proc/stat". The C function is designed to be polled at regular intervals, and a delta value is calculated from the total time provided by "/proc/stat" each time the function is called. See /proc/stat explained for details.
#include<stdlib.h>
#include<string.h>
#include<stdio.h>

int cpu(void)
{
 FILE* fp = fopen("/proc/stat","r");
 if(fp)
 {
 static long long prevTotal=0,prevIdle;
 static const char d[2] = " ";
 char str[100];
 char* token;
 long long total,idle=0;
 int i;
 if(fgets(str,100,fp));/* ignore return value */
 fclose(fp);
 token = strtok(str,d); /* Skip 'cpu' */
 for(i=0,total=0 ; NULL != (token = strtok(NULL,d)) && i< 7 ; i++)
 {
 if(3 == i)
 idle = atoll(token);
 else
 total += atoll(token);
 }
 if(prevTotal)
 { /* if not the very first time this function is called */
 int deltaTotal = total - prevTotal;
 int deltaIdle = idle - prevIdle;
 i = deltaTotal * 100 / (deltaTotal + deltaIdle);
 }
 else
 i=0; /* We have no data */
 prevTotal=total;
 prevIdle=idle;
 return i; /* percentage CPU since last call */
 }
 return 0;
}
Example 2: C code for reading data from "/proc/stat" and for converting the data to cpu load.
Note that we could have easily implemented the above C function directly in Lua using Lua's IO functions, and the irony is that this function would have been easier to implement in Lua. However, we simply need a C function that we can use for creating the same feature we provided by using the Lua code in Example 1 and at the same time show how to map Lua to C code.
A Lua binding can be handcrafted or created automatically. The following shows how to create bindings automatically, but before proceeding, check out the Online Interactive Lua Binding Tutorial which provides introductory information and shows how to manually create a basic Lua binding.
There are two practical ways to add native C or C++ APIs to Mako Server:
Native Lua API Integration Options
- Load a shared library at runtime.
Build the binding as an external module and load it from Lua withrequire(). This keeps the Mako Server executable unchanged and lets you deploy or update native APIs independently. See Building Mako Server C Modules for the shared-library workflow. - Compile the binding into the executable.
Link the C or C++ binding directly into the Mako Server/BAS source build. This is the model used in the example below, where thecpufunction and its Lua binding are compiled into the executable.
The compiled-in model is useful when the native API is always part of your product or when you want a single executable without external module files. The related SOL2 C++ Lua Binding Tutorial shows how Lua bindings can be integrated in the executable.
Automatic Lua Binding Generation:
SWIG is an interface compiler that connects programs written in C and C++ with scripting languages, including Lua. It works by taking declarations from C/C++ header files and generating the wrapper code (Lua bindings) needed to access the underlying C/C++ code from a Lua script. In addition, SWIG provides a variety of customization features that let you tailor the wrapping process to suit your application.
To use SWIG, you start by making a SWIG interface file as shown below:
%module cpu /* The module name used by your Lua code */

%{
 /* Put headers and other declarations here */
 int cpu(void);
%}

/* Put the same headers here, or just the function declarations you
 want exposed to Lua.
*/
int cpu(void);
Example 3: SWIG interface file for the cpu() function.
Compile Mako Server with the new 'cpu' C code:
- Copy the C code above (Example 2), create BAS/MyCustomBindings.c, paste the C code into this new file, and save the file.
- Copy the SWIG interface code above (Example 3), create BAS/MyCustomBindings.i, paste the interface code into this new file, and save the file.
- Execute the following commands in the console:
cd BAS/ make -f mako.mk
The mako.mk makefile should run the command 'swig -lua MyCustomBindings.i', which produces the file MyCustomBindings_wrap.c. The makefile then compiles all code and links it together, producing a new Mako Server executable with our new 'cpu' Lua api. Note that you can also cross-compile using the mako.mk makefile by either setting the CC environment variable or by directly adding the line CC=.... at the top of mako.mk.
You will find the following function in the auto-generated C file MyCustomBindings_wrap.c.
int luaopen_cpu(lua_State* L);
The Mako Server C code BAS/examples/MakoServer/src/MakoMain.c must call this function at startup so the 'cpu' API gets registered. However, you do not need to modify MakoMain.c since it includes the following construction:
myCustomBindings(L);
The function is a macro that normally expands to nothing, but the makefile sets the following when compiling the code:
-DmyCustomBindings=luaopen_cpu
Open MakoMain.c in an editor and search for myCustomBindings(L). You can add additional APIs at the same location in the code.
How to use the new 'cpu' Lua binding:
- Open the following file in an editor: LSP-Examples/Light-Dashboard/www/.preload
- Delete the code you previously added (the Lua code from Example 1); alternatively, revert the code using git
- Copy the Lua code in Example 4 below
- Add (paste) the copied code at the end of the .preload script and save the file
- Load the dashboard using the new Mako Server executable in the BAS/ directory:./mako -l::../LSP-Examples/Light-Dashboard/www
- Using your browser, navigate to http://localhost:9357/ and login
- Go to the "WebSockets" page
- Introduce system load
- You should see the gauge move as the system load changes
local function pollCPU()
 -- Call the auto-generated 'CPU' Lua binding, which subsequently
 -- calls the C function in Example 2.
 local cpu = cpu.cpu()
 trace("CPU:",cpu)
 -- cpu is between 0 and 100. We need this value to be between 0 and 180.
 angle = math.tointeger(cpu*1.8)
 smq:publish({angle=angle},"slider")
 return true -- interval timer
end

local timer = ba.timer(pollCPU)
timer:set(1000) -- poll every second

function onunload()
 timer:cancel()
end
Example 4: Lua code designed for polling the new CPU Lua binding every second.
When to automatically create bindings using SWIG:
The CPU Lua binding created above would be simple to write by hand because the cpu() function exposes a very small API. SWIG becomes more useful when you have a larger set of functions, methods, or classes that should be available from Lua.
All Lua bindings in the Barracuda App Server library are handcrafted, which keeps the code smaller. Handcrafted bindings also make it possible to design a friendlier Lua API than a direct automatic wrapper usually provides. Some bindings, such as the forkpty API we used in Example 1, cannot be auto-generated because it provides an asynchronous, event-based mechanism for sending events from C code to the Lua world. Our advanced Lua binding tutorial explains how to call Lua asynchronously from C code.
Introduction to Raspberry Pi and Other Embedded Linux Devices:
GPIO Programming with Lua Bindings
Statically adding (embedding) new Lua bindings to the Mako Server, as shown in the above example, makes it easy to replicate the server setup on another computer by simply copying the two files (mako and mako.zip) to the new computer. This method works as long as the computer you are copying to uses the same architecture. However, it is also possible to add Lua bindings dynamically by loading shared libraries at runtime. There are many ready-to-use Lua libraries that can easily be included in your Mako Server deployment.
Follow the instructions below to manually compile the server and the module or simply automate the process by running the following in a Raspberry Pi shell:
sudo apt-get install git unzip gcc make wget -O - https://raw.githubusercontent.com/RealTimeLogic/BAS/main/RaspberryPiBuild.sh | bashNavigate to testing the Lua GPIO bindings instructions after running the above script.
Note: the Raspberry Pi build script should work for most Linux systems. The script can also be used for cross-compiling the source code. See download source code for details.
Note that the Mako Server requires some minor changes to the Lua binding's C code before building. Details about this modification can be found in the Building C/C++ Lua Modules Documentation. We will also go over the required changes in the following instructions.
The instructions show how to add the ready to use Embedded Linux GPIO Lua Bindings to the Mako Server. With this additional library, you will be able to control the GPIO ports on a Raspberry Pi. The GPIO library should work on most embedded Linux environments, including Raspberry Pi and BeagleBone.
You must compile the Mako Server on the Raspberry Pi before building the GPIO Lua Bindings. We need the Mako Server's Lua C Code Module Library:
Clone the Raspberry Pi GPIO Lua Bindings:
Navigate to the Raspberry Pi GPIO Lua Bindings directory:
As explained above, before building, we need to add the initialization hook required by the Mako Server's Lua C Code Module library. To do this, open src/lua_periphery.c in an editor and change #include <lua.h> to #include <luaintf.h>. Navigate to the function luaopen_periphery and add the following line at the top of the function: luaintf(L);
As an option, use the two following 'sed' commands to automatically edit src/lua_periphery.c instead of manually editing the file.
The next step is to open the Makefile in an editor and add the Mako Server's interface module to the list of C files to be compiled. Add the following to the SRCS =: ../MakoModuleExample/src/lua/luaintf.c. The following sed command automates this:
We can now build the module, but we must first set the Lua include path as follows:
We can now simply run 'make':
This will build the shared library file periphery.so. Copy this file to the Mako Server's directory:
Note: the Mako Server is in the directory ../BAS if you used the makefile as explained at the beginning of this tutorial and in ../ if you used the LinuxBuild.sh script.
Testing the Lua GPIO bindings
Everything is now ready for writing Lua GPIO scripts. Let's create an application:
Copy the following into the nano editor and save the file:
-- Load periphery.so and access the LED interface
local LED = require('periphery').LED

local function run()
 local led = LED("led0") -- Open LED led0
 trace"Turn LED on"
 led:write(true) -- Turn on LED (set max brightness)
 ba.sleep(3000) -- 3 seconds
 trace"Turn LED off"
 led:write(false) -- Turn off LED (set zero brightness)
 led:close()
end

ba.thread.run(run) -- Defer execution to after Mako has started
Run the Mako Server as follows:
You will see the following text printed in the console: Opening LED: opening 'brightness': Permission denied. Accessing GPIO requires root access so restart the Mako Server as follows:
You should now see the LED turn on for 3 seconds. Enter CTRL-C to stop the server.
How to control the LED from a web page
We can easily create a web page with an on/off switch for turning the Raspberry Pi’s LED on and off. Navigate to the online Lua tutorial and the Lua to C Code Tutorial. Quickly read through the tutorial and copy all of the code in example 6.3. Open the nano editor as follows and paste in the code from example 6.3.
Save the file, exit nano, and open:
Delete all code and replace with the following, which will make it possible to load a module from within the application.
mako.createloader(io)
The next step is to create a module that provides the API required by example 6.3 (the code that is now in your www/index.lsp file).
Copy the following Lua code and paste the code into www/.lua/LED.lua. Save the file and exit nano.
local PLED = require('periphery').LED
local led = PLED("led0") -- Open LED led0

LED={} -- The LED API required by index.lsp

function LED.setLed(on)
 led:write(on)
end

function LED.getLed()
 return led:read()
end

return LED -- our wrapper module
Start the Mako Server
Use a browser and navigate to http://ip-address, where ip-address is your Raspberry Pi's IP address. You should see an on/off switch. Note that you must first click the switch and then click the submit button. See the online tutorial for how to remove the submit button and how to enable AJAX.
Adding the LED web page to the Light Dashboard App
You can add the LED switch page to the Light Dashboard App if you cloned the LSP-Examples as previously shown in this tutorial. We start by copying the two files we created to the Light Dashboard App’s www directory as follows:
We need to register the new page with the menu system. Open the menu file as follows:
Add the following JSON to the line just below the WebSocket page:
 {
 "name": "LED",
 "href": "led.html"
 },
We also have to edit the Light Dashboard App’s preload script and add the mako.createloader call to this file. Open the file as follows:
Add the following at the top of the file:
mako.createloader(io)
You can now start the Mako Server as follows:
Navigate to the server and log in with the credentials admin/qwerty. Click the LED link in the left pane. You should now see the LED switch that lets you toggle the Raspberry Pi LED.
👁 Light Dashboard LED Page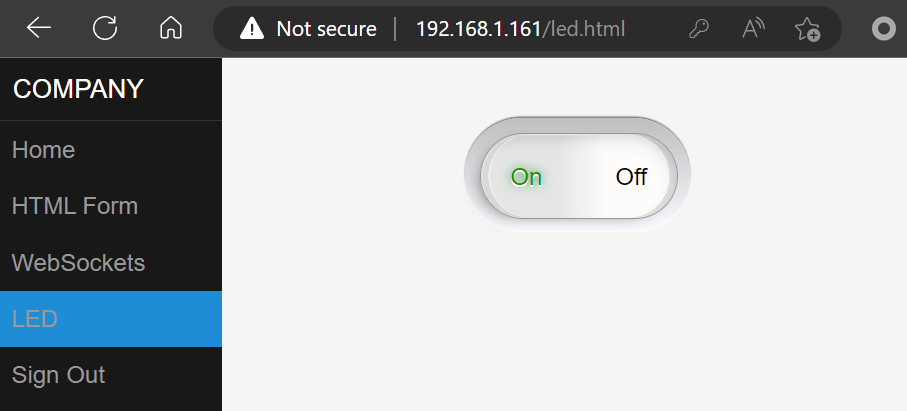
AI-Assisted Embedded Web Interface Design
Did you know that AI-assisted embedded web interface design can be particularly effective when using high-level embedded web servers and application frameworks? The article AI-assisted Embedded Web Interface Design explains how AI-assisted development can simplify the creation of embedded web interfaces and IoT applications. The article also introduces Spec-Driven AI Development as a more disciplined alternative to blind vibe coding, showing how AI can accelerate development while still requiring proper engineering practices.
👁 AI Generated Embedded Web Interface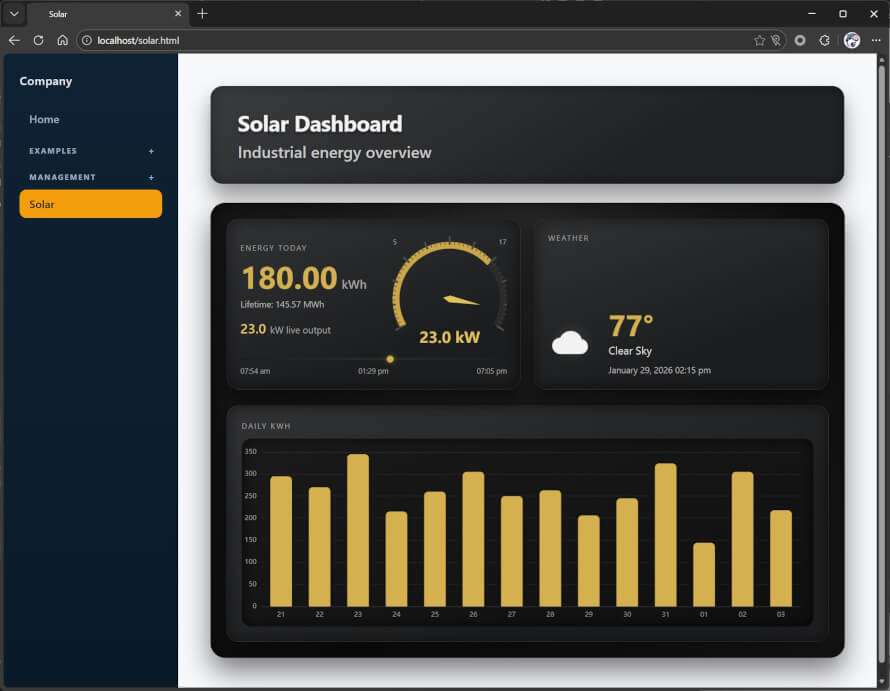
Next Step
You can use what you have learned in this tutorial as a foundation for an IoT or web-based device management application. The following tutorials are useful next steps when working with Mako Server.
Mako Server Linux Tutorials:
Posted in Tutorials