 |
VOOZH | about |
|
VOOZH | about |
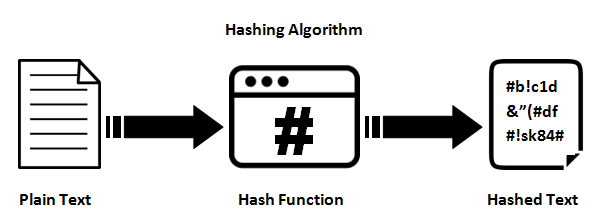
Web3 represents a shift toward a decentralized internet, built on blockchain technology. Blockchain, popularized by Bitcoin, is often confused with it, but Bitcoin is just one application of blockchain. A blockchain is a secure, unchangeable database that stores data in encrypted blocks linked through hashing. Each block has a unique hash, and new blocks use the previous block’s hash to maintain security. While blockchains can store any data, they commonly track transactions. Unlike Web2, Web3 and blockchain ensure no single entity controls the data. In this article, we’ll create a simple Python blockchain to store text, offering a practical understanding of how the technology works.
This article was published as a part of the Data Science Blogathon.
The first block in a blockchain is known as the genesis block. Since there are no prior blocks when the blockchain is created, the preceding hash cannot be derived from the chain itself. Instead, it is generated using a secret value specified by the blockchain’s creator, ensuring that all subsequent blocks follow a consistent structural format. Each blockchain has an associated difficulty level, which determines the number of leading zeros required in the block’s hash. To meet this requirement, a nonce—a whole number—is used to generate a hash with the specified leading zeros. Due to the use of the SHA256 hashing algorithm, pre-calculating the correct nonce is nearly impossible, making trial-and-error the only viable method.
The process of finding the correct nonce to satisfy the hash condition is called blockchain mining. This task is computationally intensive and time-consuming, as it involves running loops to test possible nonce values until the correct one is found. For our blockchain, we set the difficulty level to 4, meaning each hash must start with “0000.” In contrast, Bitcoin’s difficulty level is set to 30, and mining a single block typically takes around 10 minutes. This mining process is essential for adding new blocks to the blockchain, ensuring security and integrity.
There is nothing fancy here; all the modules used in building the blockchain are native python modules and can be directly imported without having to install them using pip. We will be using the hashlib module for performing SHA256 hashing while the time module will be useful to fetch the block generation time.
import hashlib
from time import time
from pprint import pprintWe will define a class called Blockchain with two properties: blocks and secret. The blocks property will store all the blocks in the blockchain, while the secret variable will help generate the previous hash for the genesis block. The class will include three key functions: create_block, validate_blockchain, and show_blockchain. The create_block function will generate a new block, append it to the blockchain, and implement the block properties discussed earlier. It will also compute the nonce needed. This nonce will meet the blockchain’s rule of having a hash that starts with four zeros.
The validate_blockchain function will verify the blockchain’s integrity by checking the fingerprint (hash) of each block. If any block contains an incorrect previous hash, the function will flag the blockchain as unstable, indicating possible tampering. This security feature ensures blockchains remain immutable and tamper-proof. Lastly, the show_blockchain function will display all the blocks in the blockchain, allowing users to inspect the chain’s contents easily.
class blockchain():
 def __init__(self):
 self.blocks = []
 self.__secret = ''
 self.__difficulty = 4
 # guessing the nonce
 i = 0
 secret_string = '/*SECRET*/'
 while True:
 _hash = hashlib.sha256(str(secret_string+str(i)).encode('utf-8')).hexdigest()
 if(_hash[:self.__difficulty] == '0'*self.__difficulty):
 self.__secret = _hash
 break
 i+=1
 def create_block(self, sender:str, information:str):
 block = {
 'index': len(self.blocks),
 'sender': sender,
 'timestamp': time(),
 'info': information
 }
 if(block['index'] == 0): block['previous_hash'] = self.__secret # for genesis block
 else: block['previous_hash'] = self.blocks[-1]['hash']
 # guessing the nonce
 i = 0
 while True:
 block['nonce'] = i
 _hash = hashlib.sha256(str(block).encode('utf-8')).hexdigest()
 if(_hash[:self.__difficulty] == '0'*self.__difficulty):
 block['hash'] = _hash
 break
 i+=1
 self.blocks.append(block)
 def validate_blockchain(self):
 valid = True
 n = len(self.blocks)-1
 i = 0
 while(i<n):
 if(self.blocks[i]['hash'] != self.blocks[i+1]['previous_hash']):
 valid = False
 break
 i+=1
 if valid: print('The blockchain is valid...')
 else: print('The blockchain is not valid...')
 def show_blockchain(self):
 for block in self.blocks:
 pprint(block)
 print()
Checkout this article Guide to Ethereum Blockchain with Python
Now that we have built the blockchain class, let’s use it to create our blockchain and add some blocks to it. I will add 3 blocks to the blockchain and will validate the blockchain and finally print the blocks and look at the output.
Python Code:
import hashlib
from time import time
from pprint import pprint

class blockchain():
 def __init__(self):
 self.blocks = []
 self.__secret = ''
 self.__difficulty = 4
 # guessing the nonce
 i = 0
 secret_string = '/*SECRET*/'
 while True:
 _hash = hashlib.sha256(str(secret_string+str(i)).encode('utf-8')).hexdigest()
 if(_hash[:self.__difficulty] == '0'*self.__difficulty):
 self.__secret = _hash
 break
 i+=1
 def create_block(self, sender:str, information:str):
 block = {
 'index': len(self.blocks),
 'sender': sender,
 'timestamp': time(),
 'info': information
 }
 if(block['index'] == 0): block['previous_hash'] = self.__secret # for genesis block
 else: block['previous_hash'] = self.blocks[-1]['hash']
 # guessing the nonce
 i = 0
 while True:
 block['nonce'] = i
 _hash = hashlib.sha256(str(block).encode('utf-8')).hexdigest()
 if(_hash[:self.__difficulty] == '0'*self.__difficulty):
 block['hash'] = _hash
 break
 i+=1
 self.blocks.append(block)
 def validate_blockchain(self):
 valid = True
 n = len(self.blocks)-1
 i = 0
 while(i<n):
 if(self.blocks[i]['hash'] != self.blocks[i+1]['previous_hash']):
 valid = False
 break
 i+=1
 if valid: print('The blockchain is valid...')
 else: print('The blockchain is not valid...')
 def show_blockchain(self):
 for block in self.blocks:
 pprint(block)
 print()

b = blockchain()
b.create_block('Ram', 'Python is the best programming language!!')
b.create_block('Vishnu', 'I love cybersecurity')
b.create_block('Sanjay', 'AI is the future')
b.show_blockchain()
b.validate_blockchain()
We can see the blocks present on the blockchain and that the validate_blockchain function returns true. Now let’s meddle with our blockchain and add a new block somewhere in-between the blocks of the blockchain and run the validate_blockchain function to see what it returns.
block = {
 'index': 2,
 'sender': 'Arjun',
 'timestamp': time(),
 'info': 'I am trying to tamper with the blockchain...'
}
block['previous_hash'] = b.blocks[1]['hash']
i = 0
while True:
 block['nonce'] = i
 _hash = hashlib.sha256(str(block).encode('utf-8')).hexdigest()
 if(_hash[:4] == '0'*4):
 block['hash'] = _hash
 break
 i+=1
b.blocks.insert(2, block)
b.show_blockchain()
b.validate_blockchain()
This is the output we get.
{'hash': '0000bfffcda53dc1c98a1fbaeab9b8da4e410bbcc24690fbe648027e3dadbee4',
 'index': 0,
 'info': 'Python is the best programming language!!',
 'nonce': 91976,
 'previous_hash': '000023ae8bc9821a09c780aaec9ac20714cbc4a829506ff765f4c82a302ef439',
 'sender': 'Ram',
 'timestamp': 1654930841.4248617}
{'hash': '00006929e45271c2ac38fb99780388709fa0ef9822c7f84568c22fa90683c15f',
 'index': 1,
 'info': 'I love cybersecurity',
 'nonce': 171415,
 'previous_hash': '0000bfffcda53dc1c98a1fbaeab9b8da4e410bbcc24690fbe648027e3dadbee4',
 'sender': 'Vishnu',
 'timestamp': 1654930842.8172457}
{'hash': '000078a974ba08d2351ec103a5ddb2d66499a639f90f9ae98462b9644d140ca9',
 'index': 2,
 'info': 'I am trying to tamper with the blockchain...',
 'nonce': 24231,
 'previous_hash': '00006929e45271c2ac38fb99780388709fa0ef9822c7f84568c22fa90683c15f',
 'sender': 'Arjun',
 'timestamp': 1654930848.2898204}
{'hash': '0000fe124dad744f17dd9095d61887881b2cbef6809ffd97f9fca1d0db055f2a',
 'index': 2,
 'info': 'AI is the future',
 'nonce': 173881,
 'previous_hash': '00006929e45271c2ac38fb99780388709fa0ef9822c7f84568c22fa90683c15f',
 'sender': 'Sanjay',
 'timestamp': 1654930845.594902}
The blockchain is not valid...
We can see that the validate_blockchain function returns false because there is some mismatch in the fingerprinting and hence the integrity of our blockchain has been compromised.
Read this article about the Concept of Blockchain Technology
Importing modules helps organize code and reuse functions. Building the blockchain involves linking blocks securely with hashes. Creating and validating the blockchain ensures data remains tamper-proof. Each step relies on clear logic and careful execution. Together, they form a reliable system that maintains integrity without unnecessary complexity. The process is straightforward when broken down.
I love exploring ML, DL, Machine Vision, Databases, and Full-stack Web Development. I've worked on multiple projects with different stacks and I also hold a patent in the domain of machine vision for manufacturing.
GPT-4 vs. Llama 3.1 – Which Model is Better?
Llama-3.1-Storm-8B: The 8B LLM Powerhouse Surpa...
A Comprehensive Guide to Building Agentic RAG S...
Top 10 Machine Learning Algorithms in 2026
45 Questions to Test a Data Scientist on Basics...
90+ Python Interview Questions and Answers (202...
8 Easy Ways to Access ChatGPT for Free
Prompt Engineering: Definition, Examples, Tips ...
What is LangChain?
What is Retrieval-Augmented Generation (RAG)?
Edit
Resend OTP
Resend OTP in 45s