 |
VOOZH | about |
|
VOOZH | about |
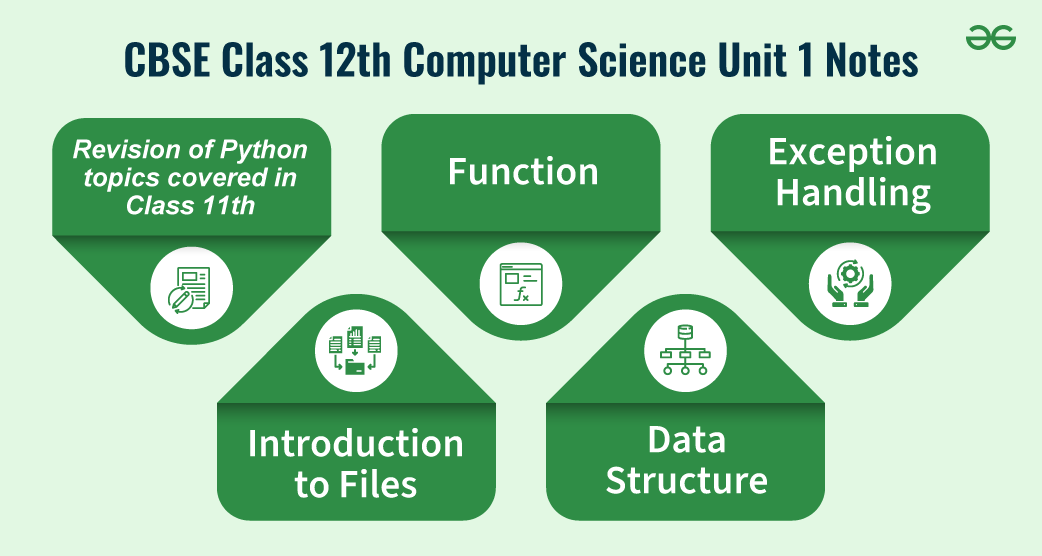
CBSE Class 12th Unit 1: Computational Thinking and Programming is a crucial part of the curriculum for Class 12th students, as outlined in the latest CBSE 2024-25 syllabus.
This unit is designed to provide a solid foundation in various essential topics, ensuring students are well-prepared for their board exams and future endeavors in computer science.
Here's a comprehensive overview of the key concepts covered in the CBSE Class 12th CS Unit 1 notes:
- Revision of Python topics covered in Class XI: Refreshing the fundamental concepts learned in the previous year.
- Functions: Understanding different types of functions (built-in, module-defined, user-defined), creating user-defined functions, and exploring arguments, parameters, and scopes (global and local).
- Exception Handling: Introduction to handling exceptions using try-except-finally blocks to manage errors effectively.
- Introduction to Files: Learning about different types of files (Text, Binary, CSV) and understanding relative and absolute paths.
- Text File: Opening and closing text files, understanding text file open modes, writing/appending data, reading data, and using seek-and-tell methods.
- Binary File: Basic operations on binary files, importing the pickle module, using dump() and load() methods, and performing read, write, search, append, and update operations.
- CSV File: Importing the csv module, opening and closing CSV files, writing data using writer(), writerow(), writerows(), and reading data using reader().
- Data Structure: Understanding stacks, performing push and pop operations, and implementing stacks using lists.
This guide will provide detailed explanations and examples for each topic, ensuring Class 12th students are confident and well-prepared in computational thinking and programming according to the latest CBSE 2024-25 curriculum.
Table of Content
For a comprehensive review of Python topics from Class XI, including data types, control structures, functions, and more, check out our dedicated article on Python revision for Class 12th students.
This shortlist includes the fundamental Python topics that will be revised in Class 12th to ensure a strong foundation for advanced programming concepts. For detailed coverage of each topic, make sure to refer to our comprehensive Python revision guide.
In Python, a function is a piece of code you can use repeatedly to do a specific job. It helps make your code more organized and less repetitive. You create a function using the def keyword, then give it a name and put any inputs (called parameters) in parentheses. When you want to use the function, you "call" it, and the code inside the function runs.
Here’s an example in Python:
def greet(name):
    return f"Hello, {name}!"
When you call greet("Alice"), it’s like saying, “Hi, Alice!” Just think of it as creating your custom commands that make your code do exactly what you want.
Creating a user-defined function in Python is like designing your custom tool that fits your exact needs. It’s a way to bundle up a set of instructions and give it a name, so you can use it whenever you need it. Here’s how you can create one, step by step:
Here’s a simple example to illustrate:
# Step 1: Define the Function
def add_numbers(a, b):
 # Step 2: Write the Function Body
    result = a + b
    return result
# Step 3: Call the Function
sum = add_numbers(5, 3)
print("The sum is:", sum)
In this example:
Creating user-defined functions is like making your recipes or tools. They help you repeat tasks easily without having to rewrite code. Plus, they make your code cleaner and easier to understand—just like having a neatly organized workspace makes doing tasks more enjoyable!
Parameters: Think of parameters as the ingredients you need for a recipe. They’re placeholders defined in the function's definition. When you create a function, you set up these placeholders to accept values later. For example:
def make_smoothie(fruit, liquid):
    # 'fruit' and 'liquid' are parameters
    smoothie = f"Blend {fruit} with {liquid}."
    return smoothie
1. Here, fruit and liquid are parameters. They don’t have specific values yet, they’re just waiting to be filled in.
Arguments: Arguments are the actual values you pass into the function when you call it. They’re like the specific ingredients you choose for your smoothie. Using the previous example:
my_smoothie = make_smoothie("banana", "milk")2. Here, "banana" and "milk" are arguments. They’re the real ingredients you’re using in your smoothie recipe.
To put it all together:
Default parameters in programming are like setting up your function with built-in values that it will use if you don’t provide any. They help make functions more flexible and easier to use. Here’s how they work:
Setting Default Values: When you define a function, you can assign default values to some of the parameters. If you call the function without specifying a value for these parameters, it automatically uses the default ones.
For example, let’s create a function that prints a welcome message:
def welcome_message(name="Guest"):
    print(f"Welcome, {name}!")
1. Here, name="Guest" sets "Guest" as the default value for the name parameter.
Using Default Parameters: When you call this function, you can either provide a name or let it use the default value.
welcome_message()          # Output: Welcome, Guest!
welcome_message("Alice")   # Output: Welcome, Alice!
2. In the first call, the function uses the default value "Guest". In the second call, it uses the provided argument "Alice".
Default parameters make your functions more versatile and save you from having to repeat code. It’s a simple way to give your functions a default behavior while still allowing for customization when needed.
Positional parameters are like the ordered slots in a function where you place your values when calling it. They must be provided in the same order as they appear in the function definition. Here’s a breakdown of how they work:
Defining Positional Parameters: When you create a function, you list the parameters in a specific order. These parameters will receive the values based on their position when the function is called.
For example, let’s define a function that takes two parameters, a and b:
def multiply(a, b):
    return a * b
1. Here, a and b are positional parameters.
Calling the Function with Positional Parameters: When you call this function, you need to provide arguments in the same order as the parameters.
result = multiply(4, 5)
print(result)  # Output: 20
2. In this call, 4 is assigned to a, and 5 is assigned to b based on their positions.
If you swap the values:
result = multiply(5, 4)
print(result)  # Output: 20
Now, 5 is assigned to a and 4 to b, and the result might be different depending on what your function does.
Positional parameters are straightforward and crucial for many functions because they ensure that values are matched to the correct parts of your function. Just remember the order of arguments matters.
When a function returns a value, it’s like giving back the result after performing a task. This makes your function not only perform an action but also provide information or data that can be used later. Here’s how you can work with functions that return values:
Returning a Single Value: Most functions return a single value, which you can use immediately. For example, let’s create a function that calculates the square of a number:
def square(number):
    return number * number
Here, return number * number sends back the result of the calculation. When you call this function:
result = square(4)
print(result)  # Output: 16
1. The function square returns 16, which is then printed out.
Returning Multiple Values: Functions can also return more than one value. This is often done using tuples. For example, a function that returns both the sum and the product of two numbers might look like this:
def sum_and_product(x, y):
    return x + y, x * y
When you call this function:
total, product = sum_and_product(3, 5)
print("Sum:", total)       # Output: Sum: 8
print("Product:", product) # Output: Product: 15
2. Here, sum_and_product returns two values, which are captured in total and product.
Returning values from functions helps you build more flexible and powerful programs. You can use these values to make decisions, perform further calculations, or display results. It’s like having a function do the work and then hand you the results so you can use them however you like.
The flow of execution in programming is like following a set of instructions step by step. It determines the order in which statements and commands are executed in your code. Here’s a simple breakdown of how it works:
1. Starting Point: When you run a program, the flow of execution begins at the top of your code and proceeds line by line. This is where your program starts, just like the first step in a recipe or a set of instructions.
2. Sequential Execution: By default, most code executes in sequence. This means the code runs from the first line to the last line, one after the other.
print("Step 1")
print("Step 2")
print("Step 3")
In this example, the output will be:
Step 1
Step 2
Step 3
3. Control Flow Statements: Sometimes, you need your program to make decisions or repeat actions. This is where control flow statements come in:
These allow your program to choose different paths based on conditions
Here, the program decides which message to print based on the value of age.
age = 18
if age >= 18:
 print("You can vote.")
else:
 print("You are too young to vote.")
These let your program repeat actions multiple times
for i in range(3):
    print("This is loop iteration", i)
This loop will print the message three times, with i taking values from 0 to 2.
Function Calls: When a function is called, the flow of execution jumps to that function’s code, runs it, and then returns to the point where it was called. This helps organize code and avoid repetition.
def greet(name):
    print(f"Hello, {name}!")
greet("Alice")
The program jumps to the greet function, prints the greeting, and then continues from where it left off.
Understanding the flow of execution is crucial because it helps you predict and control how your program behaves, ensuring it performs the right actions at the right times.
The scope of a variable determines where in your code a variable can be accessed or modified. It’s like figuring out where a certain tool or ingredient can be used in a recipe. Here’s a breakdown of the two main types of scopes in programming:
1. Global Scope: Variables defined in the global scope are accessible from anywhere in your code, both inside and outside functions. They’re like tools you can use in any part of your code.
global_var = "I am global"
def print_global():
    print(global_var)
print_global()  # Output: I am global
Example: In this example, global_var is defined outside any function, so it’s available everywhere in the code, including inside the print_global function.
2. Local Scope: Variables defined inside a function or a block of code are local to that function or block. They can only be accessed from within the function or block where they are defined. They’re like special tools used only for specific tasks.
Example:
def my_function():
    local_var = "I am local"
    print(local_var)
my_function()  # Output: I am local
print(local_var)  # This will raise an error
Here, local_var is defined inside my_function, so it can only be used within that function. Trying to access it outside of my_function will result in an error because local_var doesn’t exist in that broader scope.
Key Points:
Understanding variable scope helps you keep your code organized and prevents issues related to variable conflicts or unintended changes.
Exception handling is like having a backup plan for when things don’t go as expected in your code. It helps you manage errors gracefully without crashing your program. Here’s a simple introduction to how it works:
Basic Components
Example:
try:
    result = 10 / 0  # This will cause a division by zero error
except ZeroDivisionError:
    print("You can't divide by zero!")
finally:
    print("This will always run.")
In this example:
Exception handling helps keep your programs running smoothly by catching and managing errors in a controlled way. It’s like having a safety net that allows you to handle unexpected issues and keep your application reliable.
Handling exceptions using try, except, and finally blocks in Python helps you manage errors and ensure your program behaves predictably, even when things go wrong. Here’s how each part works:
try Block
Example:
try:
    number = int(input("Enter a number: "))
    result = 10 / number
    print(f"Result is: {result}")
Here, you’re trying to convert user input into an integer and then perform a division. If the input isn’t a valid number or is zero, it might cause an error.
except Block
Example:
except ValueError:
    print("That's not a valid number!")
except ZeroDivisionError:
    print("You can't divide by zero!")
Here, ValueError catches cases where the user input isn’t a valid number, and ZeroDivisionError handles the case where the user enters zero, causing a division by zero.
finally Block
Example:
finally:
    print("This will always execute, no matter what.")
In this example, the message in the finally block will print whether or not an exception occurred.
Complete Example:
try:
number = int(input("Enter a number: "))
result = 10 / number
        print(f"Result is: {result}")
except ValueError:
        print("That's not a valid number!")
except ZeroDivisionError:
        print("You can't divide by zero!")
finally:
        print("This will always execute, no matter what.")
Key Points:
Using these blocks helps ensure that your program can handle errors gracefully and complete necessary clean-up tasks, making your code more robust and reliable.
Files in programming are like containers where you store data so it can be accessed later. They help you save and retrieve information beyond the runtime of your program. Here’s a simple introduction to working with files:
file = open("example.txt", "r")Example:
file = open("example.txt", "r")
content = file.read()
print(content)
file.close()
This code opens a file, reads its entire content into the variable content, prints it, and then closes the file.
file = open("example.txt", "w")
file.write("Hello, world!")
file.close()
Example:
This code opens a file for writing, writes the string "Hello, world!" to it, and then closes the file. If the file already exists, it will be overwritten. If it doesn’t, it will be created.
with open("example.txt", "r") as file:
    content = file.read()
    print(content)
Files come in various types, each suited for different kinds of data and uses. Here’s a look at three common types of files: text files, binary files, and CSV files.
Text Files
Example Code:
# Writing to a text file
with open("example.txt", "w") as file:
    file.write("Hello, world!")
# Reading from a text file
with open("example.txt", "r") as file:
    content = file.read()
    print(content)  # Output: Hello, world!
# Writing to a binary file
with open("example.bin", "wb") as file:
    file.write(b'\x00\x01\x02\x03')  # Writing bytes
# Reading from a binary file
with open("example.bin", "rb") as file:
    content = file.read()
    print(content)  # Output: b'\x00\x01\x02\x03'
import csv
# Writing to a CSV file
with open("example.csv", "w", newline='') as file:
    writer = csv.writer(file)
    writer.writerow(["Name", "Age", "City"])
    writer.writerow(["Alice", "30", "New York"])
    writer.writerow(["Bob", "25", "Los Angeles"])
# Reading from a CSV file
with open("example.csv", "r") as file:
    reader = csv.reader(file)
    for row in reader:
        print(row)
Output:
['Name', 'Age', 'City']
['Alice', '30', 'New York']
['Bob', '25', 'Los Angeles']
Each file type serves different needs based on how data is represented and used, making it important to choose the right type for your application.
Understanding file paths is crucial for managing files in programming. Paths tell your program where to find or save files. There are two main types of paths: relative and absolute.
with open("files/data.txt", "r") as file:
    content = file.read()
    print(content)
Example:
with open("/home/user/projects/files/data.txt", "r") as file:
    content = file.read()
    print(content)
Relative Path:
Absolute Path:
Understanding when to use relative versus absolute paths helps manage file locations and access more effectively, especially when dealing with complex projects or scripts.
Opening a text file, text file open modes (r, r+, w, w+, a, a+)
Opening and managing text files in programming involves using different modes that dictate how the file can be accessed and modified. Here’s a breakdown of how to open text files and the various modes available:
To open a text file in Python, you use the open() function, which takes two main arguments:
Basic Syntax:
file = open("filename.txt", "mode")"r" (Read):
Example:
with open("example.txt", "r") as file:
    content = file.read()
    print(content)
"r+" (Read and Write):
Example:
with open("example.txt", "r+") as file:
    content = file.read()
    file.seek(0)  # Move the cursor to the beginning of the file
    file.write("New content")
"w" (Write):
Example:
with open("example.txt", "w") as file:
    file.write("This is a new content.")
"w+" (Write and Read):
Example:
with open("example.txt", "w+") as file:
    file.write("Initial content")
    file.seek(0)  # Move cursor to the beginning of the file
    content = file.read()
    print(content)
"a" (Append):
Example:
python
with open("example.txt", "a") as file:
    file.write("Appended content.")
"a+" (Append and Read):
Example:
with open("example.txt", "a+") as file:
    file.write("More appended content.")
    file.seek(0)  # Move cursor to the beginning of the file
    content = file.read()
    print(content)
Each mode serves different needs depending on how you want to interact with the file, whether you’re reading, writing, or both. Understanding these modes helps ensure you use files effectively and avoid unintended data loss or corruption.
Closing a Text File
When you open a file in Python, it’s important to close it after you’re done working with it. Closing a file releases any system resources used and ensures that all changes are saved properly.
Why Close a File?
How to Close a File: You use the close() method of the file object to close the file.
Example:
file = open("example.txt", "w")
file.write("Hello, world!")
file. close()  # Important to close the file after writing
Using the with statement to open a file is a best practice in Python because it automatically handles file closing for you, even if an error occurs during file operations. This approach is cleaner and reduces the risk of leaving files open accidentally.
How It Works:
Example:
# Writing to a file using the with clause
with open("example.txt", "w") as file:
    file.write("Hello, world!")
    # No need to call file.close() explicitly
# Reading from a file using the with clause
with open("example.txt", "r") as file:
    content = file.read()
    print(content)
In this example:
Using the with statement is a more Pythonic way to handle files, making your code safer and more readable.
When working with text files in Python, you often need to write or append data to them. You can use write() and writelines() methods to achieve this. Here’s how they work and when to use each:
Example:
# Writing to a file
with open("example.txt", "w") as file:
    file.write("Hello, world!\n")
    file.write("This is a new line.")
In this example:
Example:
# Appending to a file
with open("example.txt", "a") as file:
    file.write("\nAdding a new line at the end.")
In this example:
Example:
lines = ["First line.\n", "Second line.\n", "Third line.\n"]
# Writing multiple lines to a file
with open("example.txt", "w") as file:
    file.writelines(lines)
In this example:
By choosing the appropriate method based on your needs, you can effectively manage file writing and appending operations.
Reading from a text file using the read() method in Python allows you to retrieve the entire content of the file as a single string. Here's how you can use it effectively:
Here’s a basic example demonstrating how to use read():
# Open the file in read mode
with open("example.txt", "r") as file:
    content = file.read()  # Read the entire file content
    print(content)  # Print the content
Explanation:
You can also specify the number of characters to read by providing an argument to read(). If you provide a number, read(n) will read up to n characters from the file.
Example:
with open("example.txt", "r") as file:
    partial_content = file.read(10)  # Read the first 10 characters
    print(partial_content)  # Print the partial content
Explanation:
If you call read() multiple times, it continues reading from where it left off.
Example:
with open("example.txt", "r") as file:
    first_part = file.read(5)  # Read the first 5 characters
    second_part = file.read(5)  # Read the next 5 characters
    print("First part:", first_part)
    print("Second part:", second_part)
Explanation:
Using read() is straightforward for accessing the full content of a text file and is handy when you need to work with the entire file data as a single string.
When working with text files in Python, readline() and readlines() are two methods that allow you to read the file's content in different ways. Here’s how they work and when to use each:
Example:
# Reading file line by line using readline()
with open("example.txt", "r") as file:
    line = file.readline()  # Read the first line
    while line:
        print(line, end='')  # Print the line, without adding an extra newline
        line = file.readline()  # Read the next line
Example:
# Reading all lines into a list using readlines()
with open("example.txt", "r") as file:
    lines = file.readlines()  # Read all lines into a list
    for line in lines:
        print(line, end='')  # Print each line
Explanation:
readline():
readlines():
Use readline() if:
Use readlines() if:
The seek() and tell() methods in Python provide powerful ways to manipulate the file cursor, allowing you to navigate and manage file data more precisely. Here’s a detailed look at how these methods work and how to use them effectively:
Syntax:
python
file.seek(offset, whence)
offset: The position (in bytes) to move the cursor to, relative to the position specified by whence.
whence: Optional argument specifying the reference position. It can be:
Examples:
with open("example.txt", "r") as file:
    file.seek(0)  # Move cursor to the start
    content = file.read()
    print(content)
Move to a Specific Position:
with open("example.txt", "r") as file:
    file.seek(5)  # Move cursor to the 5th byte
    content = file.read()
    print(content)
with open("example.txt", "r") as file:
    file.seek(0, 2)  # Move cursor to the end of the file
    end_position = file.tell()  # Get the end position
    print(f"End position: {end_position}")
Syntax:
python
position = file.tell()
Example:
with open("example.txt", "r") as file:
    file.seek(10)  # Move cursor to the 10th byte
    position = file.tell()  # Get current cursor position
    print(f"Current position: {position}")
Manipulating data in a text file involves various operations such as reading, modifying, and writing data at specific positions. Here’s a more detailed look at how you can perform these operations using Python:
To work with data in a file, you first need to read it. Depending on your needs, you can read the entire file, specific lines, or chunks of data.
Example:
with open("example.txt", "r") as file:
    content = file.read()  # Read the entire file content
    print(content)
You can write data to a file in different modes ("w", "a", "r+") based on whether you want to overwrite, append, or modify existing content.
Examples:
Overwrite Existing Content:
with open("example.txt", "w") as file:
    file.write("New content\n")
with open("example.txt", "a") as file:
    file.write("Appended content\n")
To insert data at a specific location in a file, you need to read the existing content, modify it, and then write it back. This is because text files don’t support direct insertion; you must rewrite the file with the new content.
Steps:
Example:
4. Truncating Data
Truncating a file means cutting off its content from a specified position. This is useful for removing unwanted content from the end of a file.
Example:
with open("example.txt", "r+") as file:
    file.seek(10)  # Move cursor to the 10th byte
    file.truncate()  # Remove everything from the 10th byte onwards
To replace a portion of the file, you typically read the entire file, modify the specific part, and then write the entire modified content back to the file.
Example:
Basic operations on a binary file
Binary files are files that contain data in a format that is not human-readable, as opposed to text files which contain data in plain text. In Python, you can perform various operations on binary files, including reading and writing data. Here’s a guide on how to work with binary files:
To work with binary files, you need to open them in binary mode. This is done by adding a "b" to the mode string ("rb" for reading, "wb" for writing, "ab" for appending, etc.).
Example:
# Open a binary file for reading
with open("example.bin", "rb") as file:
    data = file.read()  # Read the entire file content
    print(data)
2. Reading from a Binary File
You can read binary data in chunks or as a whole. Binary files are typically read in bytes, so methods like read(), read(size), and readinto() can be used.
Read the Entire File:
with open("example.bin", "rb") as file:
    data = file.read()  # Read the entire file
Read a Specific Number of Bytes:
with open("example.bin", "rb") as file:
    chunk = file.read(10)  # Read the first 10 bytes
Read Line by Line: For binary files, this is less common, but you can read data into memory and then process it as needed.
To write binary data, open the file in binary write mode ("wb") or append mode ("ab"). Data should be in bytes format.
Examples:
Write Data:
with open("example.bin", "wb") as file:
    data = b'\x00\x01\x02\x03'  # Binary data to write
    file.write(data)
Append Data:
with open("example.bin", "ab") as file:
    additional_data = b'\x04\x05\x06'
    file.write(additional_data)
You can use seek() to move the file cursor and tell() to get the current position of the cursor.
Seek:
with open("example.bin", "rb") as file:
    file.seek(5)  # Move cursor to the 5th byte
    data = file.read(10)  # Read 10 bytes from that position
Tell:
with open("example.bin", "rb") as file:
    file.seek(10)  # Move cursor to the 10th byte
    position = file.tell()  # Get the current position (should be 10)
Truncate the file to reduce its size or remove data from a specific point. This can be done using the truncate() method.
Example:
with open("example.bin", "r+b") as file:
    file.seek(10)  # Move cursor to the 10th byte
    file.truncate()  # Truncate the file from the 10th byte onward
When working with binary files in Python, you can use various file open modes to control how you read, write, and append data. Each mode serves a different purpose and affects how the file is handled. Here’s a breakdown of the file open modes for binary files:
"rb" (Read Binary)
Example:
with open("example.bin", "rb") as file:
data = file.read() # Read the entire binary content
"rb+" (Read and Write Binary)
Example:
with open("example.bin", "rb+") as file:
    data = file.read(10)  # Read the first 10 bytes
    file.seek(0)  # Move cursor to the start
    file.write(b'\x01\x02\x03')  # Write binary data
"wb" (Write Binary)
Example:
with open("example.bin", "wb") as file:
    file.write(b'\x01\x02\x03\x04')  # Write binary data
"wb+" (Write and Read Binary)
Example:
with open("example.bin", "wb+") as file:
    file.write(b'\x01\x02\x03')  # Write binary data
    file.seek(0)  # Move cursor to the start
    data = file.read()  # Read the written data
"ab" (Append Binary)
Example:
with open("example.bin", "ab") as file:
    file.write(b'\x05\x06\x07')  # Append binary data
"ab+" (Append and Read Binary)
Example:
with open("example.bin", "ab+") as file:
    file.write(b'\x08\x09\x0A')  # Append binary data
    file.seek(0)  # Move cursor to the start
Closing a binary file in Python is essential to ensure that all data is properly written to the file and that system resources are released. The close() method is used to close a file after you are done with it. Here’s how you can manage closing binary files:
Using close() Method
After performing operations on a file, you should explicitly call the close() method to close the file. This is important for ensuring that all changes are saved and resources are freed.
Example:
file = open("example.bin", "wb")  # Open file in write-binary mode
file.write(b'\x01\x02\x03\x04')  # Write binary data
file.close()  # Close the file
Explanation:
The with statement is the preferred way to work with files because it automatically handles opening and closing the file. When the block of code inside the with statement is exited, the file is closed automatically, even if an error occurs.
Example:
with open("example.bin", "wb") as file:  # Open file in write-binary mode
    file.write(b'\x01\x02\x03\x04')  # Write binary data
# File is automatically closed here
Explanation:
The pickle module in Python is used for serializing and deserializing Python objects, which means converting Python objects to a byte stream (serialization) and converting byte streams back into Python objects (deserialization). This is particularly useful for saving and loading complex data structures to and from files. The dump() and load() methods are key functions in this process.
Before using pickle, you need to import it:
import picklepickle.dump()
The dump() method is used to serialize a Python object and write it to a file.
Syntax:
pickle.dump(obj, file, protocol=None)
Example:
import pickle
data = {'name': 'Alice', 'age': 25, 'is_student': True}
with open('data.pkl', 'wb') as file:  # Open file in binary write mode
    pickle.dump(data, file)  # Serialize `data` and write to the file
Explanation:
The load() method is used to deserialize a Python object from a file, essentially reading the byte stream and converting it back into a Python object.
Syntax:
python
obj = pickle.load(file)
Example:
import pickle
with open('data.pkl', 'rb') as file:  # Open file in binary read mode
    data = pickle.load(file)  # Deserialize data from the file
print(data)  # Output: {'name': 'Alice', 'age': 25, 'is_student': True}
Explanation:
Handling binary files involves various operations such as reading, writing, searching, appending, and updating data. Here’s a guide on how to perform these operations in binary files using Python:
To read data from a binary file, open the file in binary read mode ("rb"). You can read the entire file or a specific number of bytes.
Read Entire File:
with open("example.bin", "rb") as file:
    data = file.read()  # Read all data from the file
    print(data)
Read Specific Number of Bytes:
with open("example.bin", "rb") as file:
    chunk = file.read(10)  # Read the first 10 bytes
    print(chunk)
2. Writing to or Creating a Binary File
To write data to a binary file, open the file in binary write mode ("wb"). This will create the file if it doesn’t exist or overwrite it if it does.
Write Data:
with open("example.bin", "wb") as file:
    file.write(b'\x01\x02\x03\x04')  # Write binary data
Create and Write Data:
with open("newfile.bin", "wb") as file:
    file.write(b'Hello World')  # Create a new file and write data
3. Searching in a Binary File
Searching in a binary file involves reading the file and looking for specific patterns or bytes. Since binary files don’t have a text-based structure, you need to search through the byte data.
Search for a Byte Pattern:
4. Appending to a Binary File
To append data to a binary file, open the file in binary append mode ("ab"). This mode adds data to the end of the file without modifying existing content.
Append Data:
with open("example.bin", "ab") as file:
    file.write(b'\x05\x06\x07')  # Append binary data
Updating data involves reading the existing content, modifying it, and then writing it back to the file. This generally requires reading the entire file, making changes, and writing the entire file back.
Update Specific Data:
CSV (Comma-Separated Values) files are a popular format for storing tabular data. The csv module in Python provides functions to work with CSV files, allowing you to read from and write to them efficiently. Here’s a guide on how to use the csv module to handle CSV files:
Before you can work with CSV files, you need to import the csv module:
import csvTo work with CSV files, you need to open them, perform the necessary operations, and then close them. Python's csv module works with file objects, so you use standard file-handling methods to open and close files.
You open a CSV file using Python's built-in open() function and pass the file object to the csv module's reader or writer functions.
Example: Opening a CSV File for Reading
import csv
with open('data.csv', mode='r', newline='') as file: # Open file in read mode
reader = csv.reader(file) # Create a CSV reader object
for row in reader:
print(row) # Print each row in the CSV file
Example: Opening a CSV File for Writing
import csv
with open('data.csv', mode='w', newline='') as file:  # Open file in write mode
    writer = csv.writer(file)  # Create a CSV writer object
    writer.writerow(['Name', 'Age', 'City'])  # Write header row
    writer.writerow(['Alice', '30', 'New York'])  # Write data row
When using the with statement, the file is automatically closed when the block of code is exited, which is a good practice as it ensures that resources are managed properly. If you’re not using the with statement, you need to manually close the file.
Manual Closing Example:
import csv
file = open('data.csv', mode='r', newline='')  # Open file in read mode
reader = csv.reader(file)  # Create a CSV reader object
for row in reader:
    print(row)  # Print each row
file.close()  # Close the file manually
Key Points
Writing data to a CSV file in Python involves using the csv module's writer() function, along with writerow() and writerows() methods. Here’s a detailed guide on how to use these functions:
The csv. writer() function creates a writer object that you can use to write data to a CSV file. You need to open a file in write mode ("w") or append mode ("a"), and then use the writer object to add data to the file.
The writerow() method is used to write a single row of data to the CSV file. The row data should be provided as a list or tuple.
Example:
import csv
# Open file in write mode
with open('data.csv', mode='w', newline='') as file:
    writer = csv.writer(file)  # Create a CSV writer object
    # Write a single row
    writer.writerow(['Name', 'Age', 'City'])  # Header row
    writer.writerow(['Alice', '30', 'New York'])  # Data row
    writer.writerow(['Bob', '25', 'Los Angeles'])  # Another data row
Explanation:
The writerows() method is used to write multiple rows at once. You need to provide a list of lists or tuples, where each inner list or tuple represents a row of data.
Example:
import csv
# Open file in write mode
with open('data.csv', mode='w', newline='') as file:
    writer = csv.writer(file)  # Create a CSV writer object
 # Write multiple rows
    rows = [
        ['Name', 'Age', 'City'],  # Header row
        ['Alice', '30', 'New York'],  # Data row
        ['Bob', '25', 'Los Angeles'],  # Another data row
        ['Charlie', '35', 'Chicago']  #Another data row]
    writer.writerows(rows)  # Write all rows at once
Explanation:
When opening a CSV file, use newline='' in the open() function to handle newline characters correctly and avoid blank lines between rows.
Read from a csv file using reader()
Reading data from a CSV file in Python using the csv module involves using the csv.reader() function. This function creates a reader object that iterates over lines in the CSV file, providing each row as a list of strings. Here's a detailed guide on how to read from a CSV file:
First, you need to import the csv module:
import csvYou can read all rows from a CSV file using the csv.reader() object in a loop. Each row is returned as a list of strings.
Example:
import csv
# Open file in read mode
with open('data.csv', mode='r', newline='') as file:
    reader = csv.reader(file)  # Create a CSV reader object
    # Iterate over rows in the CSV file
    for row in reader:
        print(row)  # Print each row (list of strings)
Explanation:
If you want to read only specific rows or perform operations on certain rows, you can do so by iterating through the rows and adding conditional logic.
Example:
import csv
# Open file in read mode
with open('data.csv', mode='r', newline='') as file:
    reader = csv.reader(file)  # Create a CSV reader object
    # Read and print only rows where the age is greater than 30
    for row in reader:
        if row[1].isdigit() and int(row[1]) > 30:  # Check if the age (second column) is greater than 30
print(row)
Explanation:
If your CSV file includes a header row, you can use the csv.DictReader() function, which reads each row as a dictionary where the keys are the column names.
Example:
import csv
# Open file in read mode
with open('data.csv', mode='r', newline='') as file:
    reader = csv.DictReader(file)  # Create a CSV dict reader object
    # Iterate over rows as dictionaries
    for row in reader:
        print(row)  # Print each row as a dictionary
Explanation:
A data structure is a way of organizing and storing data so that it can be used efficiently. It helps in managing large amounts of data and performing different operations like searching, sorting, and modifying data. Examples of data structures include arrays, linked lists, stacks, and queues. They are essential for writing good programs and solving complex problems.
A stack is a fundamental data structure used in computer science, known for its Last In, First Out (LIFO) principle. This means that the last element added to the stack will be the first one to be removed. Think of a stack like a stack of plates: you add and remove plates from the top.
The primary operations for a stack are:
You can implement a stack using various programming languages and approaches. Here’s how you can do it in Python using a list:
The push operation adds an item to the top of the stack. In Python, you can use the append() method of a list to simulate this.
Example:
stack = []  # Initialize an empty stack
# Push items onto the stack
stack.append(1)
stack.append(2)
stack.append(3)
print(stack)  # Output: [1, 2, 3]
Explanation:
The pop operation removes the item from the top of the stack. You can use the pop() method of a list to perform this operation.
Example:
stack = [1, 2, 3]  # Stack with elements
# Pop items from the stack
top_item = stack.pop()  # Removes and returns the top item
print(top_item)  # Output: 3
print(stack)  # Output: [1, 2]
Explanation:
The peek operation allows you to view the item at the top of the stack without removing it. This can be done by accessing the last element in the list.
Example:
stack = [1, 2, 3]  # Stack with elements
# Peek at the top item
top_item = stack[-1]  # Accesses the last item
print(top_item)  # Output: 3
Explanation:
You can check if the stack is empty by testing if the list is empty.
Example:
stack = []  # Empty stack
# Check if the stack is empty
is_empty = len(stack) == 0
print(is_empty)  # Output: True
Explanation:
Implementing a stack using a list in Python is straightforward due to the list's built-in methods, which support stack operations like push and pop. Here's a step-by-step guide to creating a stack using Python's list data structure:
1. Define the Stack Class
Create a class called Stack that will encapsulate the stack operations. The stack will use a list to store its elements.
2. Implement Stack Operations
Implement the following methods in the Stack class:
This implementation leverages Python's list operations to efficiently manage stack functionality while ensuring that common stack-related errors are handled.
Here is the detailed Mdistribution of CBSE Class 12th Computer Science Unit 1 that helps students understand the weightage of different topics.
This helps in strategic preparation and focusing on important areas. Here’s the distribution of marks as per the latest CBSE 2024-25 curriculum:
This distribution is estimated based on the previous year's syllabus and typical weightage given to each topic
In conclusion, CBSE Class 12th Computer Science Unit 1: Computational Thinking and Programming is crucial for your education. By engaging with CBSE Class 12th Computer Science Unit 1 Notes on Python programming, functions, exception handling, and more, you're preparing for exams and building foundational skills for future careers. This unit enhances your problem-solving and critical thinking, key for success in today’s tech-driven world. Embrace learning and stay curious as you explore these essential topics.