VOOZH about

URL: https://www.geeksforgeeks.org/cloud-computing/cloudfront-distribution-in-aws-for-s3-bucket/

⇱ How to Create Cloudfront Distribution in AWS for S3 Bucket ? - GeeksforGeeks


  • Courses
  • Tutorials
  • Interview Prep

How to Create Cloudfront Distribution in AWS for S3 Bucket ?

Last Updated : 15 Jun, 2026

AWS CloudFront is a highly secure and fast Content Delivery Network (CDN) service that delivers data, videos, applications, and APIs globally with low latency. Serving static assets directly from Amazon S3 through CloudFront improves application loading speeds and reduces hosting costs.

  • Accelerates asset delivery by serving content from edge locations physically closer to users.
  • Restricts direct S3 bucket access, ensuring assets are accessed securely only through CloudFront.
  • Easily handles sudden traffic spikes by caching static web content across AWS edge servers.
  • Supports secure HTTPS connections with custom domain names using AWS Certificate Manager (ACM).
  • Lowers AWS data transfer out (DTO) egress costs compared to serving assets directly from Amazon S3.

Key Terminologies

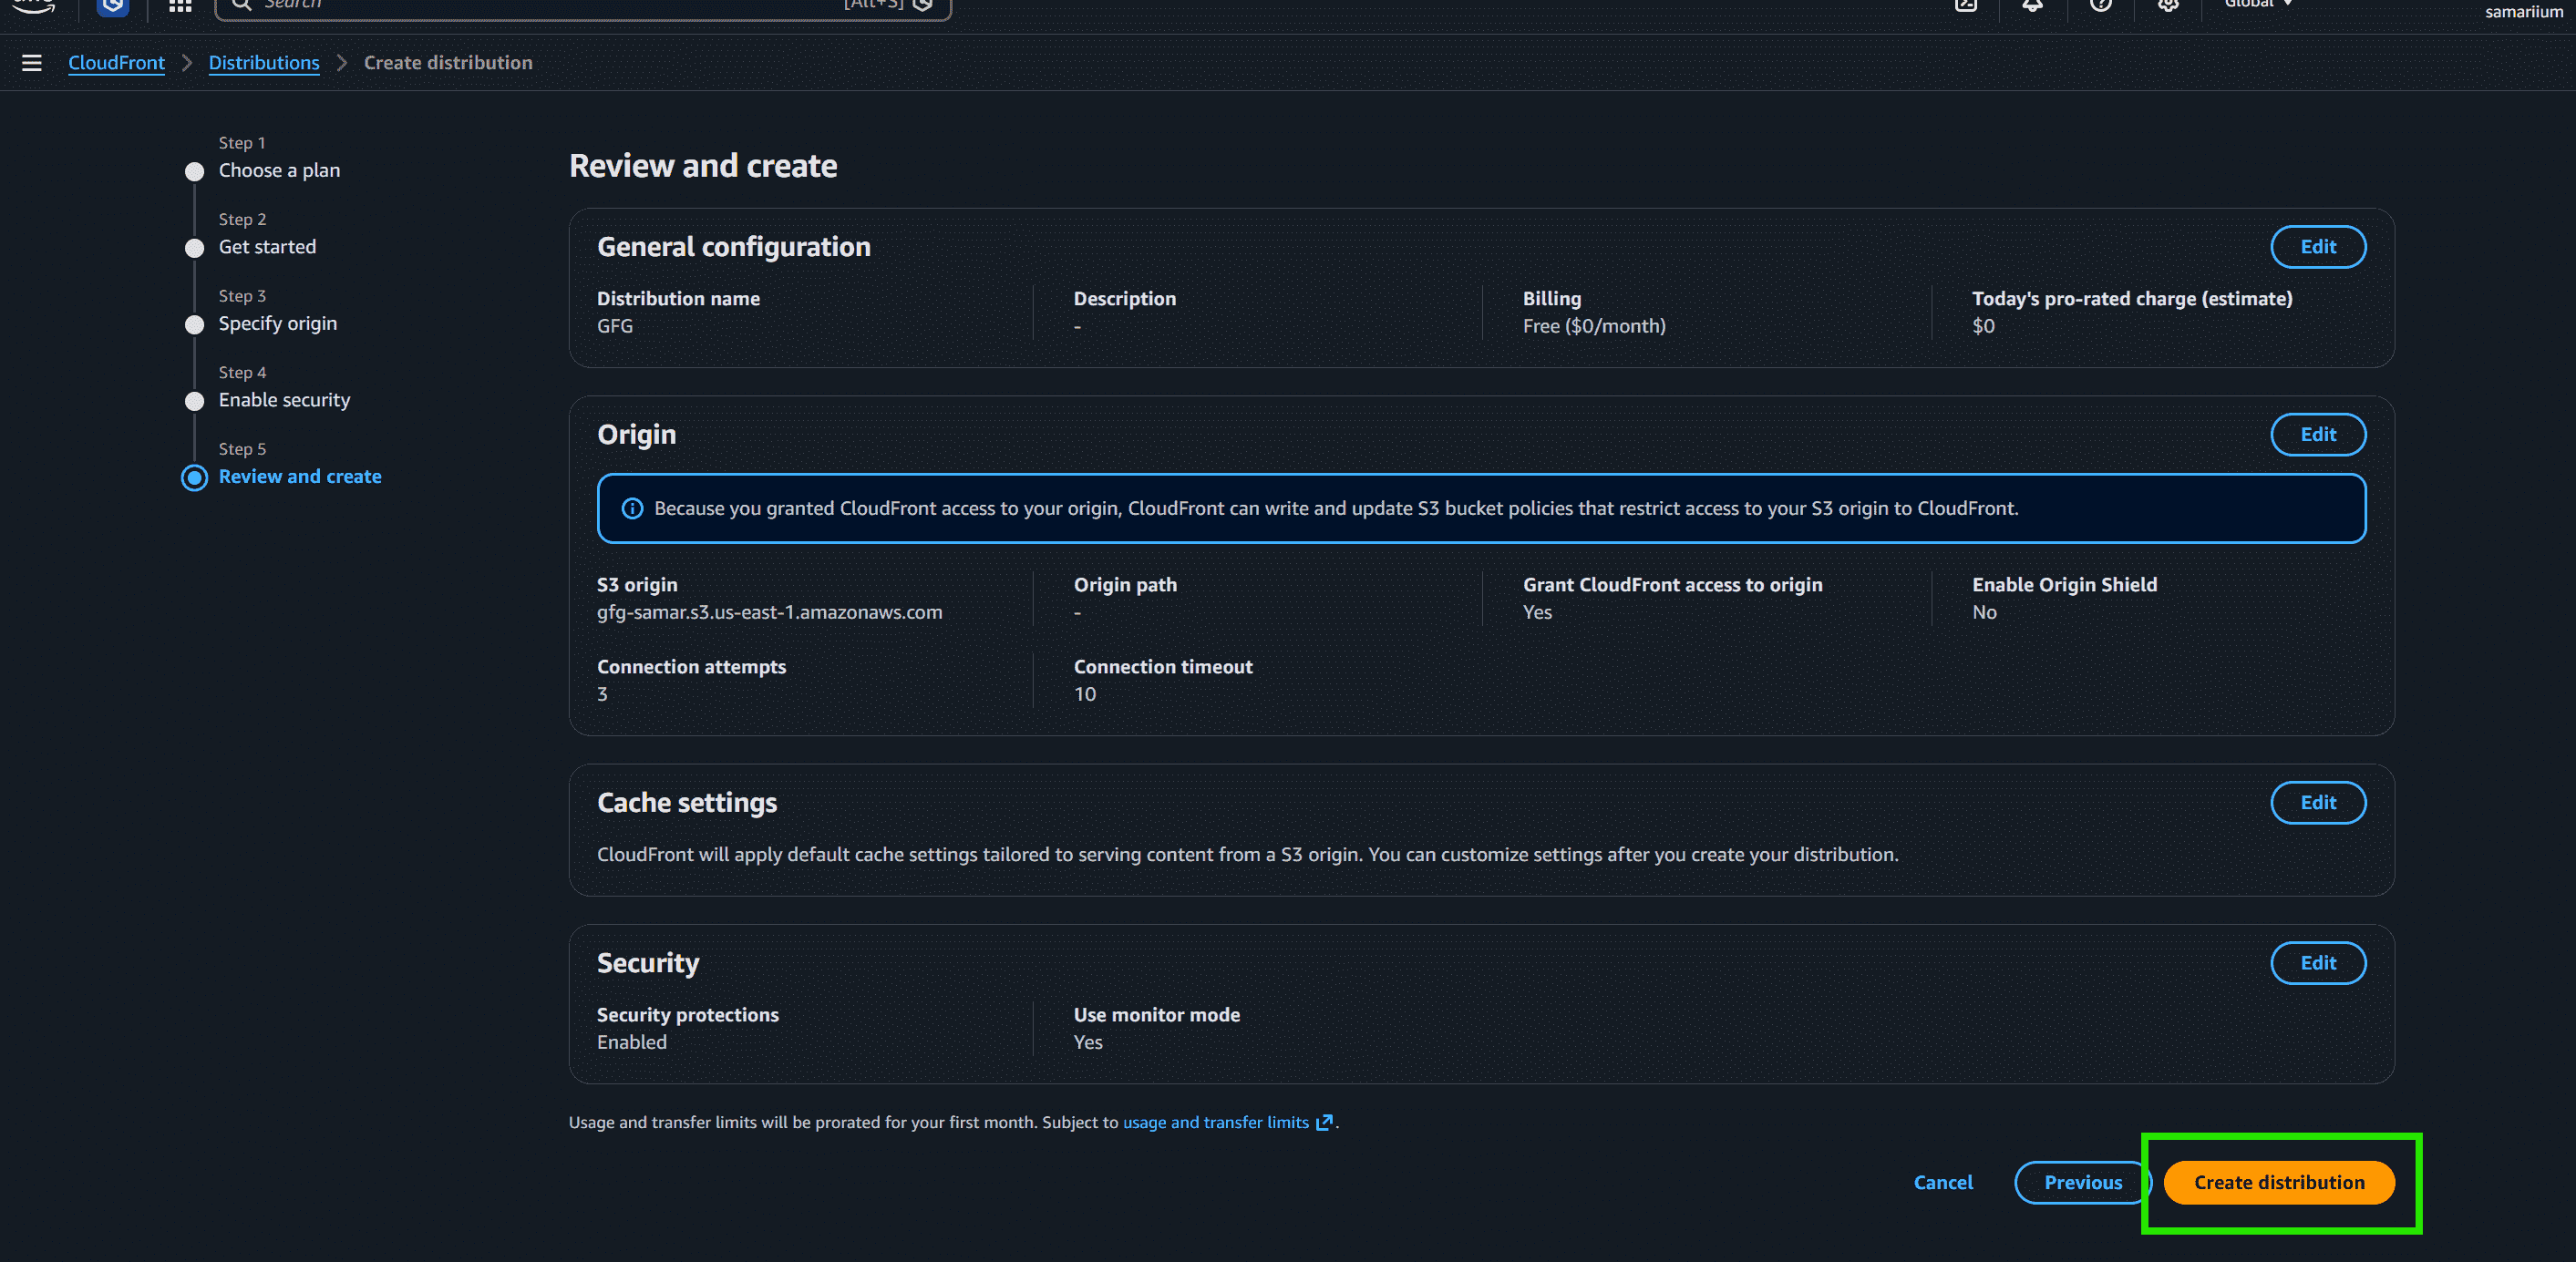
  • CloudFront: A global web service that speeds up the distribution of static and dynamic web content to end-users using a network of edge locations.
  • Distribution: A link between an origin server (like S3 or an EC2 instance) and a domain name that CloudFront uses to identify how content is routed.
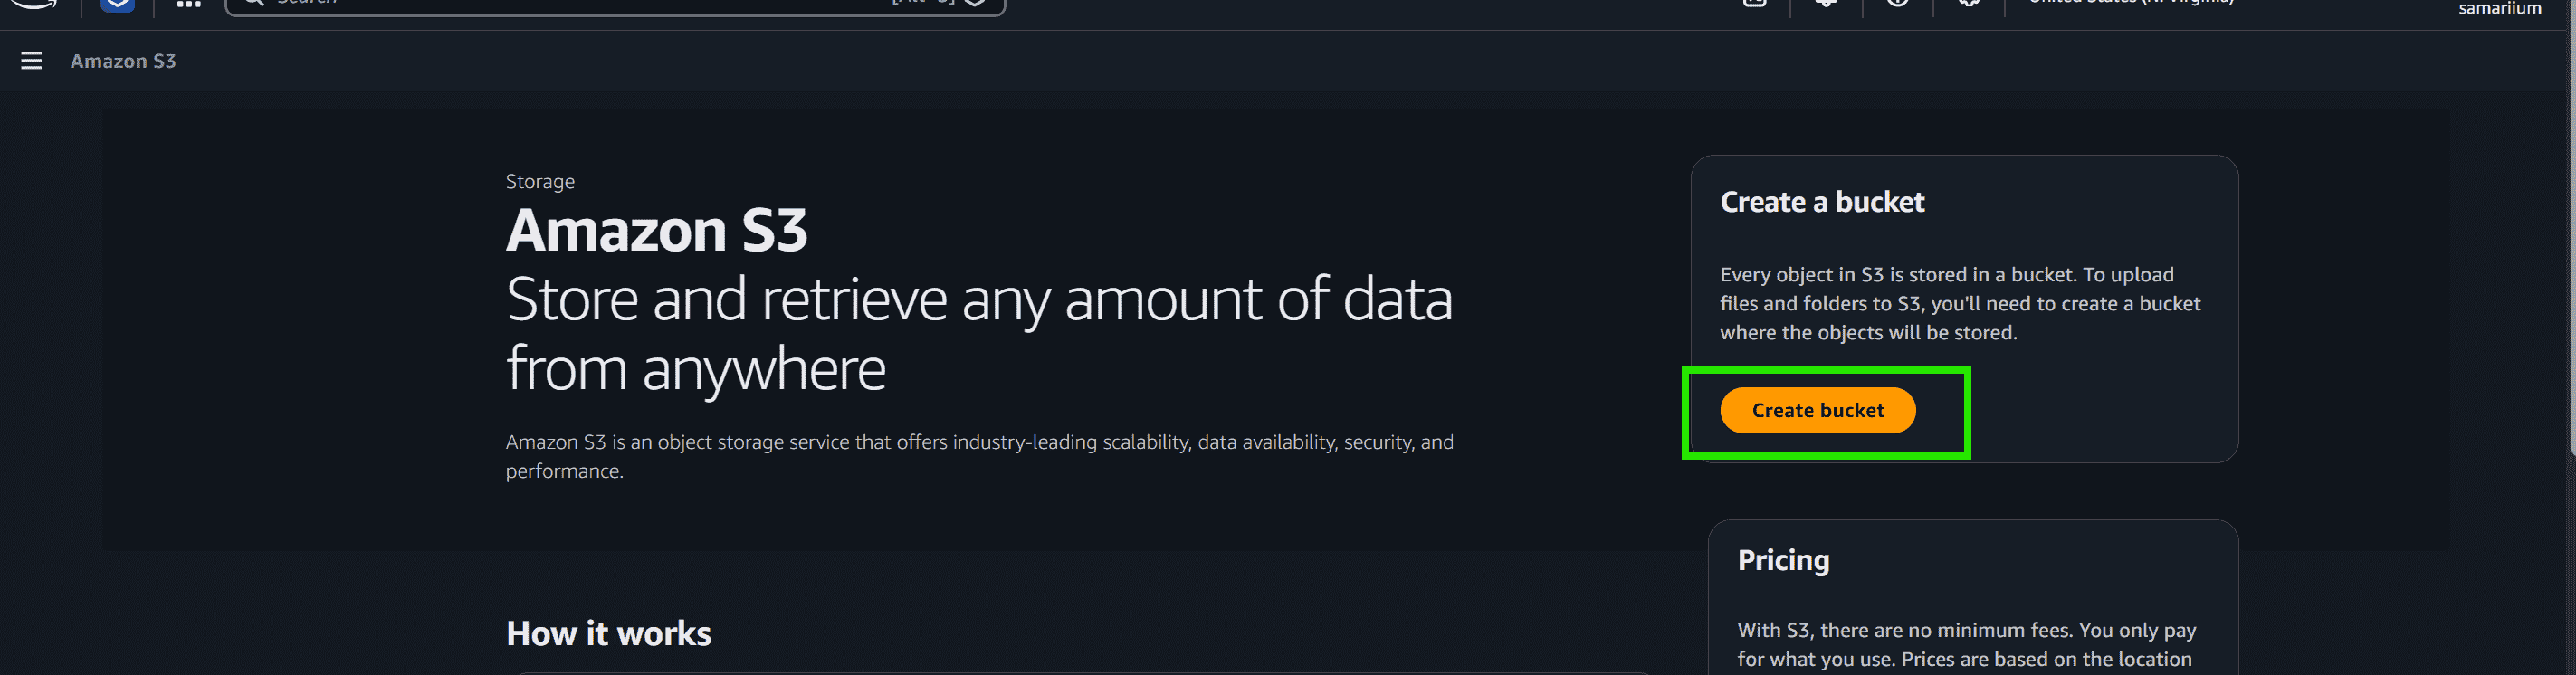
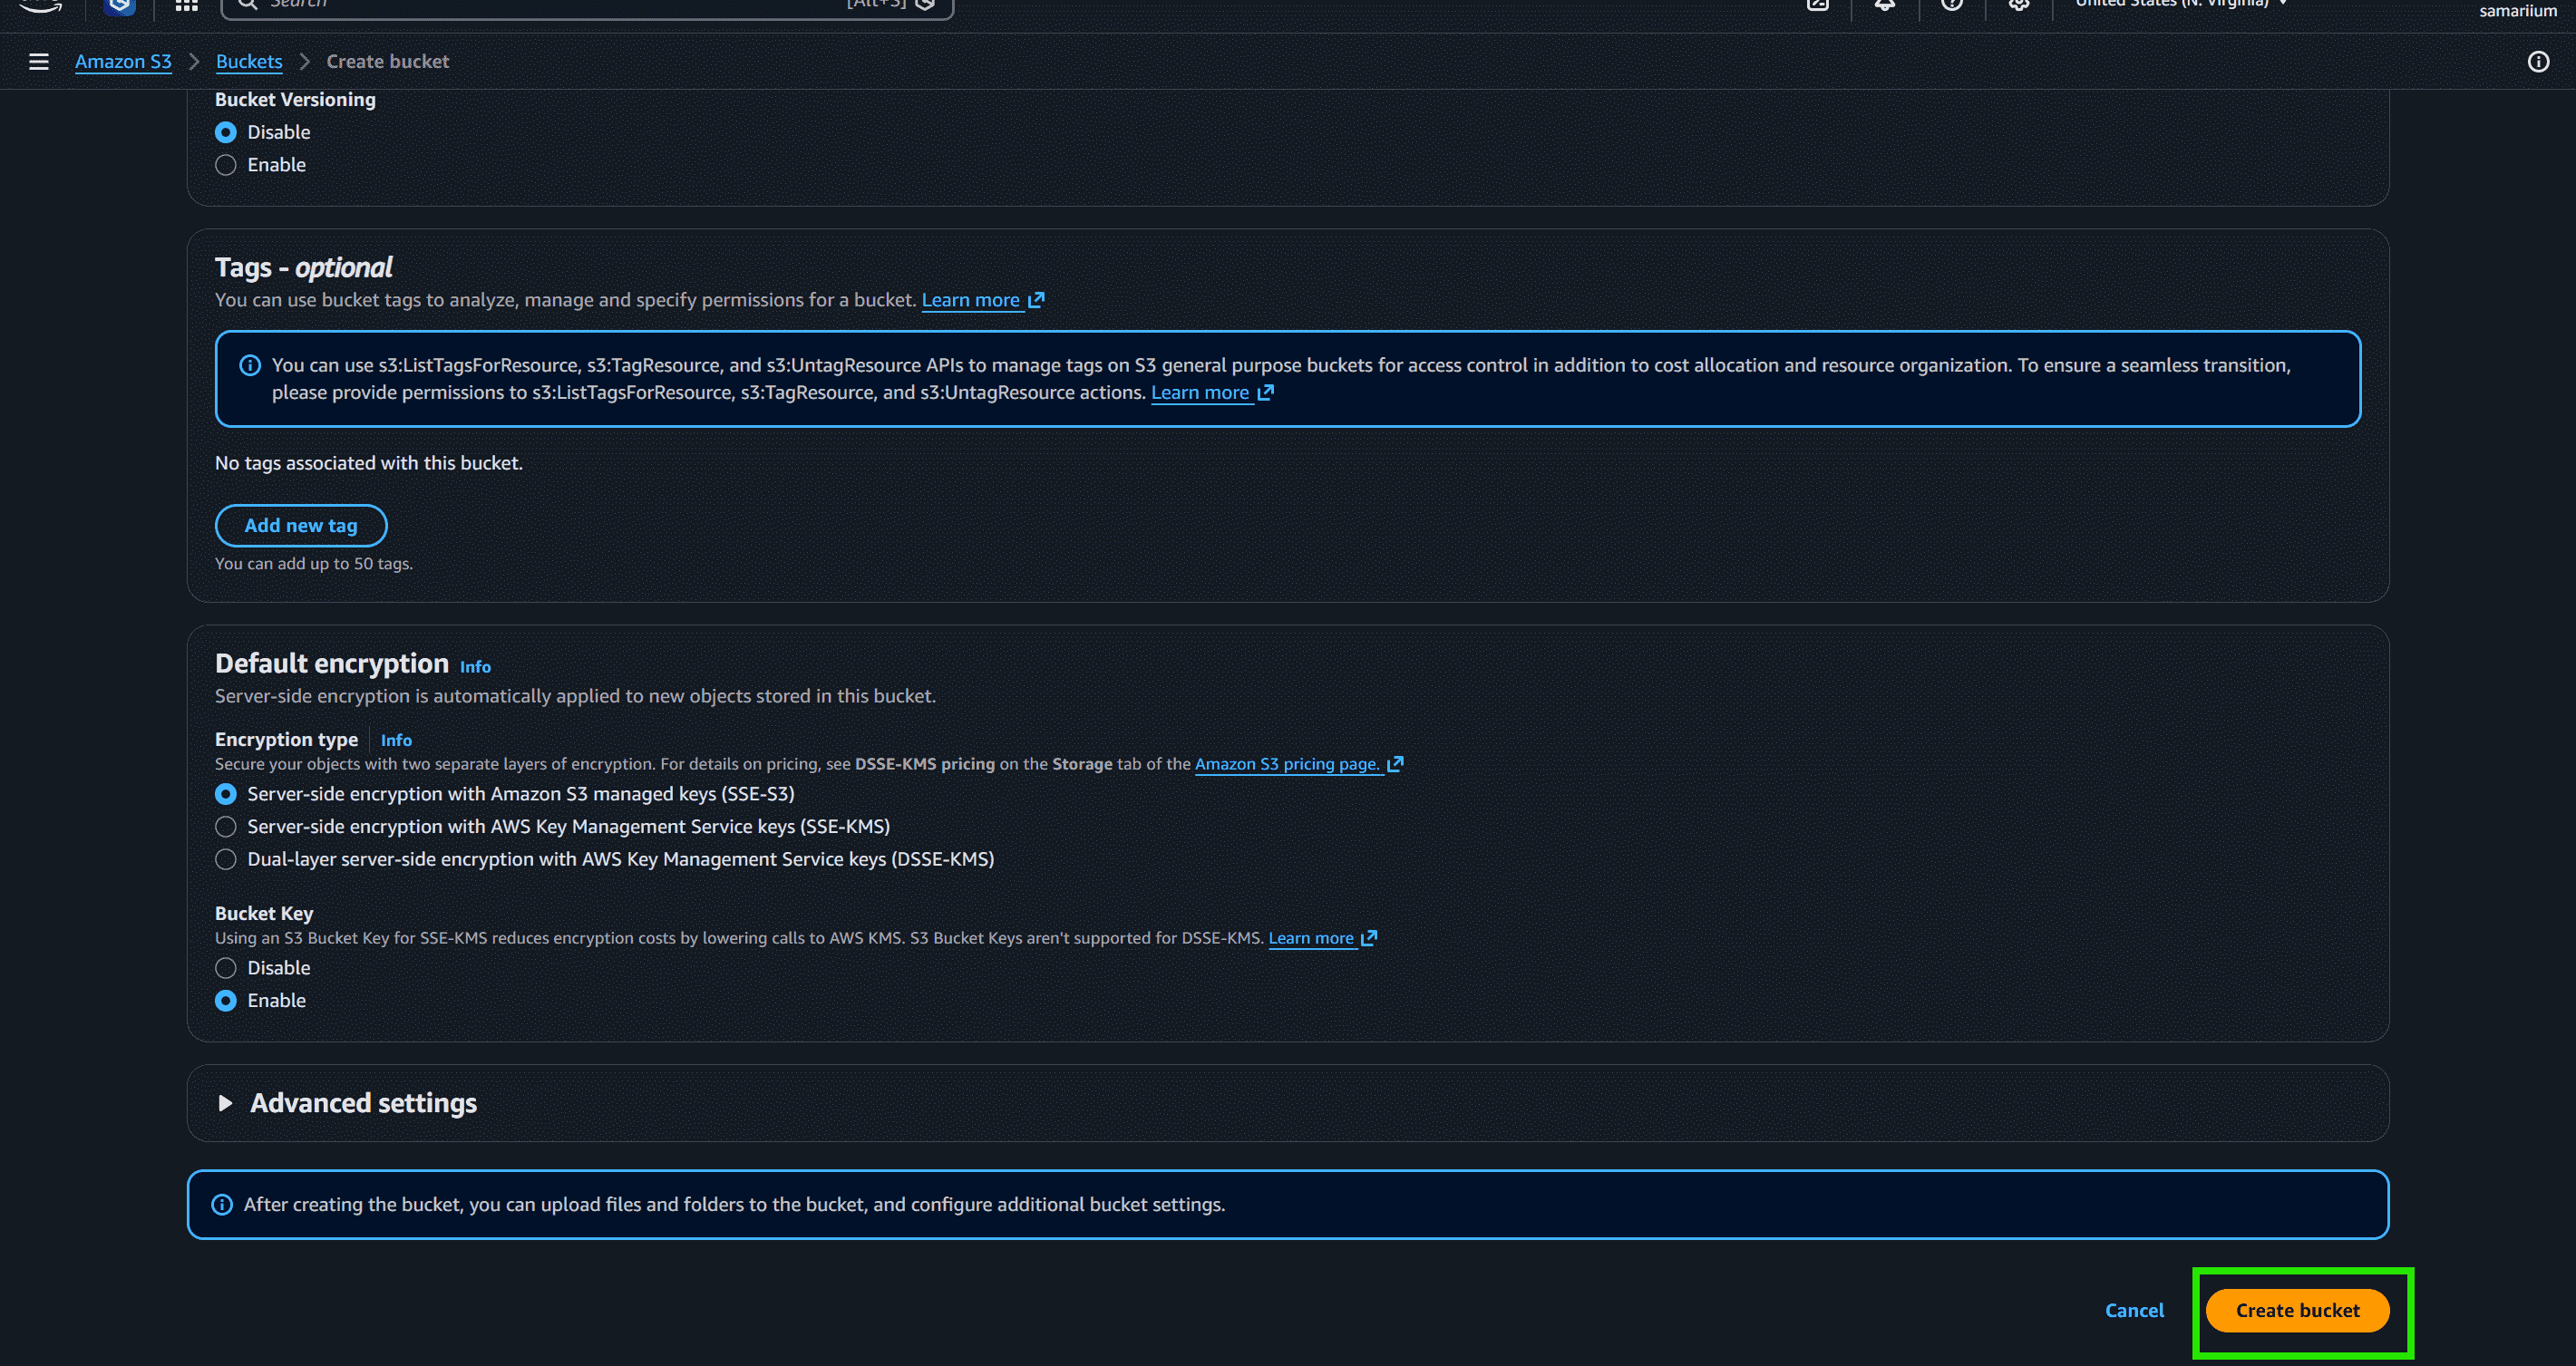
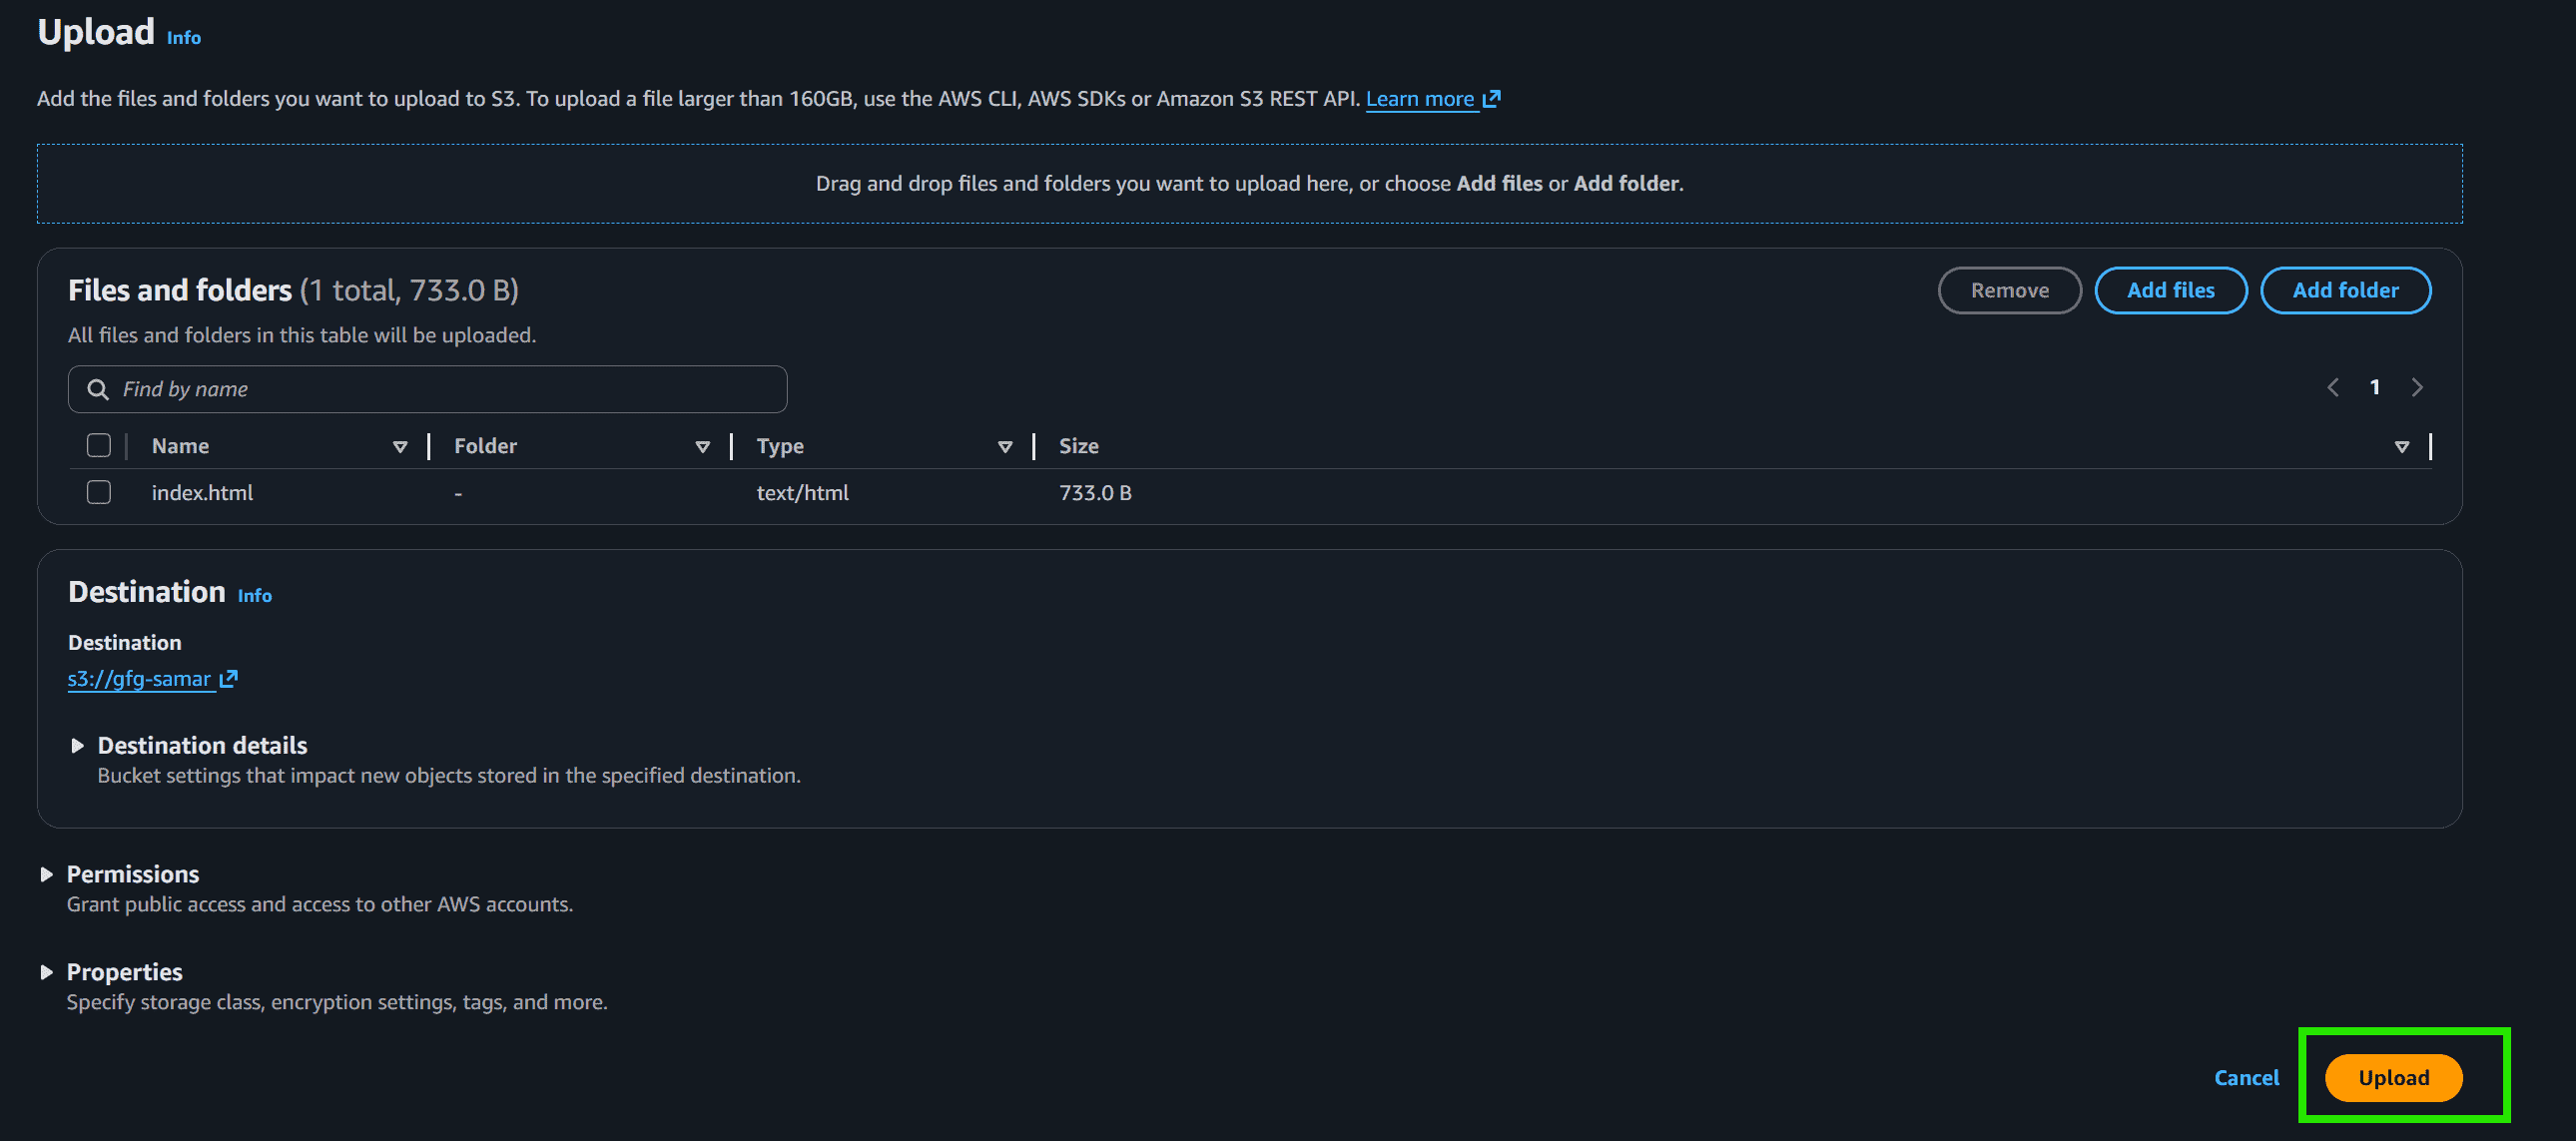
  • S3 Bucket: An object storage service in AWS used to store web files, documents, images, and videos in container-like directories.
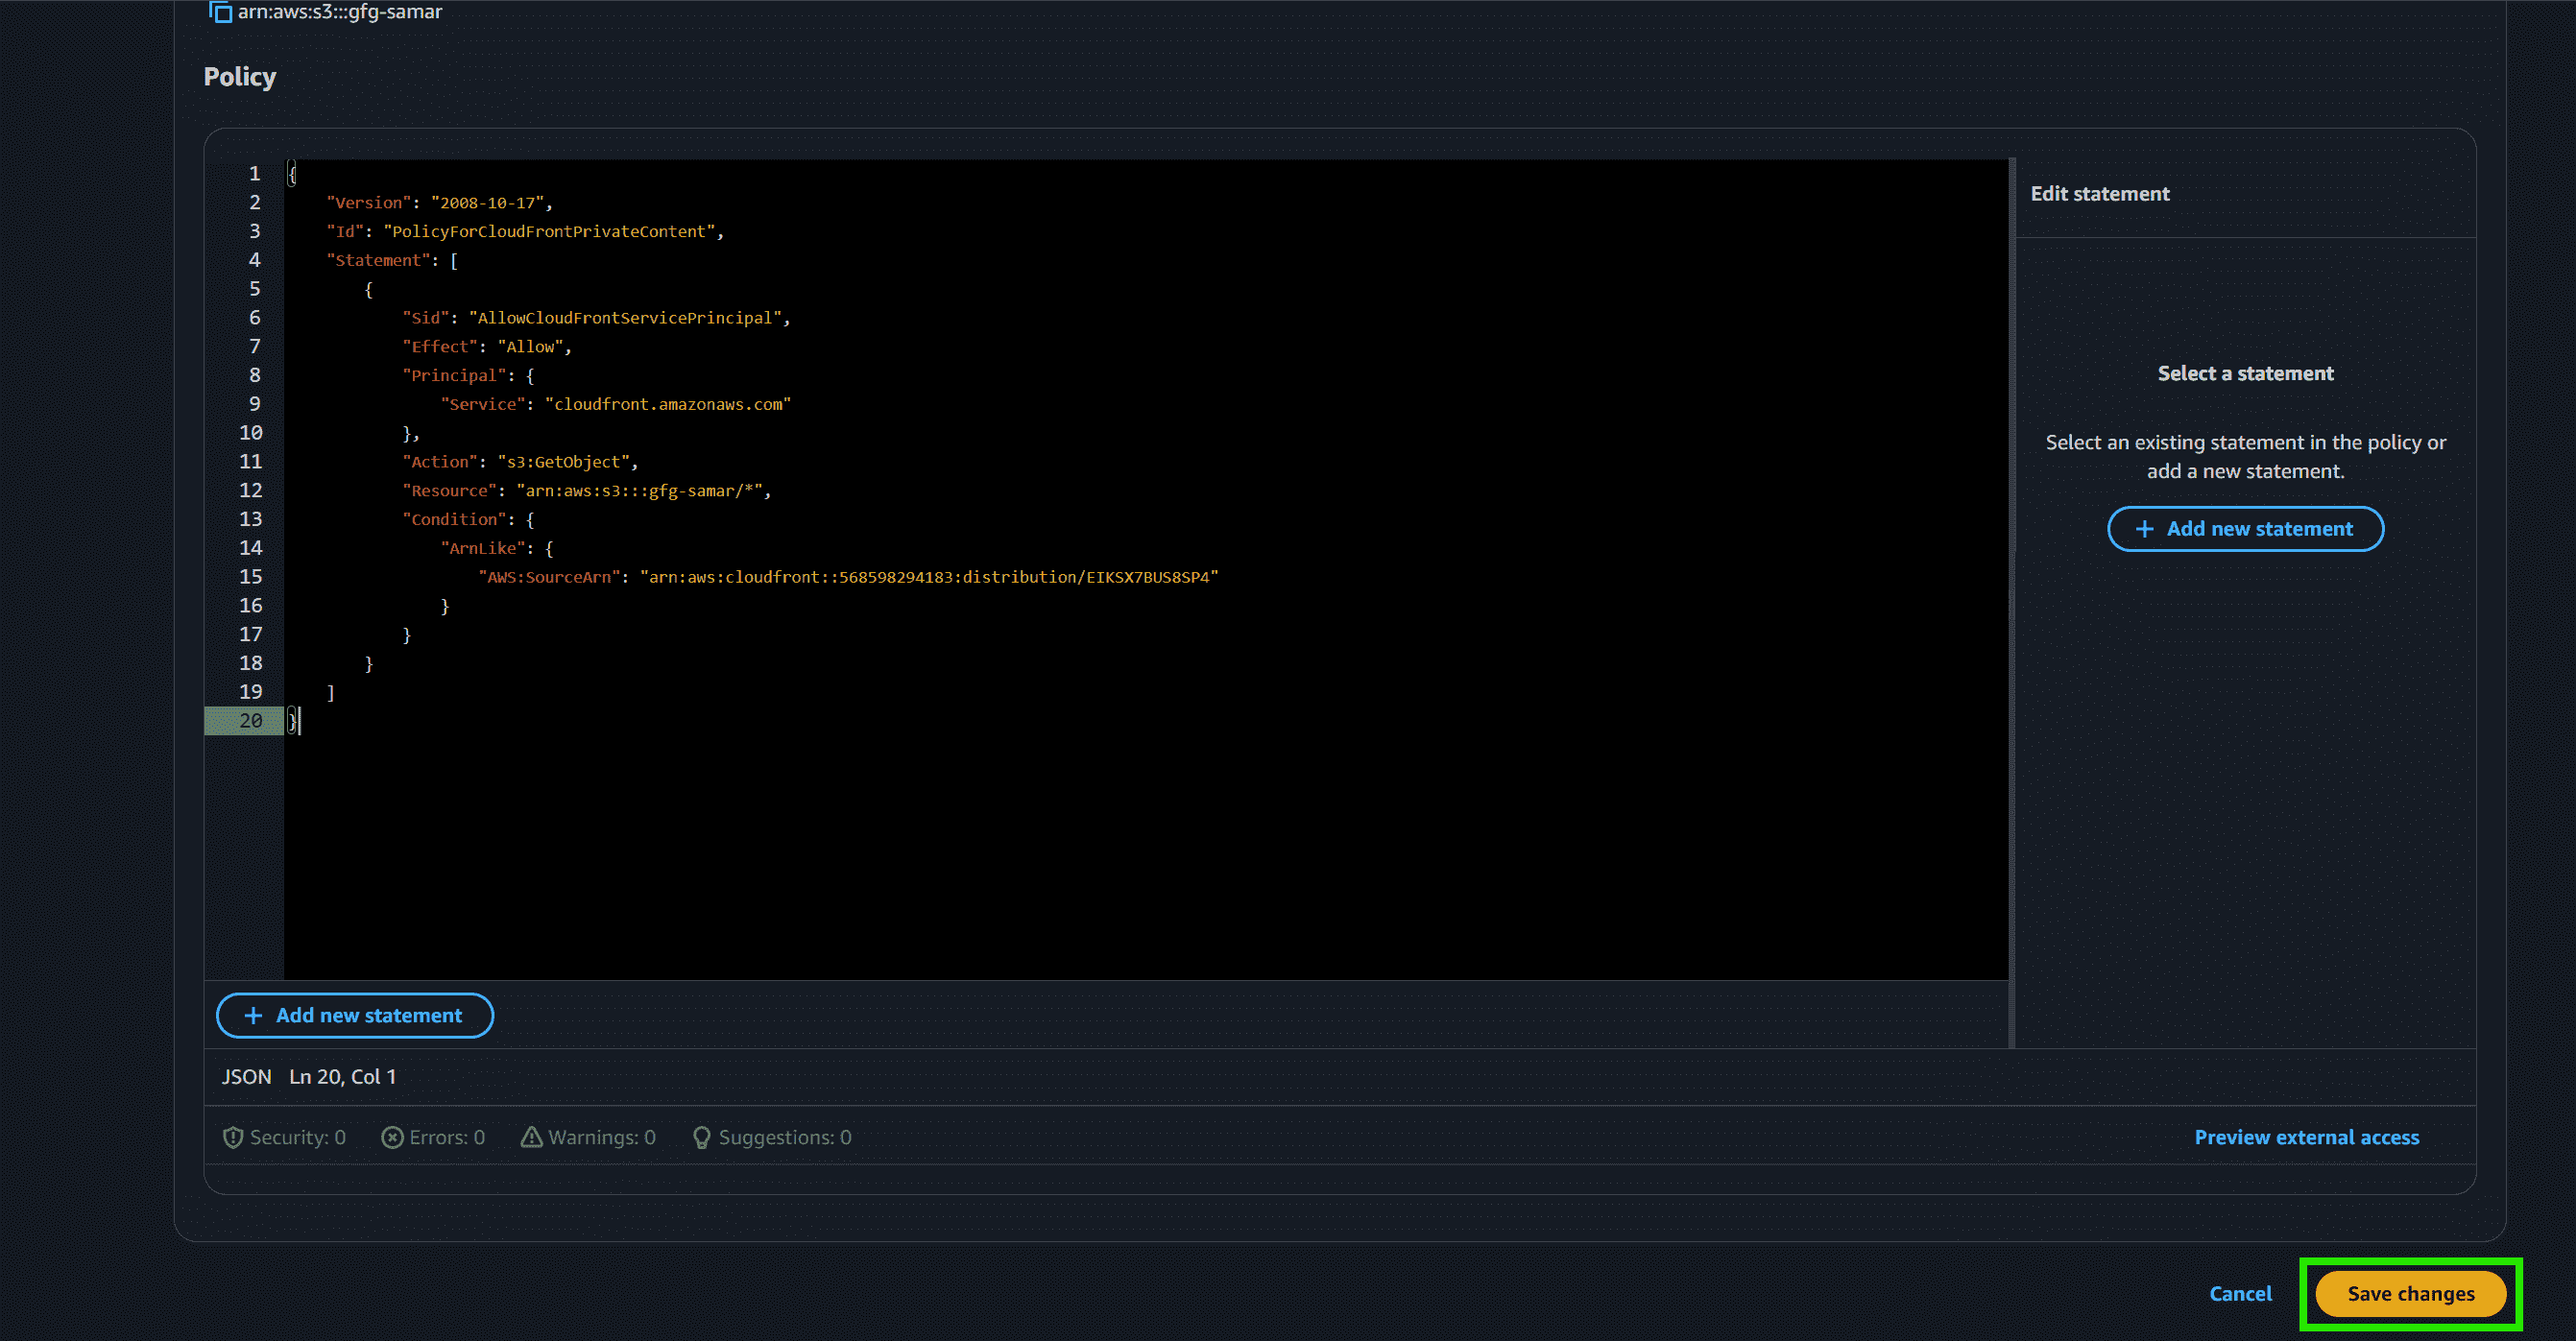
  • Origin Access Control (OAC): A secure connection mechanism that allows CloudFront to read private S3 bucket objects without exposing them to the public.

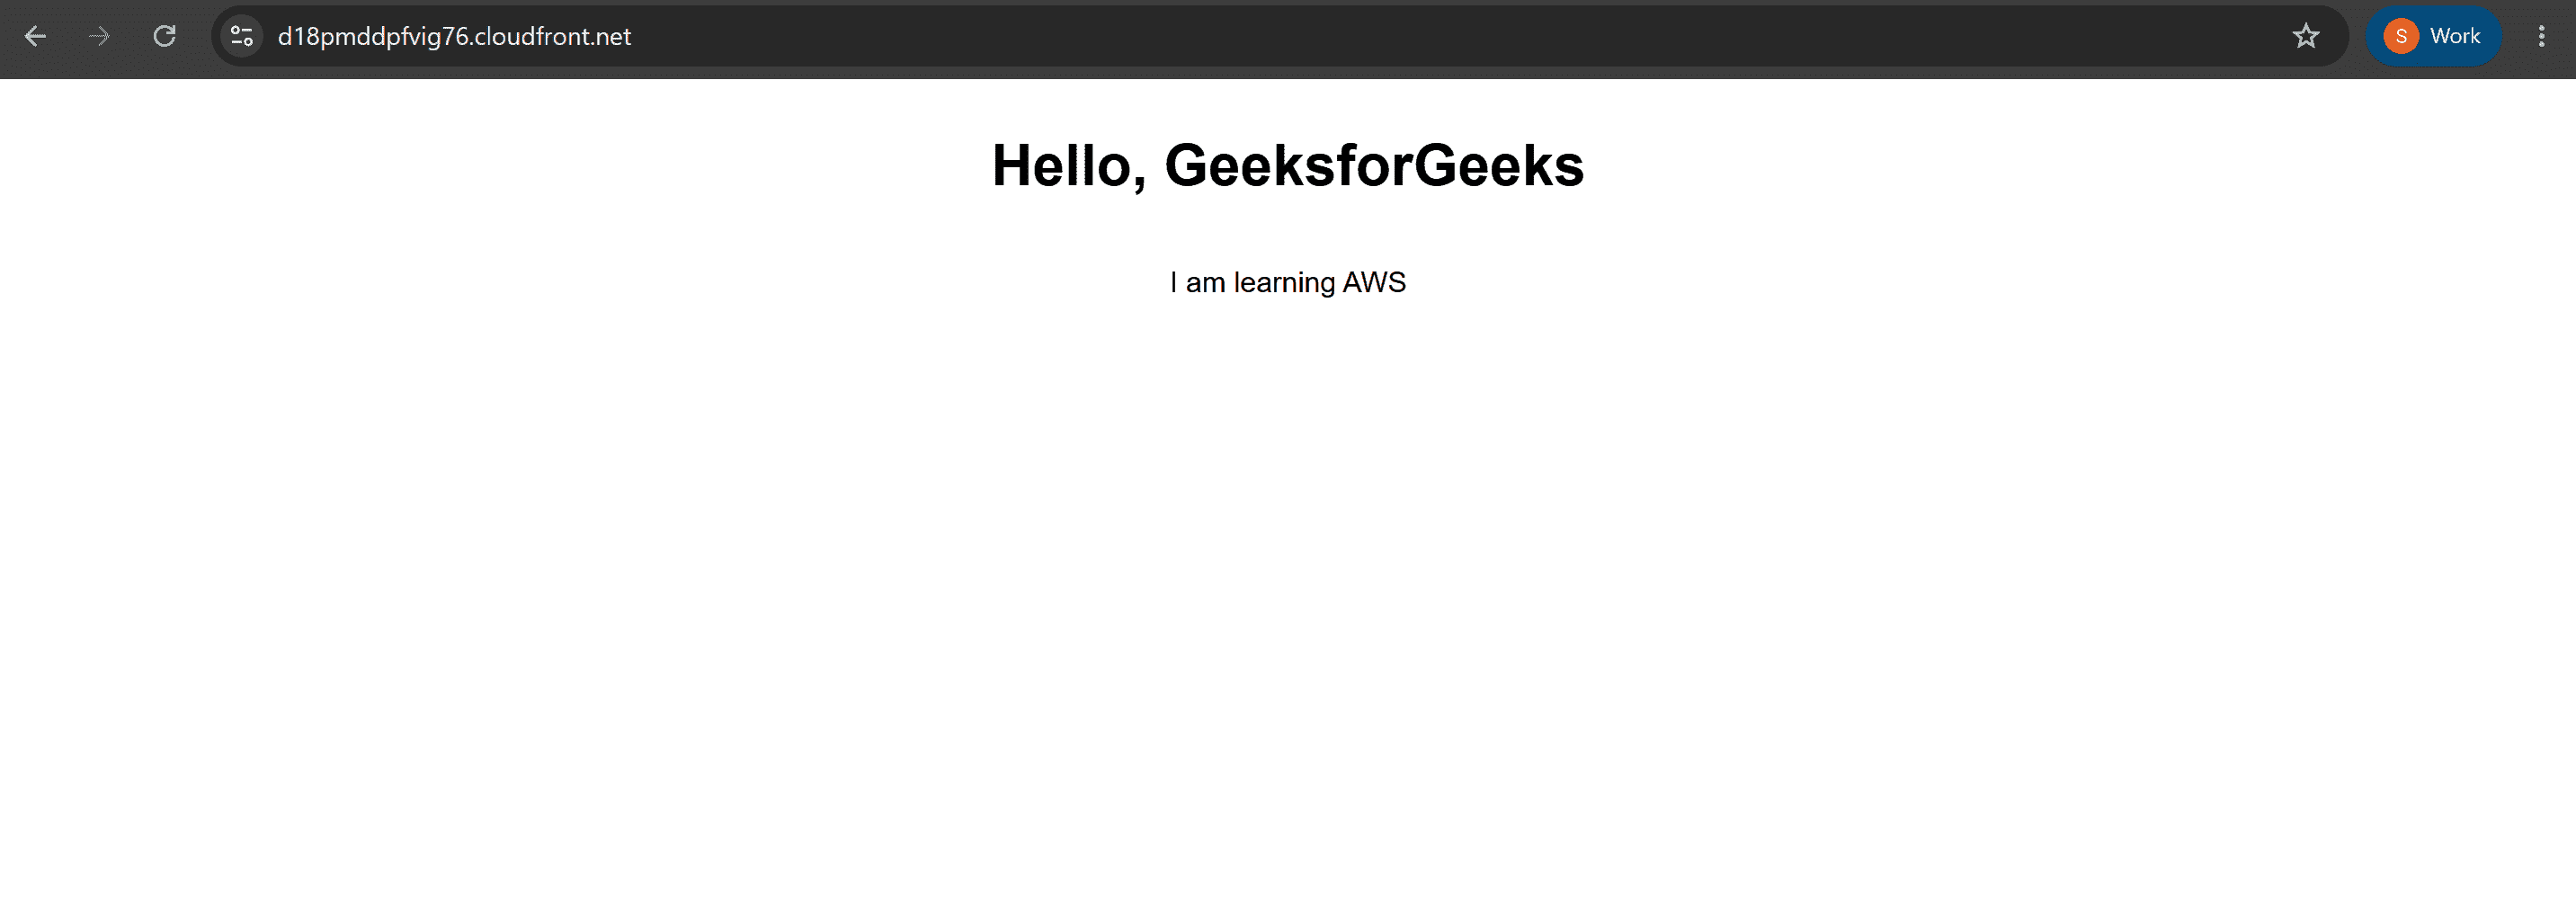
Create a CloudFront Distribution in AWS for S3 Bucket

Step 1: Create an S3 Bucket

  • Open the AWS Management Console.
  • Go to the S3 service.
  • Click Create Bucket.
👁 Screenshot-2026-06-08-091623

Step 2: Configure the Bucket

  • Enter a globally unique bucket name
  • Keep Block All Public Access enabled to secure your files.
  • Click Create bucket
👁 Screenshot-2026-06-08-091942

Step 3: Upload Static Files

  • Upload this index.html file
  • Once you drag and drop files and complete the upload process, the status page will show a successful confirmation.
👁 Screenshot-2026-06-08-092854

Step 4: Create Origin Access Control

  • Go to AWS Management Console
  • Search for CloudFront
  • Open the CloudFront dashboard
  • Click Create Distribution
👁 Screenshot-2026-06-08-093908
  • Enable Allow private S3 bucket access to CloudFront - Recommended
  • AWS automatically creates and configures Origin Access Control (OAC)
  • Select Use recommended origin settings
  • Select Use recommended cache settings
  • Enable Use monitor mode in the Security section
  • Review all settings
  • Click Create Distribution to deploy CloudFront
👁 Screenshot-2026-06-08-094615

Step 5: Add the CloudFront Bucket Policy to S3

  • Generate an S3 bucket policy that permits 's3:GetObject' actions specifically for the CloudFront service principal.
  • Open S3
  • Select your bucket
  • Go to Permissions
  • Scroll to Bucket Policy
  • Click Edit
  • Paste the policy generated by CloudFront
{
"Version": "2012-10-17",
"Statement": [
{
"Sid": "AllowCloudFrontServicePrincipalReadOnly",
"Effect": "Allow",
"Principal": {
"Service": "cloudfront.amazonaws.com"
},
"Action": "s3:GetObject",
"Resource": "arn:aws:s3:::YOUR-BUCKET-NAME/*",
"Condition": {
"StringEquals": {
"AWS:SourceArn": "arn:aws:cloudfront::YOUR-ACCOUNT-ID:distribution/YOUR-DISTRIBUTION-ID"
}
}
}
]
}
  • Replace YOUR-BUCKET-NAME
  • Replace YOUR-ACCOUNT-ID
  • Replace YOUR-DISTRIBUTION-ID
  • Click Save Changes
👁 Screenshot-2026-06-08-095809

Step 6: Retrieve and Test the CloudFront Domain URL

  • Once deployed, copy the unique domain name generated by CloudFront from your distributions details screen.
  • paste on your browser
👁 Screenshot-2026-06-08-100202

Benefits of CloudFront with S3 Bucket

  • Improved Performance: Serving your S3 content through CloudFront decreases web latency globally by caching assets closer to your users.
  • Cost Reduction: Reduces overall AWS spend because data egress from S3 to CloudFront is free, and CloudFront caching lowers origin access requests.
  • Security Control: Restricts bucket configurations, preventing users from seeing original S3 URLs or downloading assets directly.
  • Scalability: Shields S3 from sudden traffic spikes, preventing application performance throttling.
Comment
Article Tags:
Article Tags:

Explore