 |
VOOZH | about |
|
VOOZH | about |
Google Cloud DNS is a fully managed, scalable Domain Name System service that translates domain names into IP addresses so users can access applications hosted on Google Cloud. Built on Google’s global infrastructure, it provides high availability, low latency, and automatic scaling without requiring users to manage DNS servers. It supports both public and private DNS zones and integrates seamlessly with other Google Cloud services.
The architecture is designed to automatically scale and handle millions of DNS queries without requiring users to manage DNS servers.
A DNS zone represents a domain namespace managed by Cloud DNS.
Two types of zones are supported:
Each zone contains DNS records associated with the domain.
DNS records store the mapping between domain names and resources. Common record types include:
These records determine how traffic is directed to services hosted on cloud infrastructure.
Google Cloud DNS automatically assigns four authoritative name servers to each managed zone. These name servers:
Users configure their domain registrar to point to these name servers so Cloud DNS can handle resolution.
Resolvers are responsible for querying authoritative DNS servers to obtain the IP address associated with a domain. Typical resolvers include:
Resolvers send queries to Cloud DNS name servers to retrieve DNS records.
Cloud DNS operates on Google’s global network of edge locations. When a DNS query is made, it is routed to the nearest Google edge point of presence (PoP). Benefits include:
The following steps explain how DNS resolution works in Google Cloud DNS:
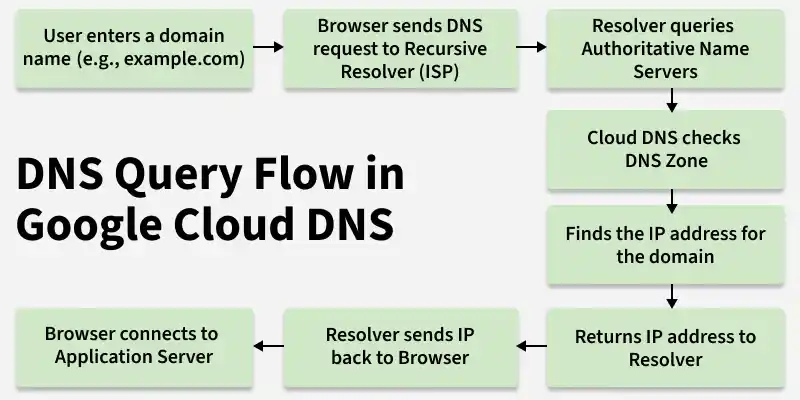
example.com) in a web browser.Google Cloud DNS works by resolving domain names into IP addresses using Google's globally distributed DNS infrastructure.
1. Domain Request: A user enters a domain name such as example.com in a browser.
2. DNS Query Sent: The request is sent to a DNS resolver, typically provided by the user’s ISP.
3. Query Reaches Cloud DNS: The resolver queries the authoritative name servers managed by Google Cloud DNS.
4. Record Lookup: Cloud DNS checks the configured DNS records (A, AAAA, CNAME, MX, TXT, etc.) within the DNS zone.
5. IP Address Returned: The corresponding IP address of the service is returned to the resolver.
6. Connection Established: The browser connects to the destination server using the returned IP address.
Because the service runs on Google's global infrastructure, DNS queries are answered from the nearest available edge location, reducing latency and improving reliability.
Google Cloud DNS can be used in several scenarios where reliable and scalable domain name resolution is required.
1. Hosting Public Websites: Organizations can map domain names to applications hosted on services such as Compute Engine, load balancers, or Kubernetes clusters.
2. Internal Service Discovery: Private DNS zones allow internal services within a VPC to communicate using domain names instead of IP addresses.
3. Multi-Region Applications: Cloud DNS can route traffic to services deployed across multiple regions, improving availability and fault tolerance.
4. Hybrid and Multi-Cloud Architectures: Organizations can integrate Cloud DNS with on-premises infrastructure to enable consistent name resolution across hybrid environments.
5. Email and Verification Records: DNS records such as MX and TXT can be configured for email routing, domain verification, and security policies like SPF, DKIM, and DMARC.
Google Cloud DNS follows a pay-as-you-go pricing model, where charges depend on the number of managed zones and DNS queries processed.
1. Managed Zones: Charges apply for each public or private DNS zone created.
2. DNS Queries: Pricing is based on the number of DNS queries processed per month.
3. Record Sets: DNS record storage is included within the managed zone pricing.
To Setup Google Cloud Domain you need to follow these steps mention below.
Go to the Google Cloud Console.
Sign in with your Google account.
Click at the project dropdown in top bar. Click on “New Project. ”Enter a Project Name and click “Create.”
If you haven’t installation billing on your challenge, you’ll want to allow billing. Go to the Billing page within the Cloud Console and comply with the instructions.
In the Cloud Console, visit the APIs & Services > Library.
Search for “Cloud DNS API” and enable it for your project.
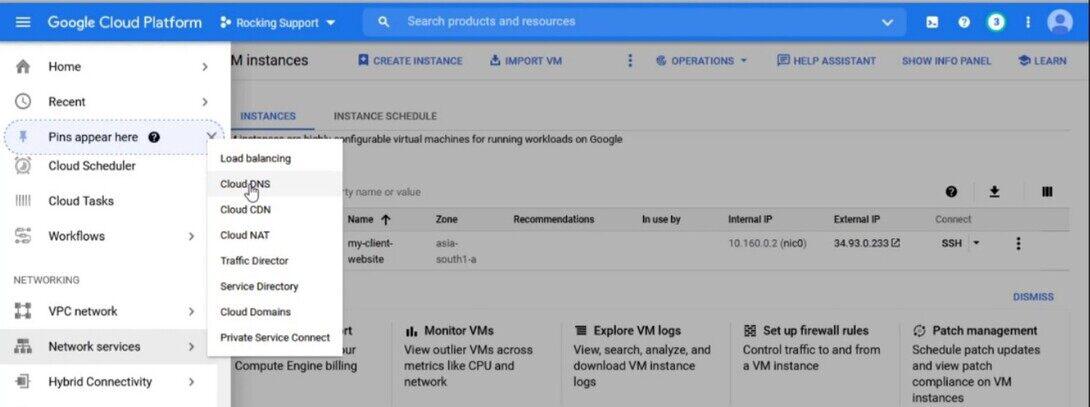
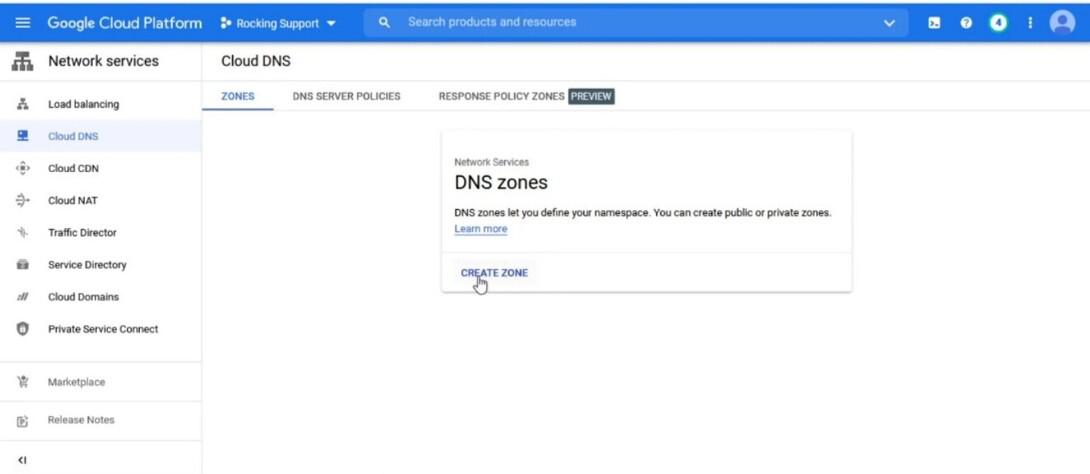
In the Cloud Console, go to Networking > Network offerings > Cloud DNS.Click on “Create Zone.”
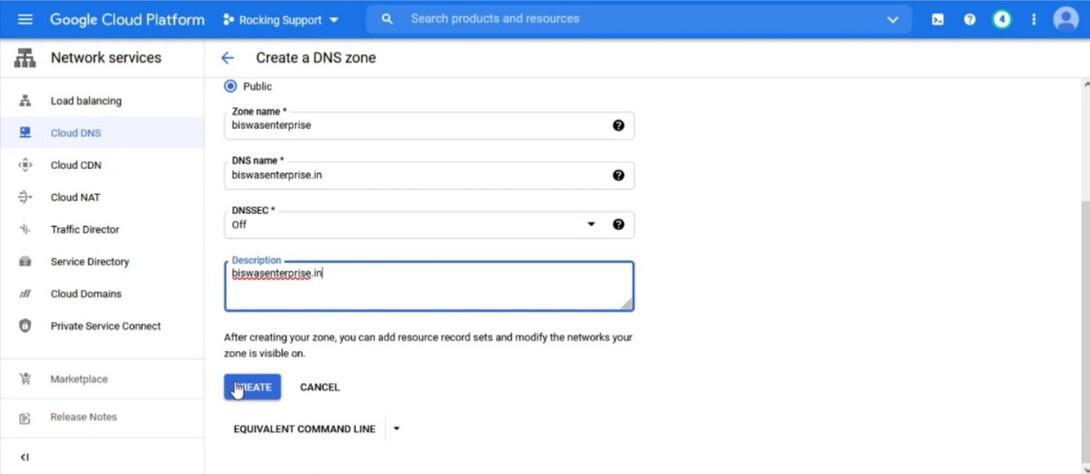
Enter a Zone Name and the DNS Name.
Click “Create.”
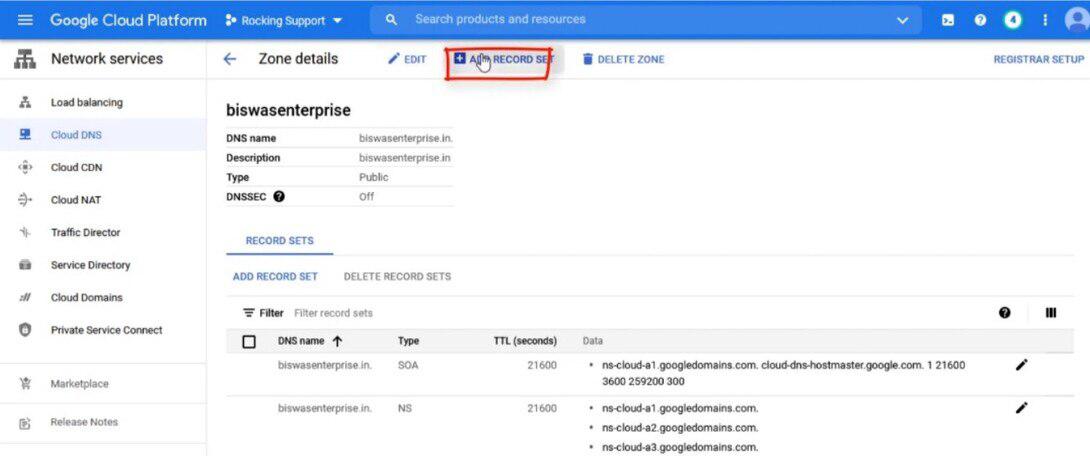
Inside your DNS Zone, click on “Add Record Set” to add DNS facts (eg. A, CNAME, MX records) for your domain. Follow the activates to add the important data.
Go in your domain registrar’s website. Find the DNS settings or DNS management segment. Replace the present name servers with those provided by Google Cloud DNS. Google Cloud DNS offers 4 name servers which you need to set up with your domain registrar.
DNS changes would possibly take the time to propagate across the internet. You can use gear like nslookup or online DNS lookup tools to confirm your DNS information and make sure they're efficiently configured.