 |
VOOZH | about |
|
VOOZH | about |
An Amazon Machine Image (AMI) is a template containing an operating system, installed programmes, and configuration settings used as the foundation for launching Amazon EC2 instances. Creating a custom AMI saves time and guarantees consistency when launching multiple instances with identical configurations.
Step 1. Log in to your AWS account. Click the Services tab in the top-left corner, navigate to the Compute category, and select EC2.
👁 AWS EC2 InstanceStep 2. In the top-right corner of the EC2 dashboard, select the AWS Region closest to your users or best suited to your application's latency and availability requirements.
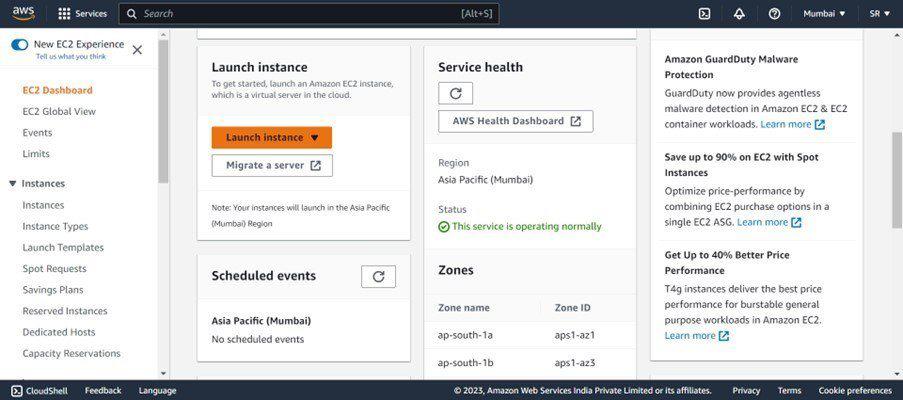
Step 3. Click Launch Instance on the EC2 dashboard to open the instance creation wizard.
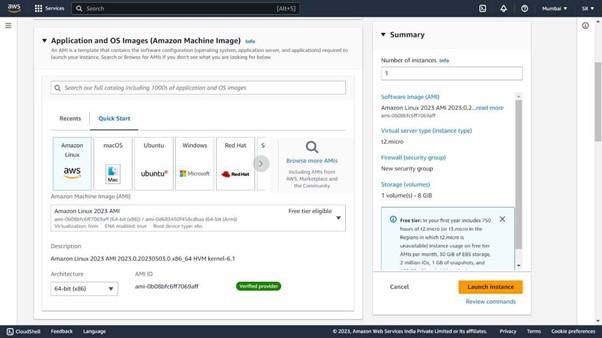
Step 4. Select an AMI appropriate for your application. For this example, select Amazon Linux 2 from the available options.
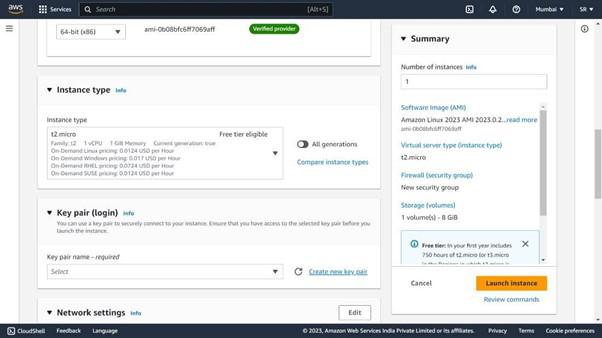
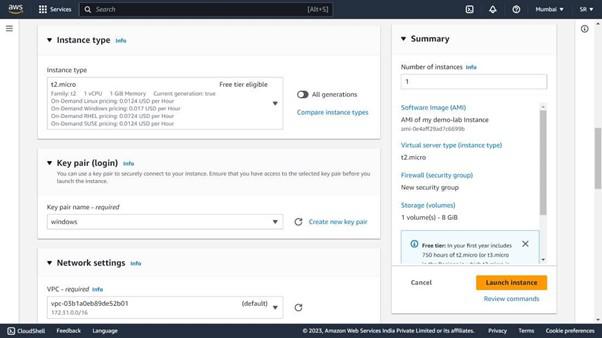
Step 5. Choose t2.micro (Free Tier eligible) or select the instance type that best matches your CPU, memory, and storage requirements.
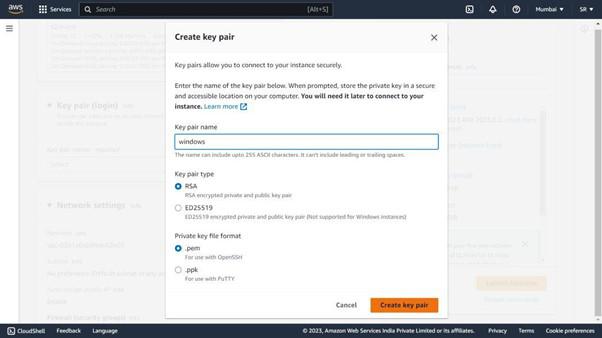
Step 6. Create a new key pair if you do not already have one. Download the private key file and store it securely, as it is required to connect to any instance launched using this key pair.
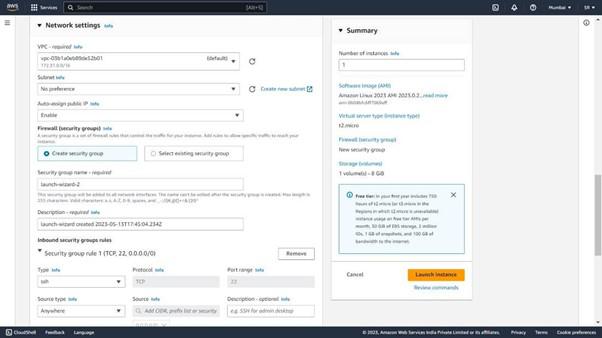
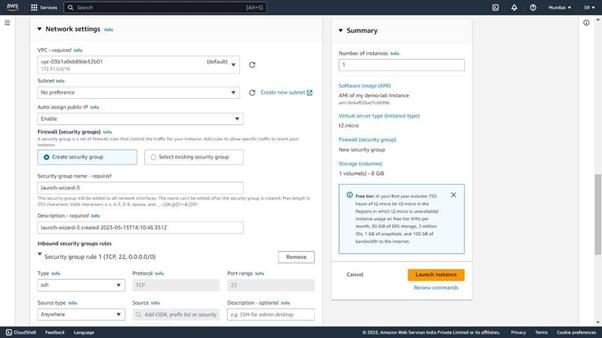
Step 7. Set the number of instances to 1. Select your default VPC or a custom VPC along with its associated subnet.
Step 8. Create a new security group or select an existing one. Specify the allowed protocols and permitted IP address ranges for inbound and outbound traffic.
Step 9. Configure EBS volumes for your instance. Available volume types include:
Step 10. Review all configuration settings, make any necessary adjustments, and click Launch.
👁 launch instanceStep 1. Open the AWS Management Console, navigate to the EC2 Dashboard, and select Instances from the left-hand navigation pane.
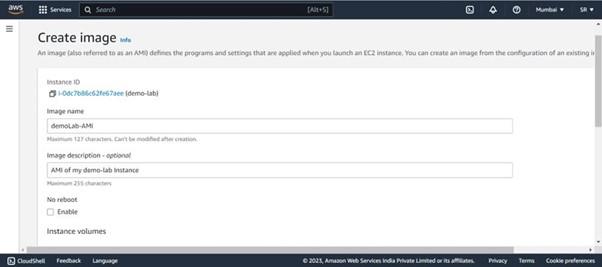
Step 2. Use the search box or filter options to locate the instance you want to use as the AMI source. Right-click the instance and select Create Image from the context menu.
Step 3. Enter a unique name and optional description for the new AMI.
Note: Selecting No reboot does not guarantee that all pending file system writes will be captured in the snapshot, which may result in an inconsistent image.
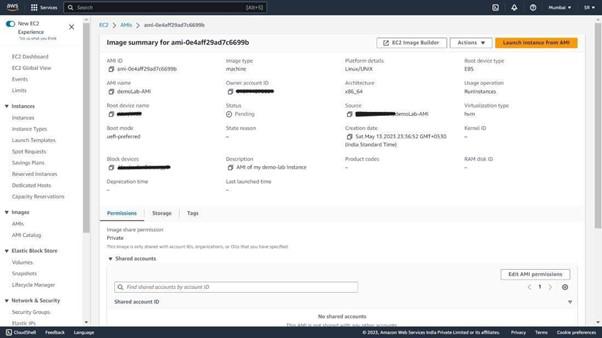
Step 4. AMI creation may take several minutes.
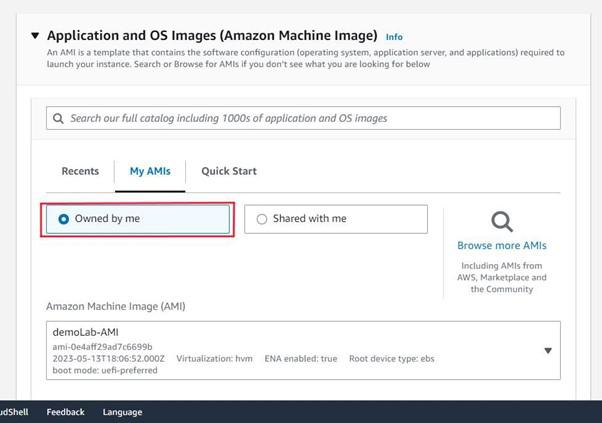
Step 5. Once the AMI status is available, click Launch Instance in the EC2 dashboard.
The Instance has been created successfully from your custom AMI.