 |
VOOZH | about |
|
VOOZH | about |
Azure Traffic Manager (ATM) is a powerful Azure service to manage user traffic and distributes it to service endpoints using various routing methods. In this article, I will be guiding you with the process of creating a web app till setting up an Azure Traffic Manager.
Step 1: Login into your Azure account
Step 2: Click on Create a resource
Step 3: Click on Web App and fill the details
Step 4: Click on Review + Create and then click on create again.
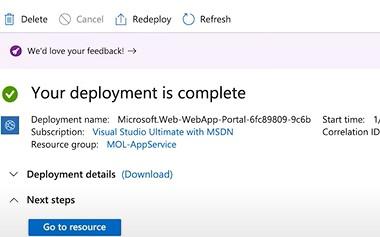
Step 5: Click on Go to Resource and then Click on the Azure Cloud Shell logo.
Step 6: Write the Bash Code
git clone <github repository url>git config --global user.email "<your email> "
git config --global user.name "<your name>"
cd <path to the code file>
Step 7: Git Deployment
git init
git add .
git commit -m "<commit message>"
Step 8: Configure App Service
az webapp deployment source config-local-git --name <name of web app> --resource-group <resource group name>Step 9: Deploy Web App
After running the above command you'll be getting a Json output in which there will be a predefined URL "scmURi:" you have to copy that URL and we will add this as a remote into our local github repository.
git remote add azure '<paste the url here> '
git push azure master
Your code will be deployed and you just have to refresh your web page.
Step 1: Login into your Azure portal.
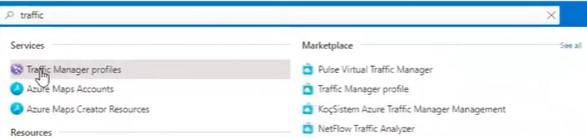
Step 2: Search "Traffic Manager Profile" in the search bar and Click on it.
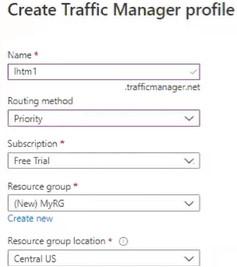
Step 3: Click on "Create traffic manager profile"
Step 1: Search "DNS Zones" in the search bar and Click on it.
Step 2: Click on Create DNS
Step 1: Go to GoDaddy or a similar website.
Step 2: Click on your Profile Name> Manage Domains
Step 3: Click on DNS > Manage Zones
Step 4: Search for the Domain Name you wrote while Deploying DNS example- gfgexample.com
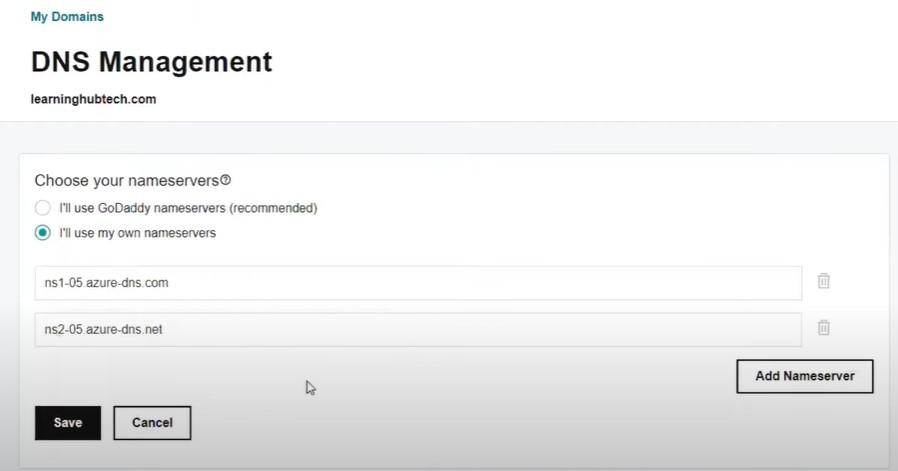
Step 5: Scroll down to find Nameservers and Click on Changes
Step 6: Open Azure Portal > Overview
Step 7: Copy Name Server 1 and paste it in GoDaddy NameServers (Step5) similarly for Name server 2
Step 8: Click on Save and with that we have created two Virtual Machines (Endpoint).
Step 1: Search "Virtual Machine" in the search bar and Click on it.
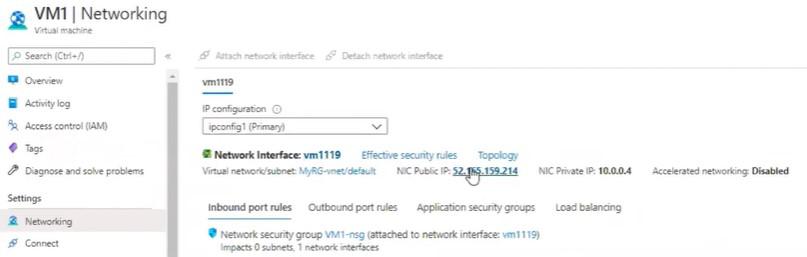
Step 2: Click on VM1 and then Click on Networking.
Step 3: Click NIC Public IP address.
Step 4: Click on Configure.
Step 5: Write a Unique name in DNS name label and Click on Save.
Step 6: Follow the same steps to configure the other Virtual Machines on public IP address.
Step 1: Search "Traffic Manager Profile" in the search bar and Click on it.
Step 2: Click on the Traffic Manager Profile you created above.
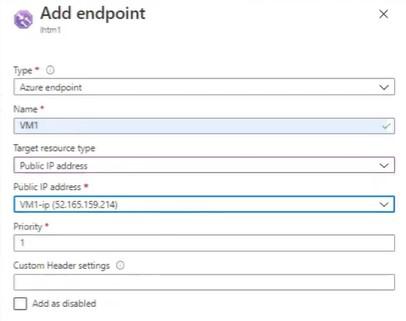
Step 3: Click on Endpoint and Click on Add.
Step 4: Click on Save and Follow the same steps to add the second endpoint.
Step 1: Search "Traffic Manager Profile" in the search bar and Click on it.
Step 2: Click on the Traffic Manager Profile you created above.
Step 3: Click on Overview and Copy the DNS name.
Step 4: Search for "DNS Zone" in the search bar.
Step 5: Click on the DNS Zone you've created and Click on Record set.
Step 6: Fill in the Details in Record Set.
Step 7: Click on OK and the whole process is complete and ready to work.