Amazon Relational Database Service (RDS) is a distributed managed relational database service offered by AWS. It automates administrative tasks such as hardware provisioning, database setup, patching, and backups, allowing you to focus on your application.
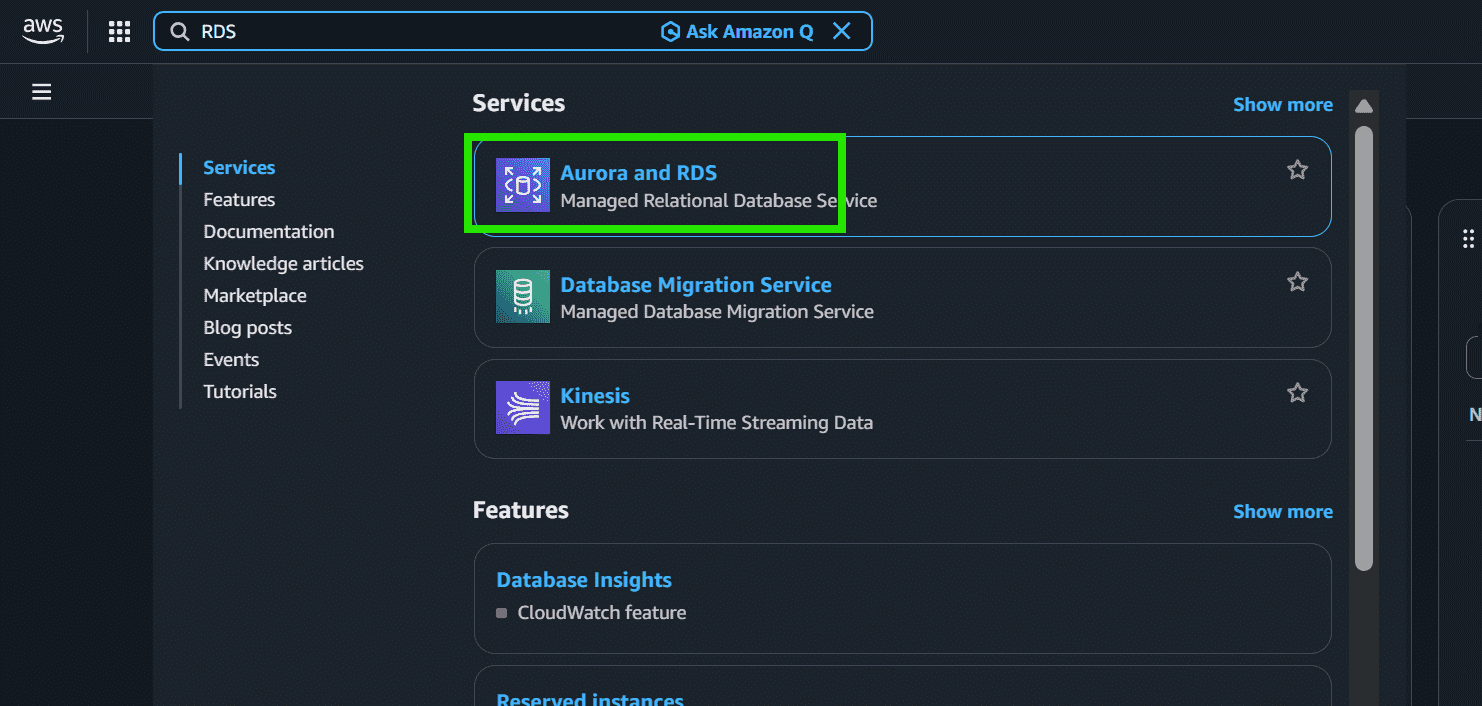
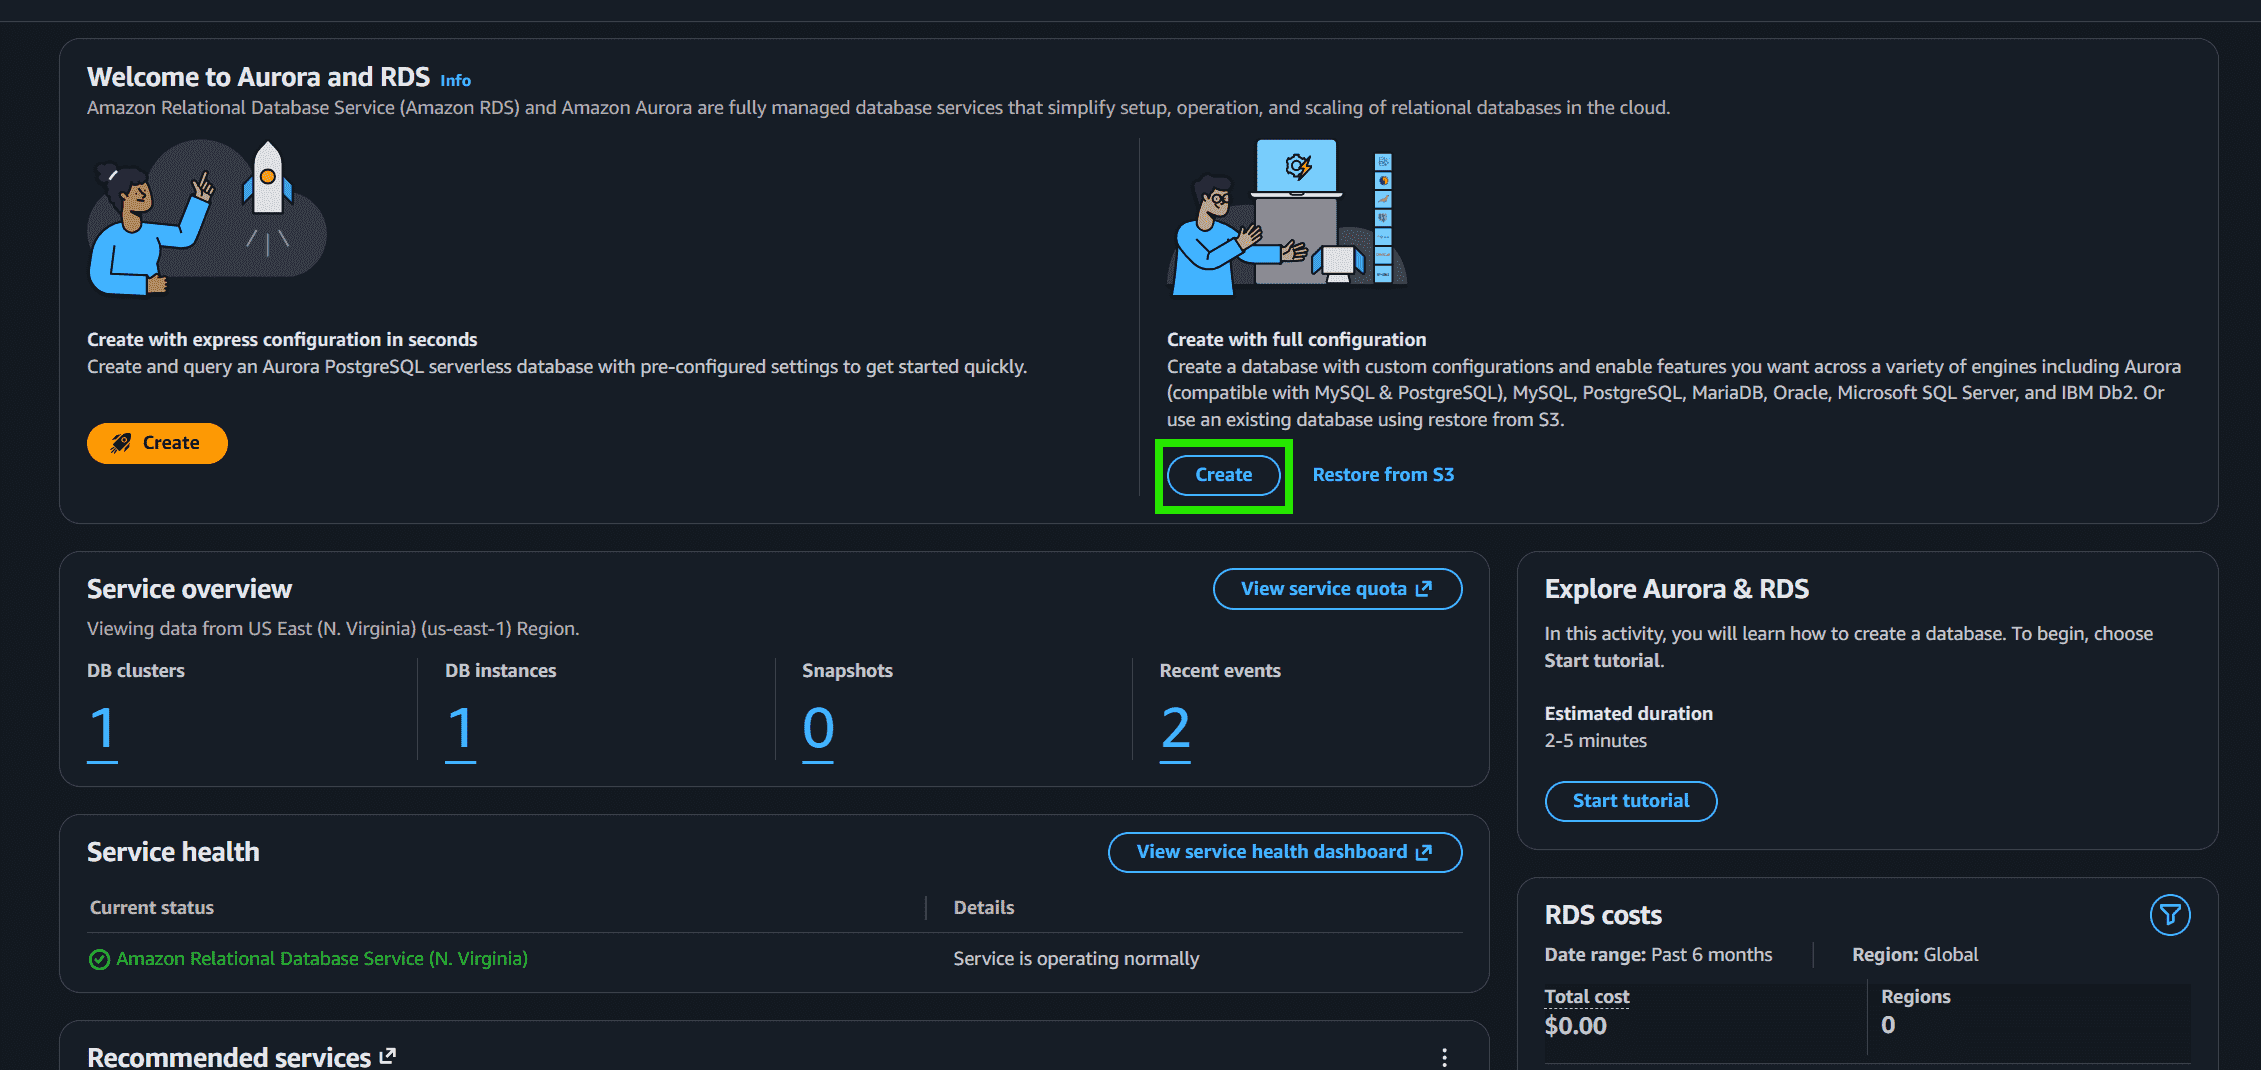
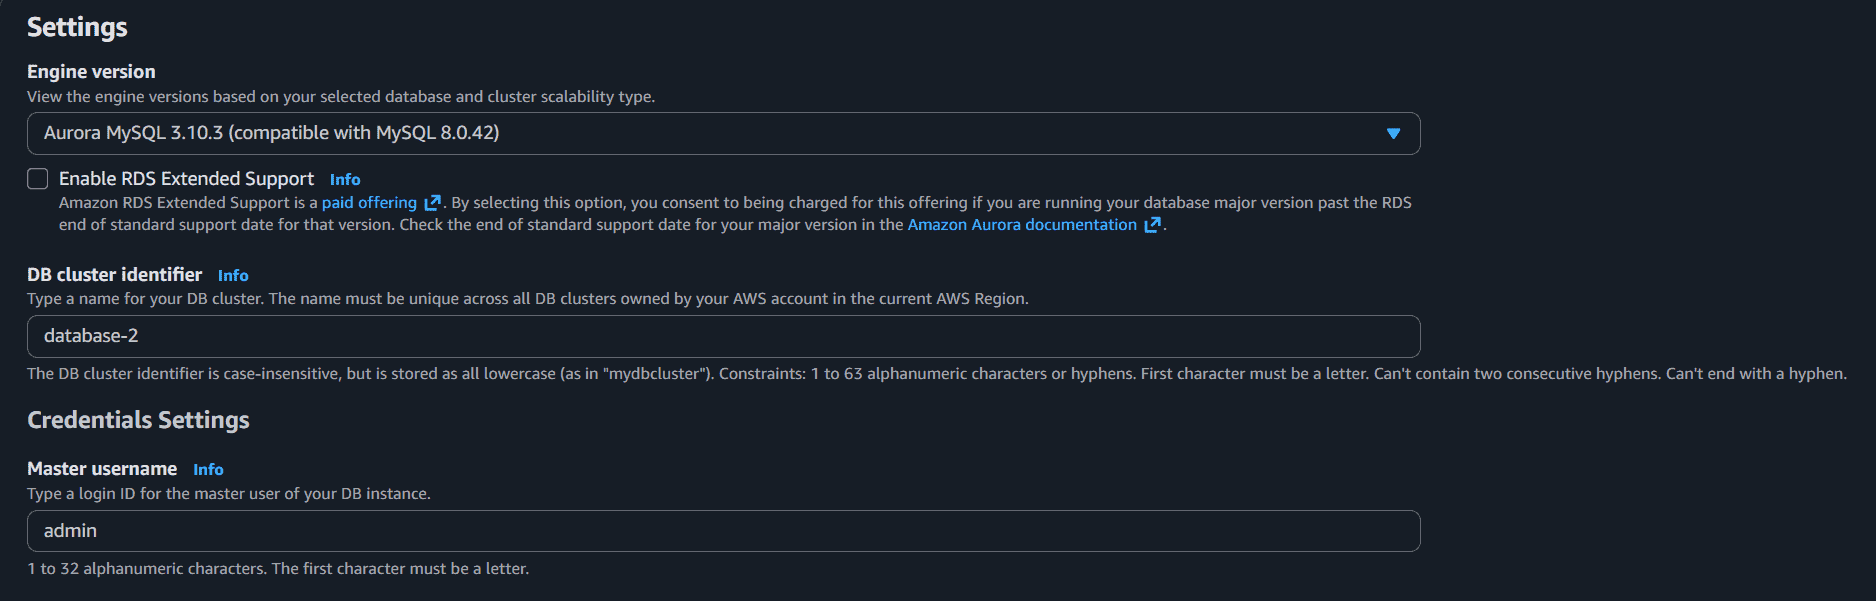
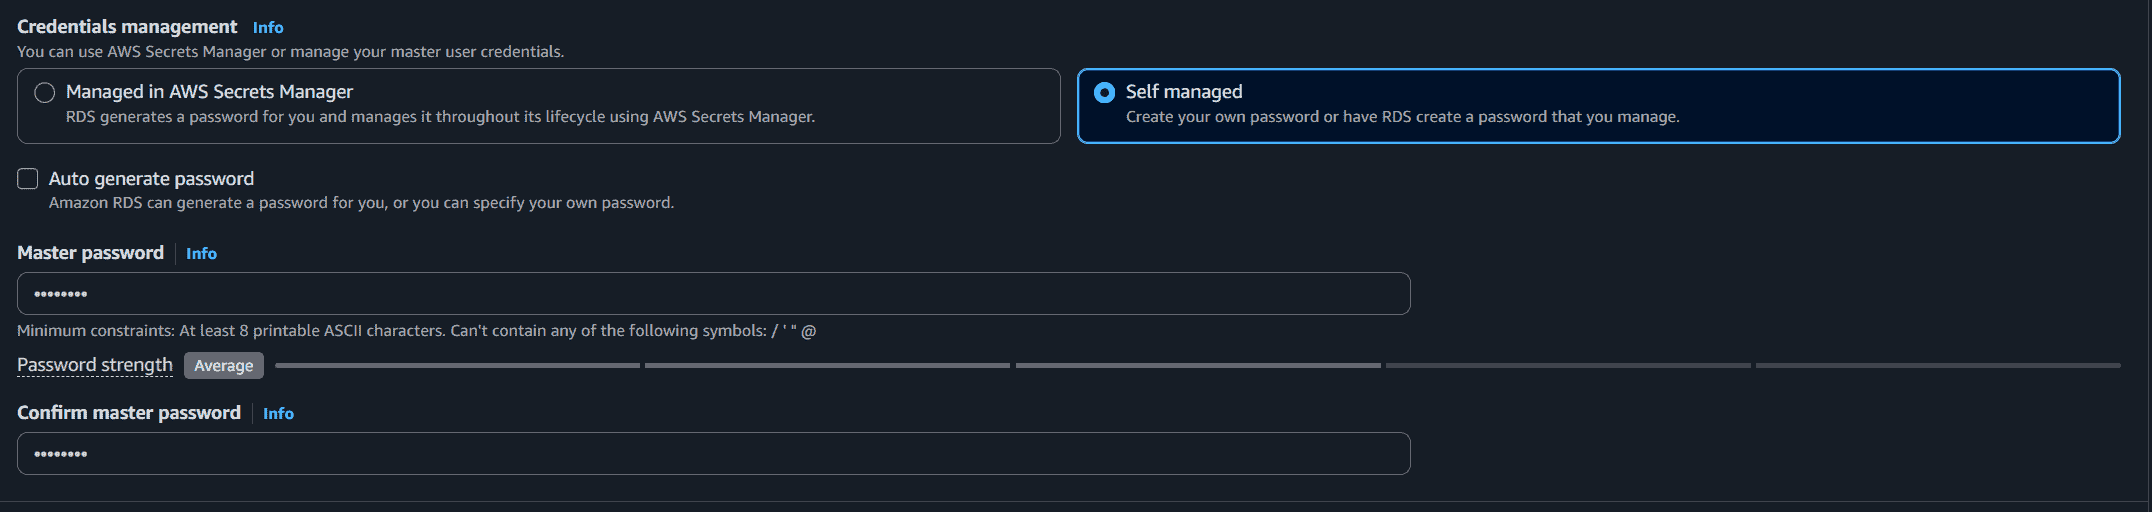
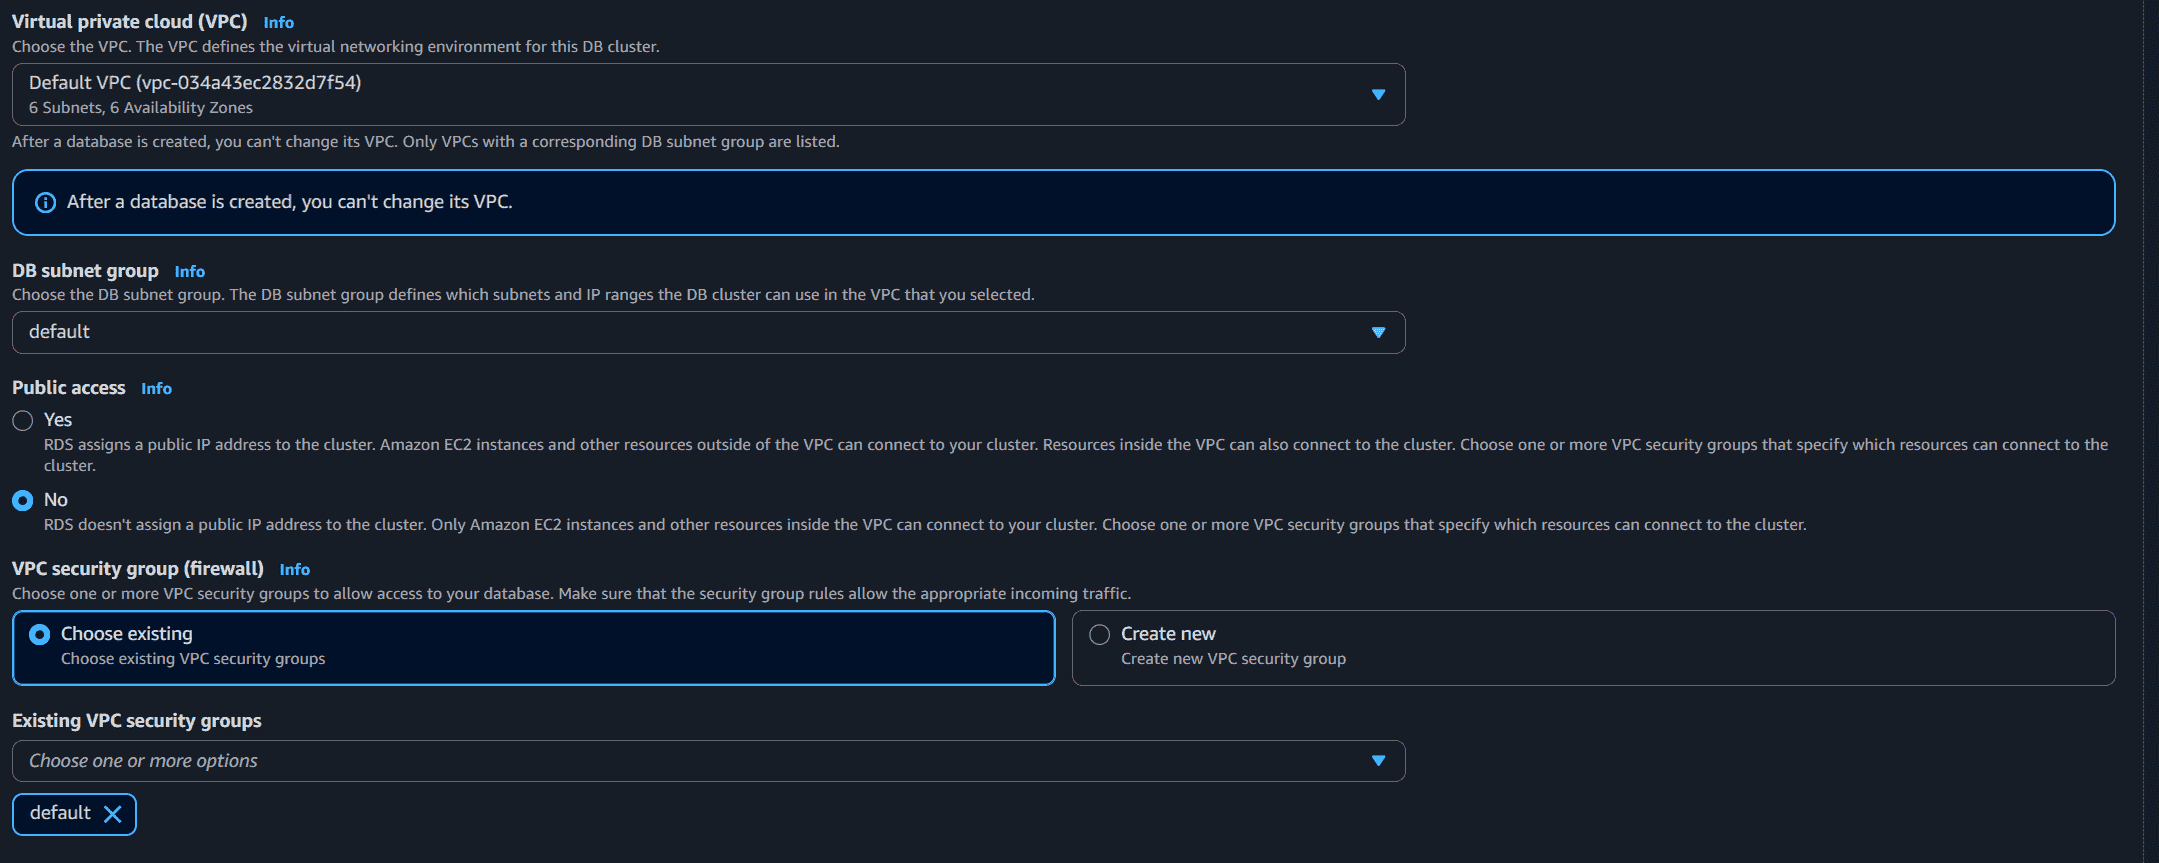
Enables database hosting without purchasing or managing dedicated physical servers. AWS handles patching, backups, and infrastructure maintenance. Supports MySQL, PostgreSQL, MariaDB, Oracle, SQL Server, and Amazon Aurora. Resize compute and storage resources with minimal downtime. Billed only for the resources consumed; no upfront capital investment. Create a Database on AWS RDS Step 1: Open the Amazon RDS Console Log in to your AWS account. Open the AWS Management Console. Search for RDS in the Services search bar. Select Amazon RDS. 👁 Screenshot-2026-06-10-102139 Step 2: Create a Database Click the blue Create button under Create with full configuration. This opens the database creation wizard. 👁 Screenshot-2026-06-10-103031 Step 3: Select Database Engine In the Engine options section, choose MySQL as the database engine. 👁 Screenshot-2026-06-10-103430 Step 4: Select Database Creation Method Choose: Easy create for automatic recommended settings, or Full configuration for manual setup. Select Full configuration for better customization. 👁 Screenshot-2026-06-10-104159 Step 5: Choose a Template In the Templates section, select: Free Tier for learning and practice Dev/Test for development environments Production for live applications Choose Dev/Test Tier to avoid unnecessary charges while testing. 👁 Screenshot-2026-06-10-104408 Step 6: Configure Database Settings Enter the following details: DB Instance Identifier Master Username Master Password Example: Identifier: database-2 Username: admin 👁 Screenshot-2026-06-10-104800 Step 7: Configure Credentials Management Select: Self managed to create your own password, or Managed in AWS Secrets Manager for automatic password management. Choose Self managed for simple setup and lower cost. 👁 Screenshot-2026-06-10-104936 Step 8: Configure Connectivity In the Connectivity section: Select the default VPC Choose the default DB subnet group Choose Public Access "No" Select or create a VPC Security Group. 👁 Screenshot-2026-06-10-105112 Step 9: Create the Database Review all configurations carefully. Click Create Database at the bottom of the page. AWS automatically starts provisioning the MySQL RDS instance. The database status will initially show as Creating. Wait until the status changes to Available. 👁 Screenshot-2026-06-10-110028 Step 10: Connect to the Database Open the created database instance. Copy the Endpoint (DNS Name) from the Connectivity section. Use the endpoint, username, and password to connect through: MySQL Workbench DBeaver Command Line Interface (CLI) Note: Always stop or delete your RDS instance when not in use. RDS is a paid service billed by the hour for running instances.
Advantages Cost Efficient: Eliminates on-premises hardware costs including power, cooling, and administration. Pay only for what you use. Reliability: AWS provides redundant infrastructure and automatic failover, making managed databases more resilient than typical on-premises setups. Simplified Management: Central administration, vendor-managed infrastructure, and SLA-backed uptime reduce operational burden. 