 |
VOOZH | about |
|
VOOZH | about |
Deploying a Flask application manually can lead to dependency issues and inconsistencies across different environments. Docker solves this problem by packaging applications into containers, ensuring they run seamlessly on any system.
In this article, we’ll learn how to Dockerize a Flask app step by step. We will cover:
Docker is a containerization tool that allows applications to run in isolated environments. It helps developers:
Let’s create a simple Flask API and containerize it using Docker.
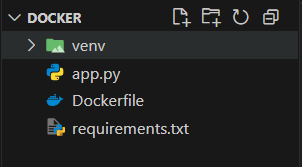
The file structure of our application should look like this:
Inside the project folder, create app.py:
Explanation:
The requirements.txt file lists all the dependencies required for a Python project. It allows easy installation of all the dependencies that are used in the application.
To create requirements.txt file for our application, use this command:
pip freeze > requirements.txt
To install all the dependencies from the requirements.txt file, use this command:
pip install -r requirements.txt
A Dockerfile contains instructions to create a Docker image. Create Dockerfile (without an extension) in the project folder and add the following content in it:
# Use an official lightweight Python image
FROM python:3.9-slim
# Set the working directory
WORKDIR /app
# Copy project files into the container
COPY . /app
# Install dependencies
RUN pip install -r requirements.txt
# Expose port 5000 for Flask
EXPOSE 5000
# Command to run the app
CMD ["python", "app.py"]
Explanation of Dockerfile:
Run this command in the terminal:
docker build -t flask-docker-app
docker run -p 5000:5000 flask-docker-app
Open a browser and visit: http://localhost:5000
Go inside the root folder "flask-docker-demo" if you aren't already in this directory and run the following command "python demo.py" It should start our development server which comes with the flask on "http://0.0.0.0:5001/". see the screenshot below. 👁 Image
We should have the following output in the browser 👁 Image
Refresh the browser again and it should give an error since the server has been closed. 👁 Image
Make sure you are in root directory of the project and run the following command.
sudo docker build --tag flask-docker-demo-app .
The above command will create an app with the tag flask-docker-demo-app. Note: Enter the password if required. Refer screenshot below.
👁 ImageRun the following command:
👁 Imagesudo docker run --name flask-docker-demo-app -p 5001:5001 flask-docker-demo-app
In the above command, -name parameter gives name to the container and -p parameter maps the host's(my laptop in this case) port 5001 to the container's port 5001 since the container is isolated and we need to map it in order to access it from external environment. And at last "flask-docker-demo-app" refers to the image to run.
Refresh the browser.👁 Image
Close the image by running "docker stop" command. To know the container id enter "docker ps" command. It shows all the running containers. Visit Docker's website for more docker commands like "saving the image as tar file" and exporting it in another system.
When you’re ready to deploy your Flask application with Docker in a production environment, following some best practices can make a significant difference in your app’s performance and security:
python:3.x-slim can help reduce overhead.By embracing Docker for your Flask applications and following these best practices, you’ll set yourself up for smoother deployments and more reliable performance, ensuring your applications run efficiently in production.
In summary, Docker provides a powerful way to package and deploy your Flask applications, ensuring they run smoothly across various environments. By creating a Docker container, you can manage dependencies effectively and eliminate potential conflicts, making your application more portable and reliable.
This article guided you through converting a simple Flask app into a Docker image, highlighting essential steps and commands. Following best practices—such as using official base images, optimizing your Dockerfile, securing sensitive information, and implementing health checks—will further enhance your app's performance and security in production.