 |
VOOZH | about |
|
VOOZH | about |
In this article, we will see what are Spot Virtual Machines and how can one save costs using these virtual machines.
Azure spot virtual machines are the VMs that are unused at the time and one can take advantage of Azure's this spare compute capacity for their needs at a very low cost as compared to the Pay-As-You-Go pricing model. Azure has enough cloud servers in their inventory and that inventory doesn't get used enough by customers, so Azure rent them to customers as a spot Virtual Machine. If demand for virtual machines or compute capacity increases from on-demand (pay-as-you-go) customers then Azure can take back their servers by just giving a short warning. Therefore, Azure spot virtual machines are not recommended to work that needs fewer interruptions.
The amount of spare server computes capacity of Azure can vary based on various factors like region for VM deployment, size of VM, time of day, etc. When there is capacity available the Azure will allocate Virtual Machine. But for these VMs there is no Service Level Agreement(SLA). SLA is basically a commitment that Azure provides to their customers for servers' uptime and connectivity. Azure spot virtual machines are a great solution for the workloads that can handle interruptions. According to Azure, up to 90% of the cost can be saved using spot VMs than the pay-as-you-go pricing model.
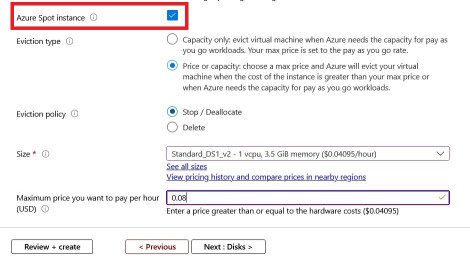
Azure provides two eviction methods for VMs based on capacity and max price you set.
Here Azure provides customers to choose what will happen to their virtual machine after eviction. We can set an eviction policy to delete or deallocate. By default Stop/Deallocate is selected.
The maximum price you want to pay per hour (Option valid only for Price or capacity selection ):
Follow the below steps to create a spot virtual machine:
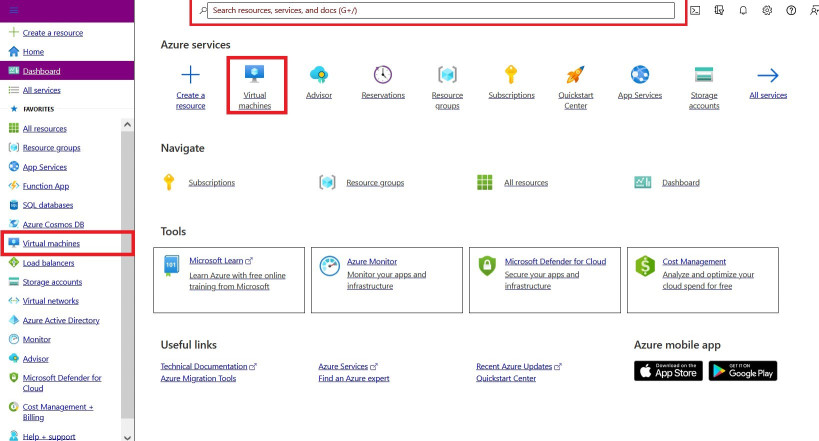
Step 1: Open the Azure portal and search for "virtual machines" in the left bar or in global search.
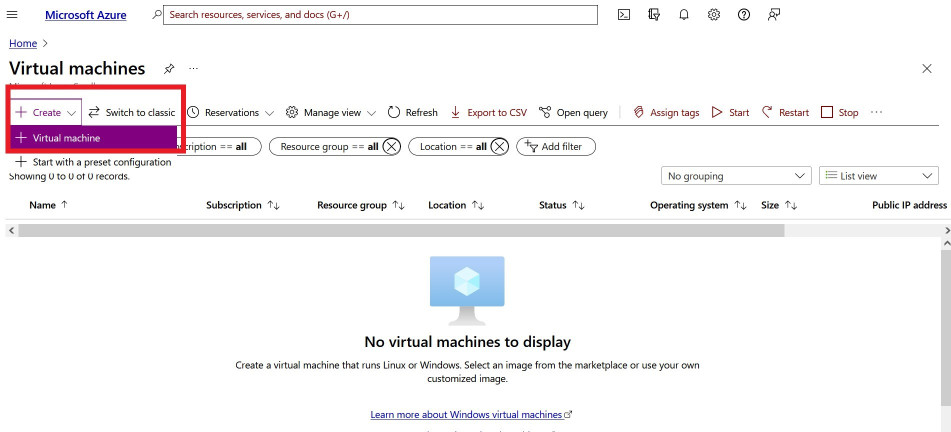
👁 ImageStep 2: In the Virtual Machine section, click for create a virtual machine.
👁 ImageStep 3: Then check for Azure spot instance, you can see more options now.
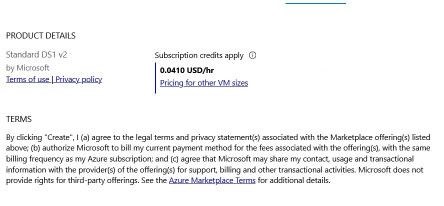
👁 ImageStep 4: Then check for other options like Disks, networking, management, etc. After everything, you will see the following window. Then click Review + create.
👁 ImageAfter your spot virtual machine is successfully deployed. If you want to change the maximum price you want to pay for spot instances then you have to first deallocate VM first, then you can set price and allocate VM again.