 |
VOOZH | about |
|
VOOZH | about |
In this article, we will learn how to create an Azure Functions project with Visual Studio Code. Azure Functions is a cloud on-demand service used for getting all the continually updated infrastructure and resources needed to run the applications. Azure Functions provide serverless computing in Azure.
Follow the below steps to create an Azure Functions project with Visual Studio Code:
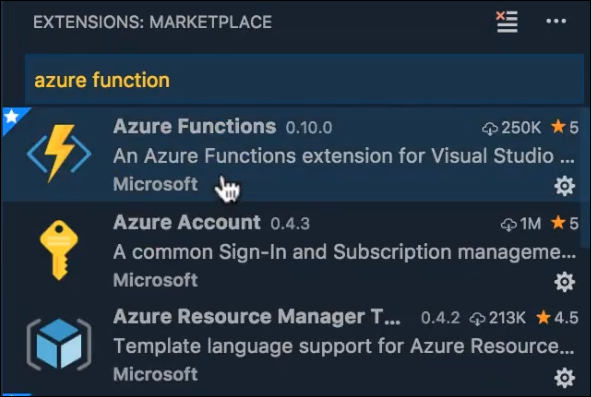
Step 1: To start working with Azure functions inside of Visual Studio Code, we're going to need to make sure that we have the extension of the Azure functions installed. So inside of the marketplace, we are going to type "Azure Functions," and select the "Azure Functions Extension."
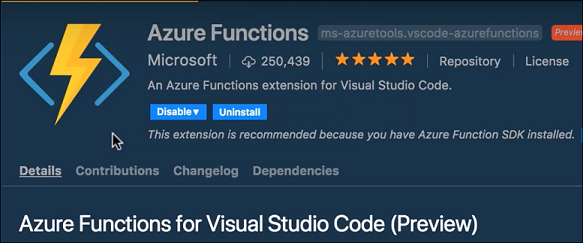
👁 ImageStep 2: In your instance of Visual Studio Code, you may already have the Azure Functions Extension installed. So, if you don't, make sure you go ahead and hit the "Install" button.
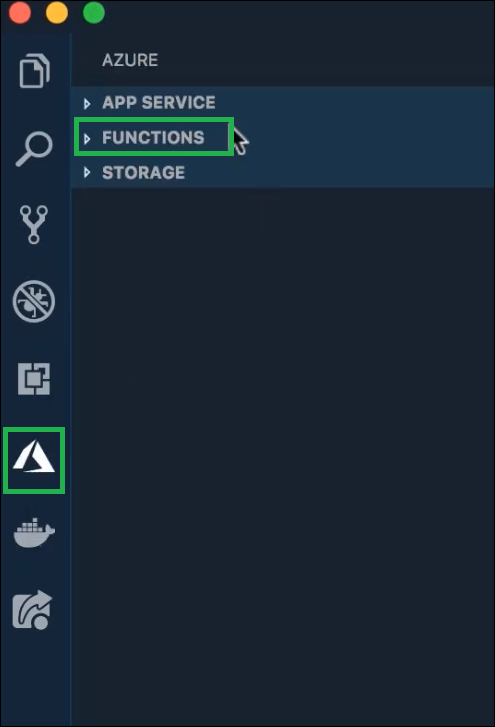
👁 ImageStep 3: After you have that installed, you should see an Azure icon available inside of your editor. There should also be a function section there.
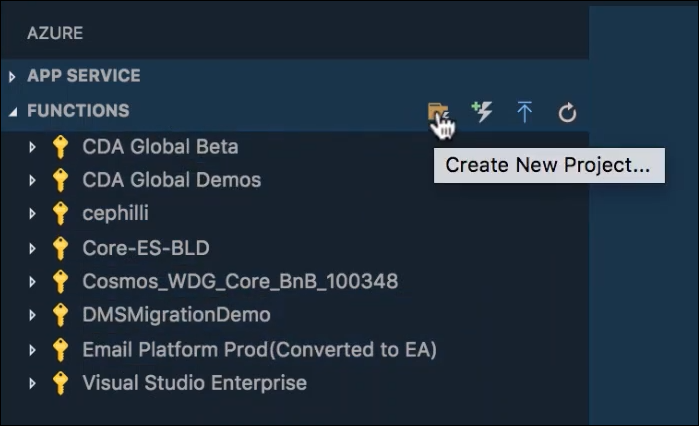
👁 ImageStep 4: Inside of this, once you've authenticated, you should see a list of all the various subscriptions you have available. Also on the right side, you have a button that says "Create new project".
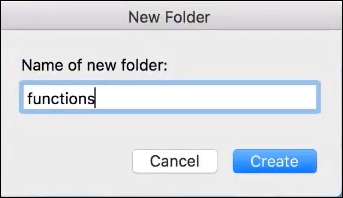
👁 ImageStep 5: Clicking on "Create New Project." It's gonna ask you where you want to put it. Create a folder and let's call this "function demo." And, hit ' create'. Finally, select the folder.
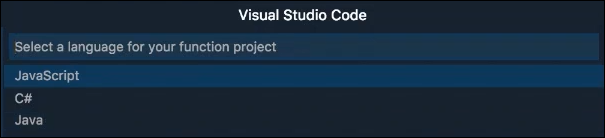
👁 ImageStep 6: Now, you can select what language you want to use. So there's "JavaScript," "C-sharp" and "Java available." Let us select "C#" for instance.
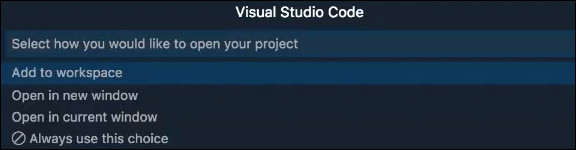
👁 ImageStep 7: Now it will be asking, "How would you like to open this project?" Let's select "Add to the workspace." If you head back over to "Explorer". You should see your Azure Functions products have been created.
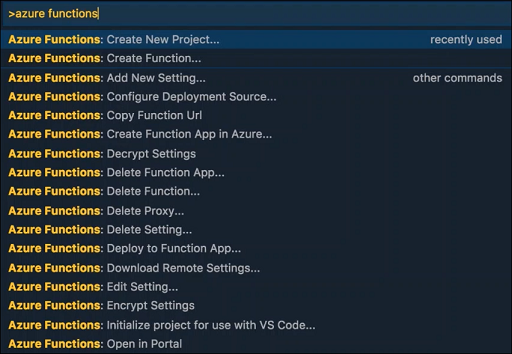
👁 ImageStep 8: Now, the next thing you need to do is actually create a function. If you open the command panel and type "azure functions", You can go down to "Create function".
👁 ImageStep 9: Select the folder containing your function app and also to function triggered lighter and create. This is going to be an HTTP-triggered function.
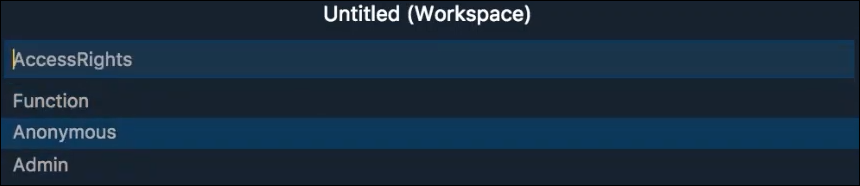
👁 ImageStep 10: Let's give it a name of "Simple API", the "Namespace" and also the "Access rights". Let's leave this anonymous for now.
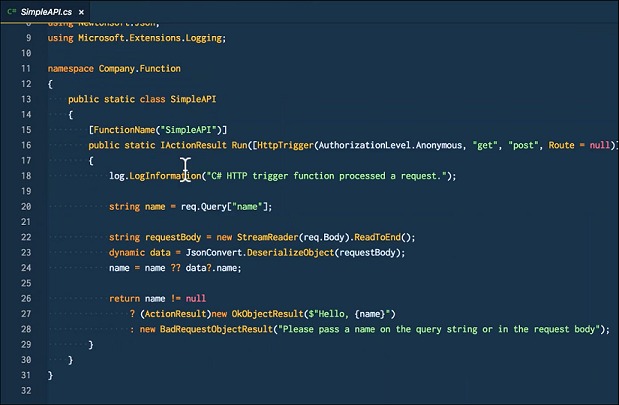
👁 ImageHere you see the Azure Functions Visual Studio extension has gone ahead and scaffolded out of functions product. You can start working on debugging your Azure Function right here inside of Visual Studio Code.
👁 ImageAnd, that's all it takes to create an Azure functions project with visual studio code.