 |
VOOZH | about |
|
VOOZH | about |
Blue-green deployment is a software deployment strategy that involves running two identical production environments, known as "blue" and "green." At any given time, only one of these environments serves live traffic, while the other remains idle or serves only non-production traffic (e.g., testing or staging).
Kubernetes is an open-source container orchestration platform that automates the deployment, scaling, and management of containerized applications.
In Kubernetes, a Deployment is a resource that manages the lifecycle of an application by defining its desired state. It provides declarative updates for Pods (the smallest deployable units of computing) and ReplicaSets (which ensure the desired number of replicas are running).
A Deployment allows you to describe the desired state of your application, including the number of replicas, container images, and configurations. Kubernetes then handles the process of creating or updating the required Pods to match the desired state.
A Kubernetes Service is an abstraction that defines a logical set of Pods and a policy by which to access them. It acts as a stable endpoint for accessing the applications running in a Kubernetes cluster, regardless of the underlying Pod's IP address or location within the cluster.
the is a deployment strategy used in Kubernetes to minimize downtime and reduce the risk associated with deploying new versions of an application. It involves running two identical production environments, referred to as "Blue" and "Green," where only one environment is live at any given time.
Here's how a Blue-Green Deployment works:
The Blue-Green Deployment strategy minimizes downtime and risk by allowing you to deploy a new version of your application in a separate environment before switching live traffic to it. This approach ensures that you have a stable fallback option if issues arise with the new version.
Let us see it in action.
This will act as our current stable version of the application. We will create a deployment for this and use the publicly available (guybarrette/hello-app) docker image available on the docker hub.
Create a file named dep-v1.yaml with the following content,
apiVersion: apps/v1
kind: Deployment
metadata:
 name: hello-v1
spec:
 replicas: 3
 strategy:
 type: RollingUpdate
 rollingUpdate:
 maxSurge: 1
 maxUnavailable: 1
 selector:
 matchLabels:
 app: hello-v1
 template:
 metadata:
 labels:
 app: hello-v1
 spec:
 containers:
 - image: guybarrette/hello-app:1.0
 resources:
 requests:
 cpu: 100m
 memory: 128Mi
 limits:
 cpu: 250m
 memory: 256Mi
 imagePullPolicy: Always
 name: hello-v1
 ports:
 - containerPort: 8080
Here strategy type RollingUpdate is used for blue green deployment, maxSurge means how many pods or percentage of pods are allowed to be created above the max replicas limit and maxUnavailable means number of pods that are allowed to be killed below the replicas limit.
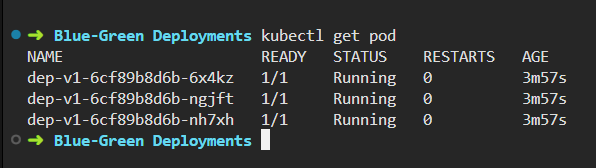
Then we can use below command to create our deployment version 1,
kubectl apply -f dep-v1.yamlIn order to access our application from the outside world, we need to make use of a Kubernetes service. It will select all pod having app: dep-v1 selector.
Create a service.yaml with the below content,
apiVersion: v1
kind: Service
metadata:
 name: blue-green-dep-service
spec:
 ports:
 - port: 8080
 targetPort: 8080
 selector:
 app: dep-v1
After that we can use the below commands to create the service,
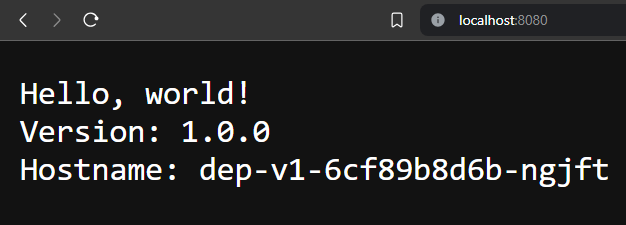
kubectl apply -f service.yamlFinally, to display the app in our browser we need to forward our port, for that we can use,
kubectl port-forward service/blue-green-dep-service 8080:8080And in the browser we should now be able to see the below output,
Create a new file dep-v2.yaml with the following content,
apiVersion: apps/v1
kind: Deployment
metadata:
 name: dep-v2
spec:
 replicas: 3
 strategy:
 type: RollingUpdate
 rollingUpdate:
 maxSurge: 1
 maxUnavailable: 1
 selector:
 matchLabels:
 app: dep-v2
 template:
 metadata:
 labels:
 app: dep-v2
 spec:
 containers:
 - image: guybarrette/hello-app:2.0
 resources:
 requests:
 cpu: 100m
 memory: 128Mi
 limits:
 cpu: 250m
 memory: 256Mi
 imagePullPolicy: Always
 name: dep-v2
 ports:
 - containerPort: 8080
This is the same as the dep-v1.yaml, except that the hello app version is 2.0.
We can use below command to deploy this too,
kubectl apply -f dep-v2.yamlAt this point, we have deployed both version of the apps but we are currently forwarding our live traffic to deployment version 1 only,
We can update our service.yaml as below.
apiVersion: v1
kind: Service
metadata:
 name: blue-green-dep-service
spec:
 ports:
 - port: 8080
 targetPort: 8080
 selector:
 app: dep-v2
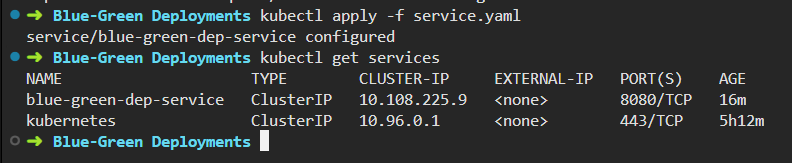
After that we can use the same command to update our service,
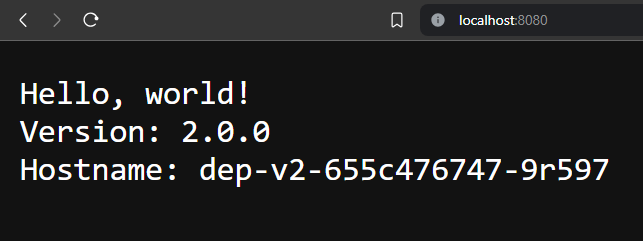
kubectl apply -f service.yamlAt this point there shouldn't be any difference but when we visit http://localhost:8080 again, version 2 of our app is live now. Make sure port forwarding is still on.
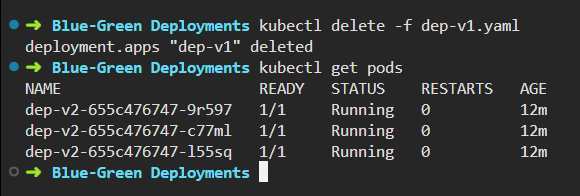
In any case if you want to switch to deployment version 1, we only need to update our service file. Then, we should remove the other version of the deployment that will not be used anymore.
kubectl delete -f dep-v1.yaml