 |
VOOZH | about |
|
VOOZH | about |
Firebase is a product of Google which helps developers to build, manage, and grow their apps easily. It helps developers to build their apps faster and in a more secure way. No programming is required on the firebase side which makes it easy to use its features more efficiently. It provides cloud storage. It uses NoSQL for the storage of data.
Here, We are going to learn How we can upload images using Django in firebase. While working with the database we may require to upload a pdf file also.
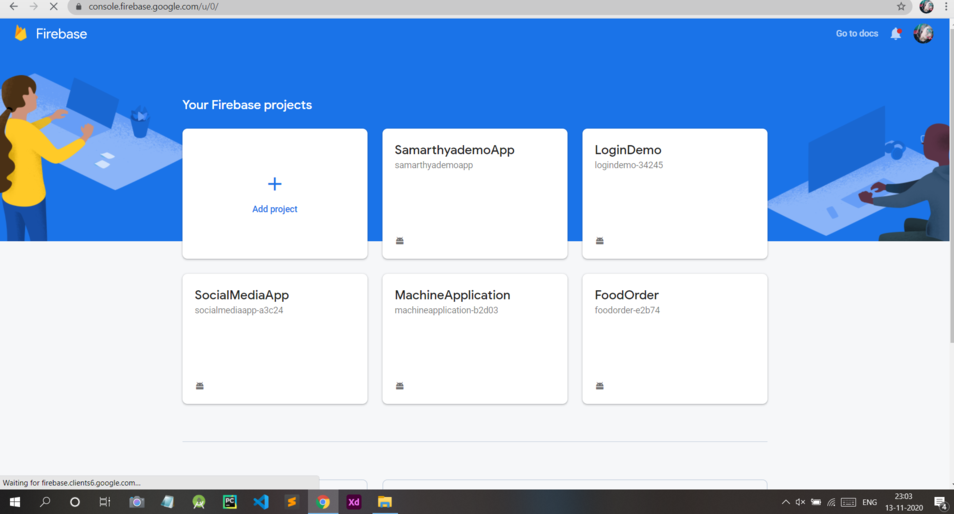
Step 1: Firstly, We are going to create a project on Firebase to connect our static web page. Visit the Firebase page for configuring your project. Visit the website and click the On Add Project button as shown below:
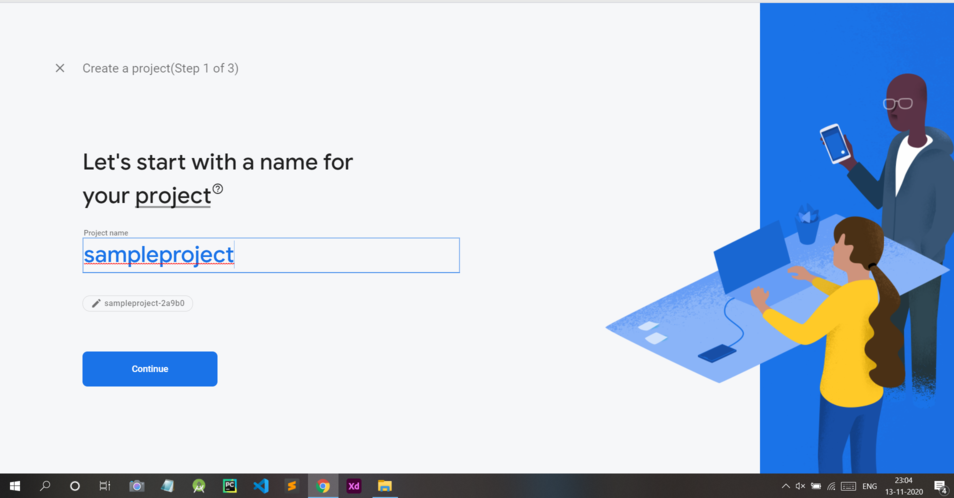
👁 ImageStep 2: Give a Name to your project and click on the Continue button.
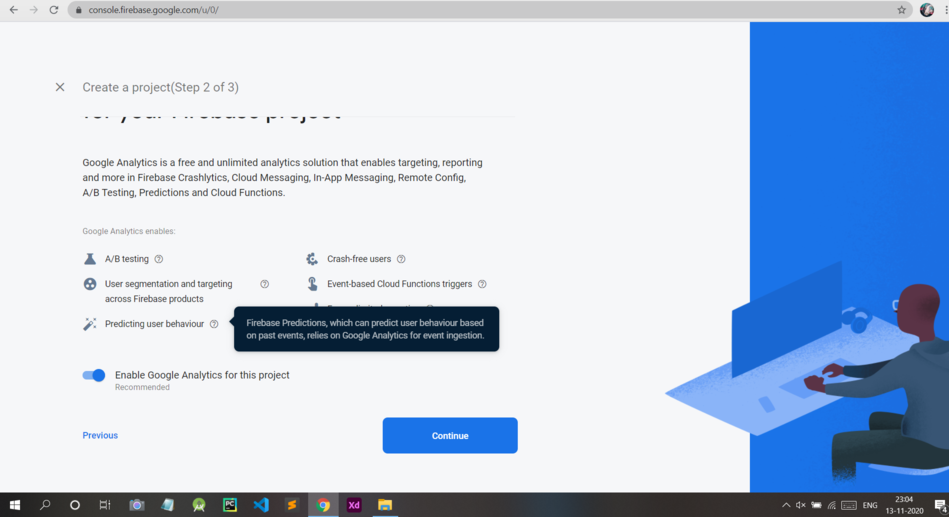
👁 ImageStep 3: Now click on the Continue button.
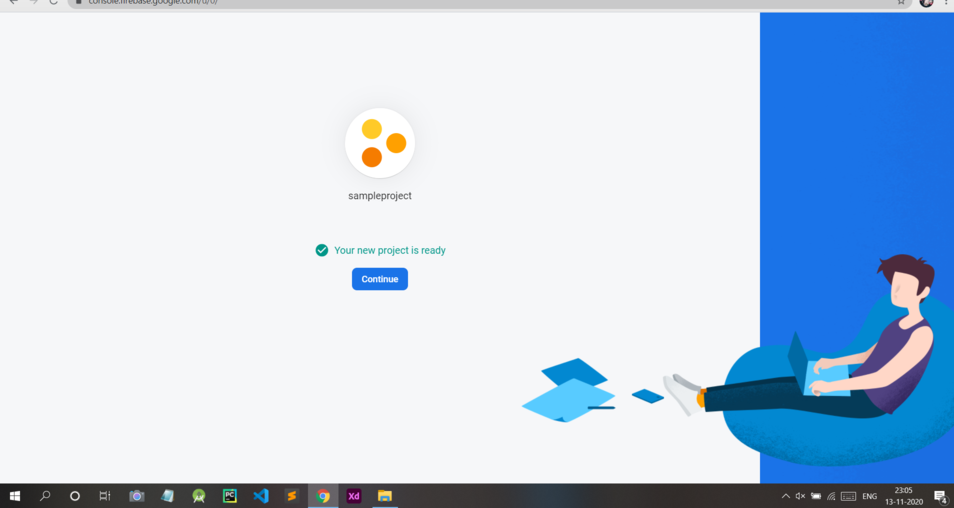
👁 ImageStep 4: Now choose Default Account For Firebase and click on the Create Project button.
👁 ImageStep 5: Now your project is created, and you are now good to go.
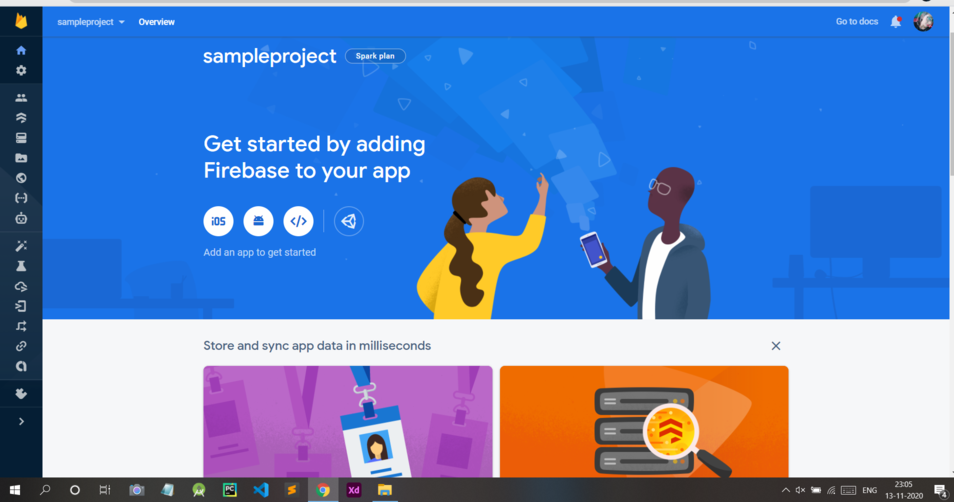
👁 ImageStep 6: Now click on the 3rd icon that’s the Web button(</>).
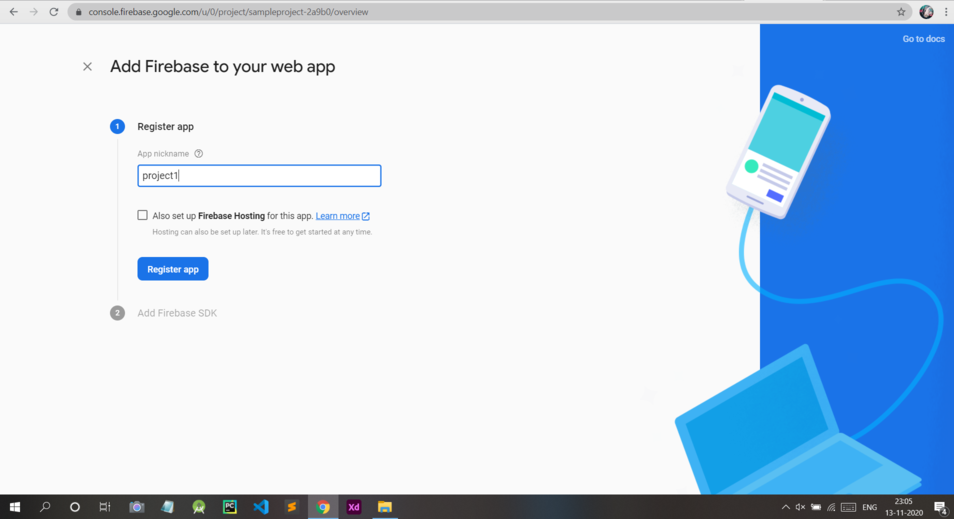
👁 ImageStep 7: Give a nickname to your web project and click on the Register App button.
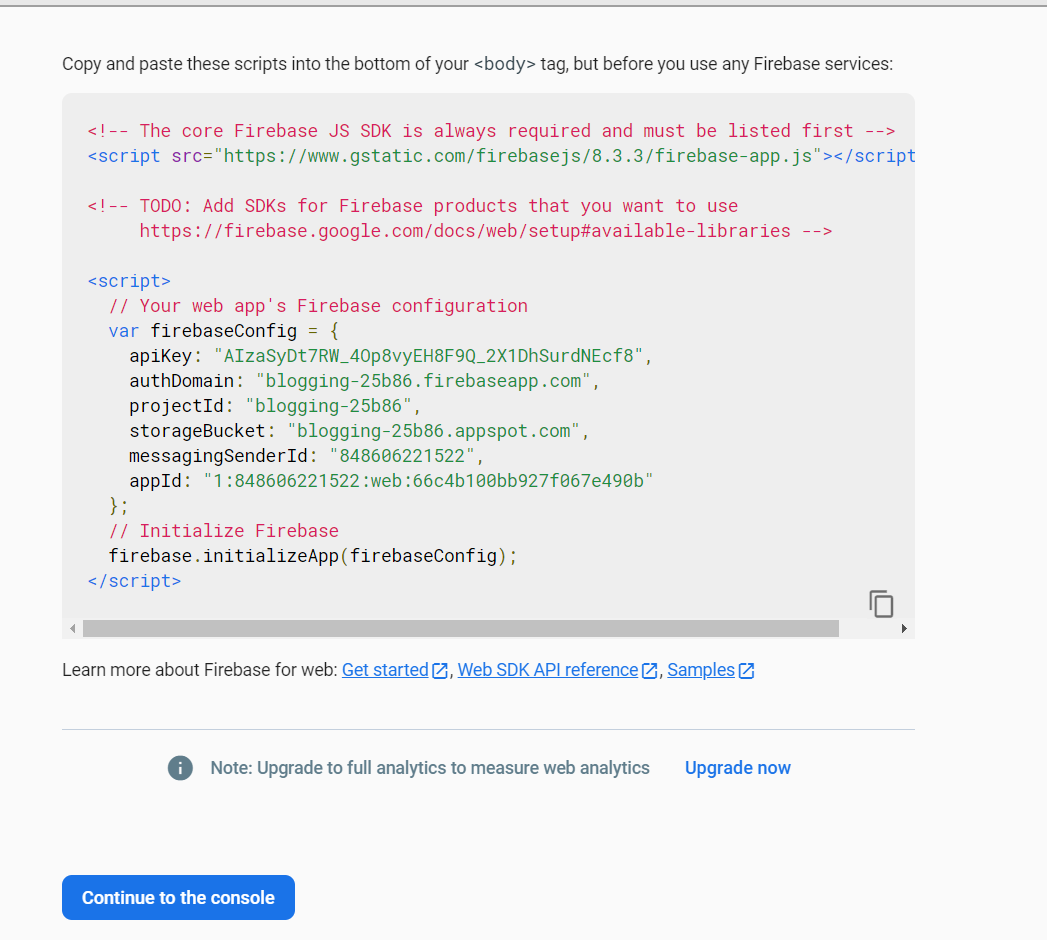
👁 ImageStep 8: Now you will see the configuration of your App like this. Copy this code somewhere as we will use it later.
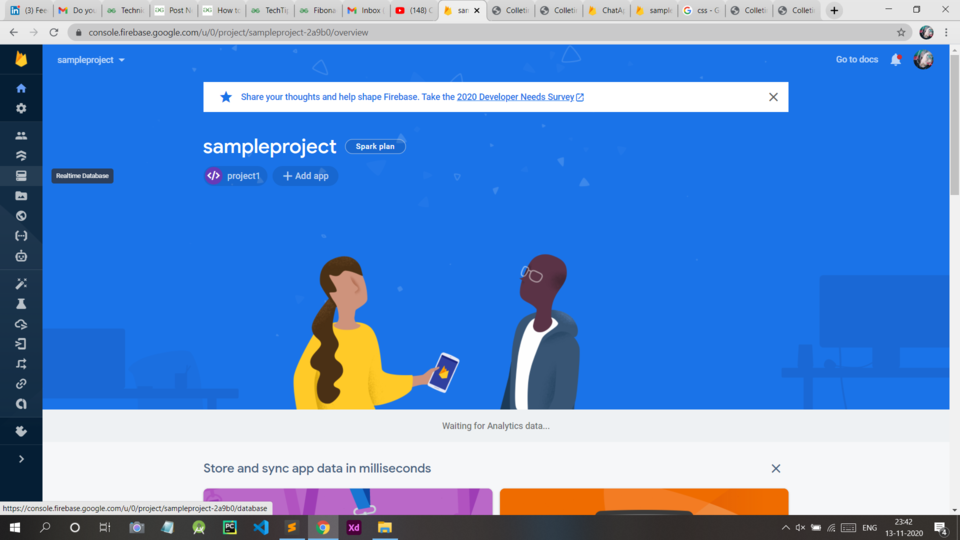
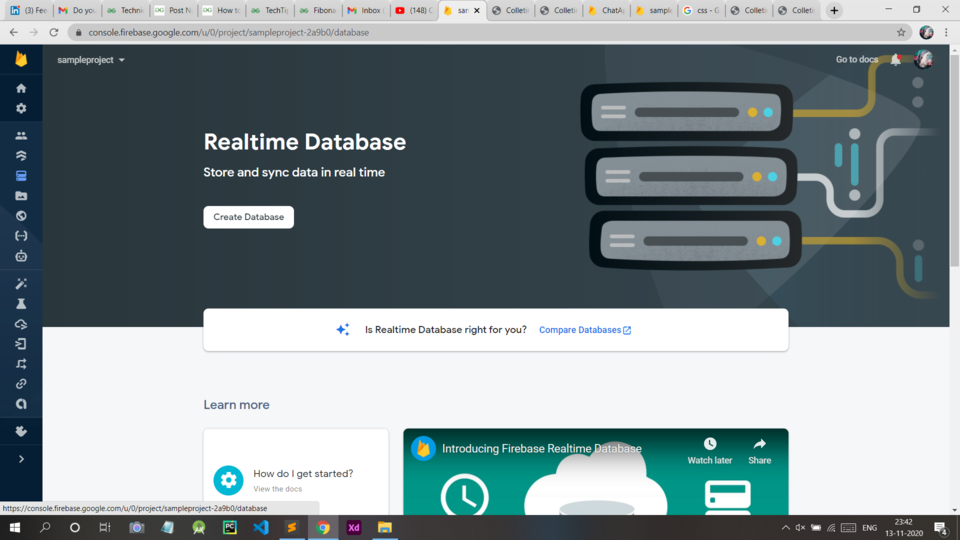
👁 ImageStep 9: Click On The Realtime Database button As Shown In Figure.
👁 ImageStep 10: Now Click On Create Database.
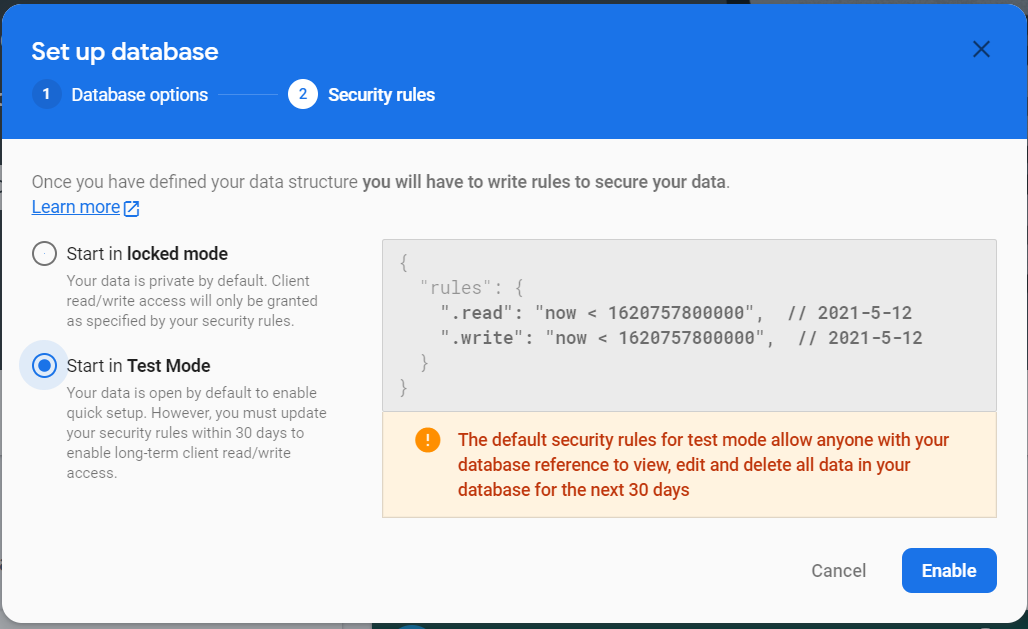
👁 ImageStep 11: Now Click On Test Mode and then Click On Enable.
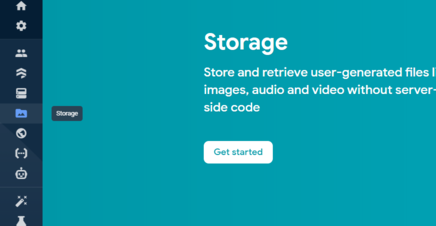
👁 ImageStep 12: Activate Firebase Storage. Click on the Storage button on the left and click on Get Started.
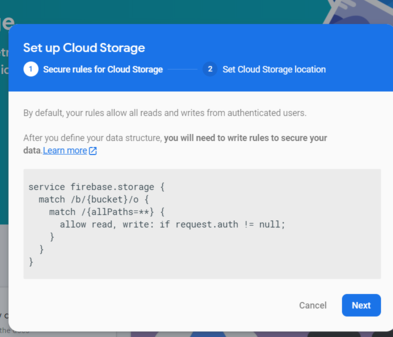
👁 ImageAfter that this box will pop up. Click on Next.
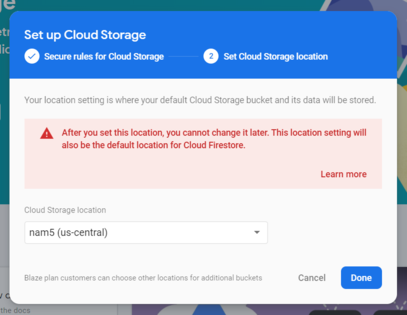
👁 ImageThen click on Done.
👁 ImageUse the below command to create a Django project:
$ django-admin startproject imageupload
Let’s verify your Django project works. Change into the outer mysite directory, if you haven’t already, and run the following commands:
$ python manage.py runserver
You’ll see the following output on the command line:
Performing system checks...
System check identified no issues (0 silenced).
You have unapplied migrations; your app may not work properly until they are applied.
Run 'python manage.py migrate' to apply them.
April 09, 2021 - 15:50:53
Django version 3.2, using settings 'imageupload.settings'
Starting development server at http://127.0.0.1:8000/
Quit the server with CONTROL-C.
Now, we hope that you have already created a project in Django. If not then refer to How to Create a Basic Project using MVT in Django? Since we are using firebase as a Database, We need to install pyrebase. For this type the following command in terminal:
$pip install pyrebase4
Create a views.py file in your project directly. The Structure should be like this.
Step 13: Go to the urls.py file and create a path to move to the webpage to upload the image.
Step 14: Then move to views.py file and write the following function to render to html page.
Step 15: Then we will move to check.html page and write the following code to upload the image in firebase. Comments are written inside to understand it better.
Now move to your project directory and run our project using the given command :
python manage.py runserver
Output: