 |
VOOZH | about |
|
VOOZH | about |
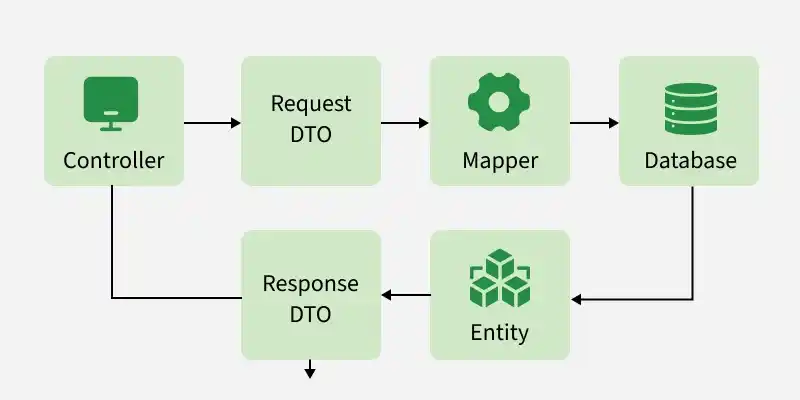
In Spring Framework, a Data Transfer Object (DTO) is a simple Java object used to transfer data between different layers of an application. DTO helps reduce the number of method calls and allows data to move efficiently between the Controller, Service, and View layers.
Follow these steps to implements Data Transfer Object in Spring Application.
Open your STS IDE then create a new maven project, File > New > Maven Project, and choose the following archetype as shown in the below image as follows:
Add the following maven dependencies and plugin to your pom.xml file.
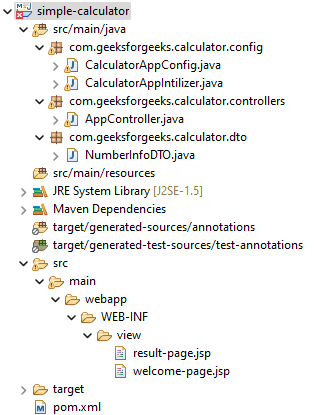
In this step, we configure the DispatcherServlet, which acts as the front controller in Spring MVC and handles all incoming client requests. Before moving into the coding part let's have a look at the file structure in the below image.
create an src/main/java folder and inside this folder create a class named CalculatorAppIntilizer and put it inside the com.geeksforgeeks.calculator.config package and extends the AbstractAnnotationConfigDispatcherServletInitializer class. Refer to the below image.
Now we create CalculatorAppInitializer class inside the com.geeksforgeeks.calculator.config package and extend AbstractAnnotationConfigDispatcherServletInitializer.
In this step, create the CalculatorAppConfig class to configure component scanning and register Spring MVC beans.
package com.geeksforgeeks.calculator.config;
import org.springframework.context.annotation.ComponentScan;
import org.springframework.context.annotation.Configuration;
@Configuration
@ComponentScan(basePackages = "com.geeksforgeeks.calculator.controllers")
public class CalculatorAppConfig {
}
In this step, configure InternalResourceViewResolver to map logical view names returned by the controller to JSP pages.
Go to the src/main/java folder and inside this folder create a class named AppController and put it inside the com.geeksforgeeks.calculator.controllers package. Below is the code for the AppController.java file.
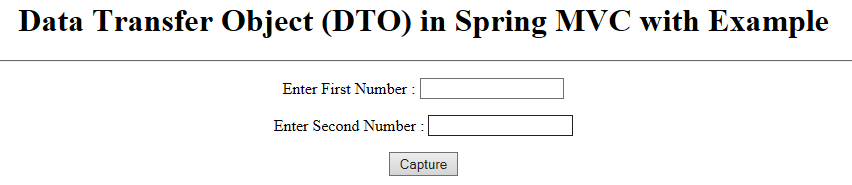
Now we have to create a view named "welcome-page" inside the WEB-INF/view folder with the .jsp extension. So go to the src > main > webapp > WEB-INF and create a folder view and inside that folder create a jsp file named welcome-page. So below is the code for the welcome-page.jsp file.
The view is looking like this :
At first, we have to create a DTO class. So go to the src/main/java folder and inside this folder create a class named NumberInfoDTO and put it inside the com.geeksforgeeks.calculator.dto package. Below is the code for the NumberInfoDTO.java file.
So we have to create a controller with the "process-homepage" endpoint. So now come to the AppController.java file again and write down the following code inside this file.
@RequestMapping("/process-homepage")
public String showResultPage(NumberInfoDTO numberInfoDTO, Model model) {
// writing the value to the properties
// by fetching from the URL
model.addAttribute("numberInfo", numberInfoDTO);
return "result-page";
}
Below is the updated code for the AppController.java file.
Updated AppController.java file
Now we have to create another view named "result-page" to display the captured values. So below is the code for the result-page.jsp file.
So now we have done with the coding part. Let's run and test our application.
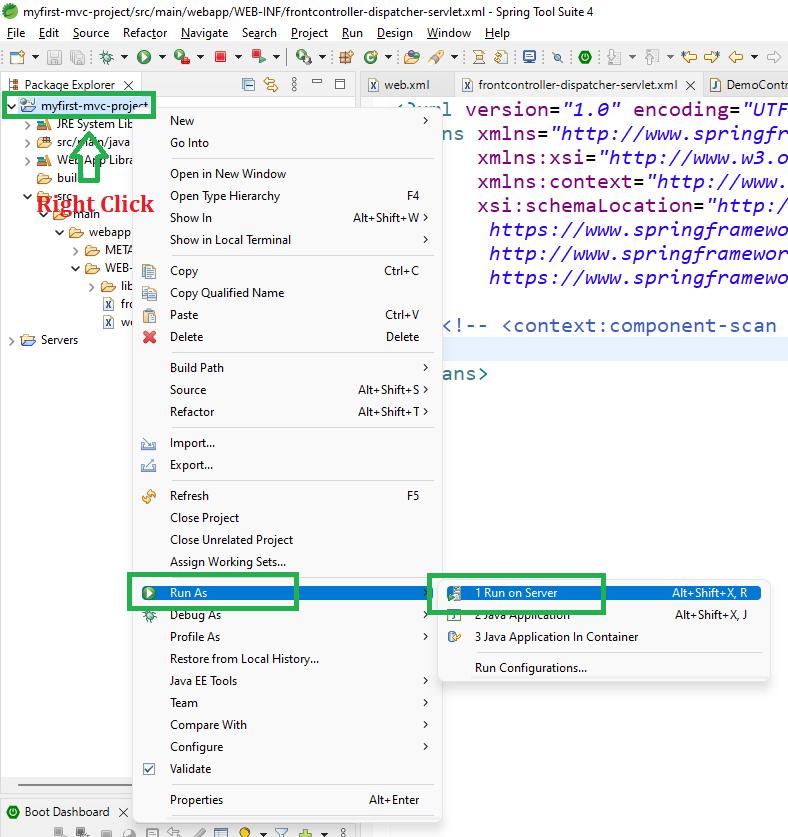
To run our Spring MVC Application right-click on your project > Run As > Run on Server. And run your application as shown in the below image as depicted below as follows:
After that use the following URL to run your controller
http://localhost:8080/simple-calculator/geeksforgeeks.org/homeOutput:
Enter values llike - 41 and 75 in the form and click Capture. After submission, Spring sends the request to the controller and generates this URL with query parameters:
http://localhost:8080/simple-calculator/geeksforgeeks.org/process-homepage?number1=41&number2=75
And you can see on the next page the values are displayed.
Explanation: When the user enters values (41 and 75) and clicks the Capture button, the form submits the data to the /process-homepage URL. Spring MVC automatically binds these request parameters to the NumberInfoDTO object. The controller then processes the DTO and displays the values on the result page.