VOOZH about

URL: https://www.geeksforgeeks.org/java/how-to-create-a-spring-boot-project-in-spring-initializr-and-run-it-in-intellij-idea/

⇱ How to Create a Spring Boot Project in Spring Initializr and Run it in IntelliJ IDEA? - GeeksforGeeks


  • Courses
  • Tutorials
  • Interview Prep

How to Create a Spring Boot Project in Spring Initializr and Run it in IntelliJ IDEA?

Last Updated : 30 Mar, 2026

Spring Boot simplifies Java application development by reducing configuration and setup time. Using Spring Initializr, developers can quickly generate a ready-to-use project structure and run it in an IDE like IntelliJ IDEA.

  • Quickly generate Spring Boot projects with required dependencies
  • Reduces manual configuration effort
  • Easily integrates with IntelliJ IDEA for development and execution

Prerequisites

Before starting, ensure you have:

Spring Initializr

Spring Initializr is a web-based tool that helps you generate a Spring Boot project structure with predefined configurations and dependencies. It allows you to customize your project based on requirements like language, build tool, and Spring Boot version.

Steps to Create Spring Boot Project

Follow below Steps to create spring boot application

Step 1: Open Spring Initializr

  • Go to: Spring initializr site
  • This is the official tool to generate Spring Boot projects

Step 2: Configure Project Details

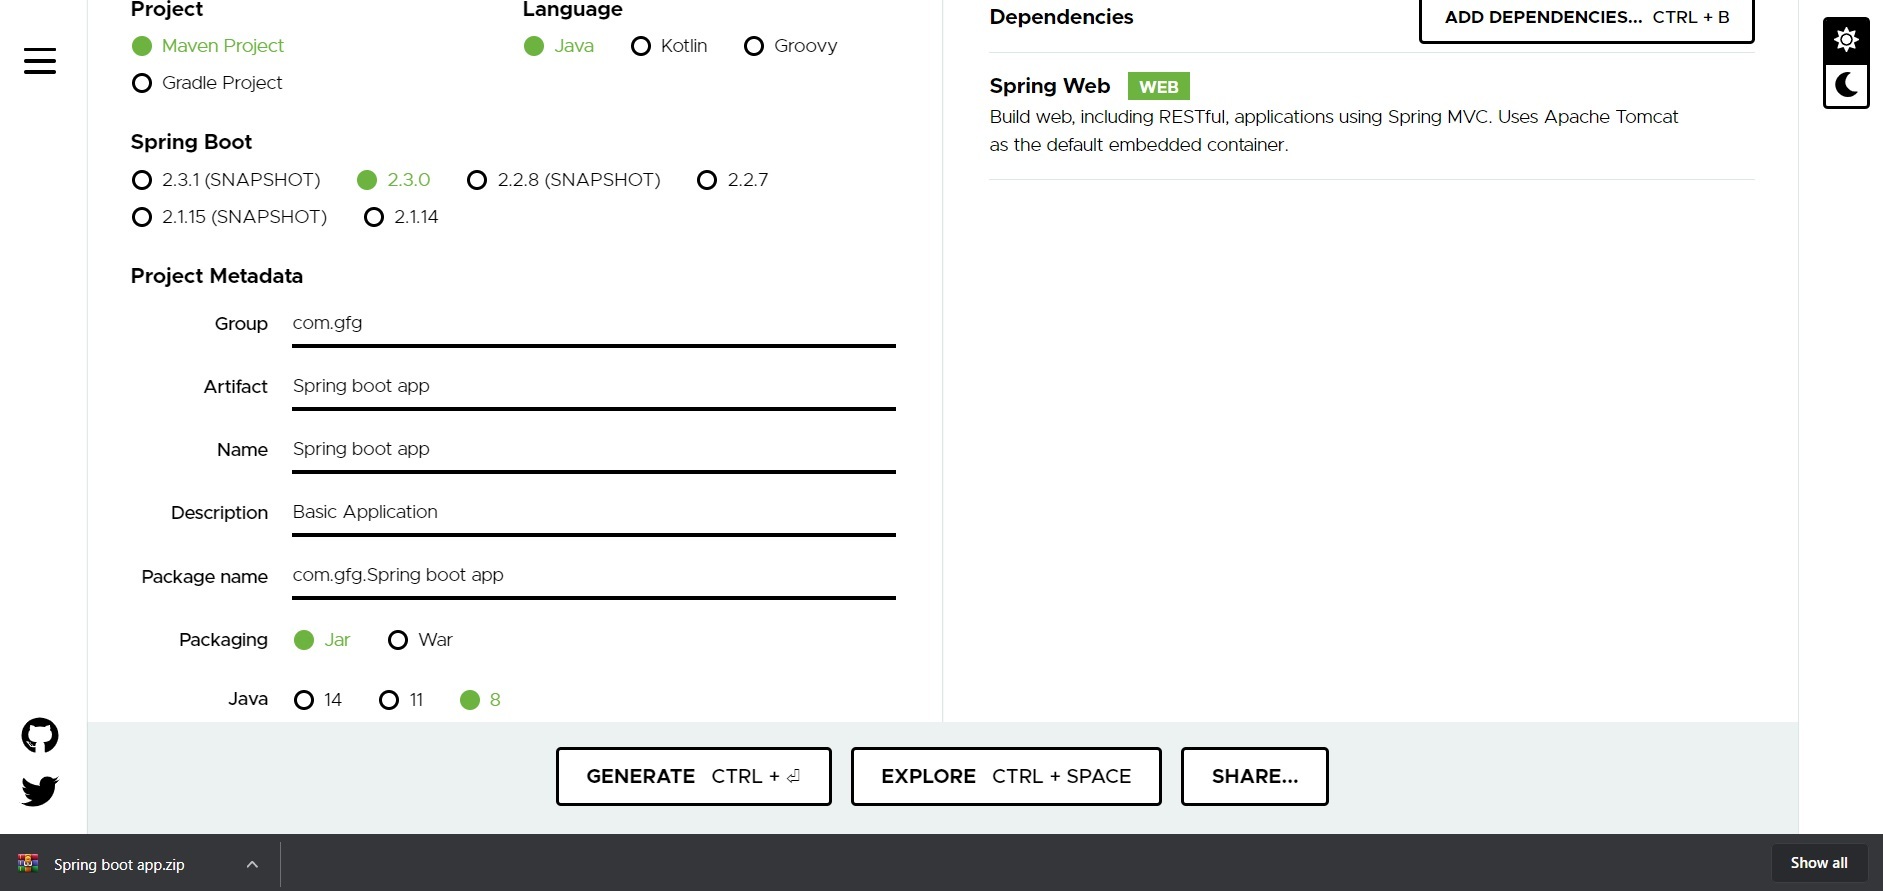
Fill in the required details:

  • Project: Maven
  • Language: Java
  • Spring Boot Version: (choose latest stable version)
  • Packaging: JAR
  • Java Version: 8 or above
  • Dependencies: Spring Web
👁 Image

Step 3: Generate Project

  • Click on Generate
  • A ZIP file containing the project will be downloaded

Step 4: Extract and Import into IntelliJ IDEA

  1. Extract the downloaded ZIP file
  2. Open IntelliJ IDEA
  3. Click on: File -> New -> Project from Existing Sources
  4. Select the extracted project folder
  5. Choose pom.xml
  6. Click Import and wait for dependencies to download
👁 Image

Note: In the Import Project for Maven window, make sure you choose the same version of JDK which you selected while creating the project.

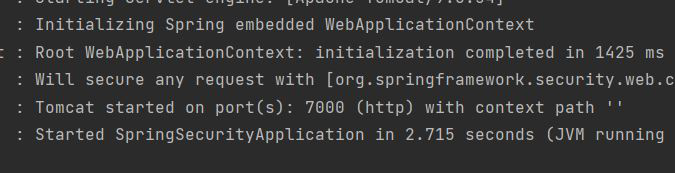
We need to change the port number using the application.properties file in the project structure of the spring application.

application.properties:

server.port=7000

Step 5: Run the Spring Boot Application

  • Go to src -> main -> java -> com.gfg.Spring.boot.app and run the main application.
  • Open the main class (annotated with @SpringBootApplication)
  • Click Run

Terminal output:

👁 Image

Tomcat is running on server 7000.

Comment
Article Tags: