 |
VOOZH | about |
|
VOOZH | about |
This mini banking application uses JDBC to connect and interact with a database for managing user accounts and transactions. JDBC enables executing SQL operations and handling transactions reliably.
In JDBC, a transaction is treated as a single unit of work. By setting setAutoCommit(false), multiple SQL statements can be grouped and changes are only saved with commit(). If any statement fails, a rollback ensures data consistency.
The application provides a menu-driven console interface allowing users to:
1. Create Java Project:
2. Create Package
3. Create Java Classes
Inside banking package, create:
Project structure:
👁 Image4. Add MySQL JDBC Connector
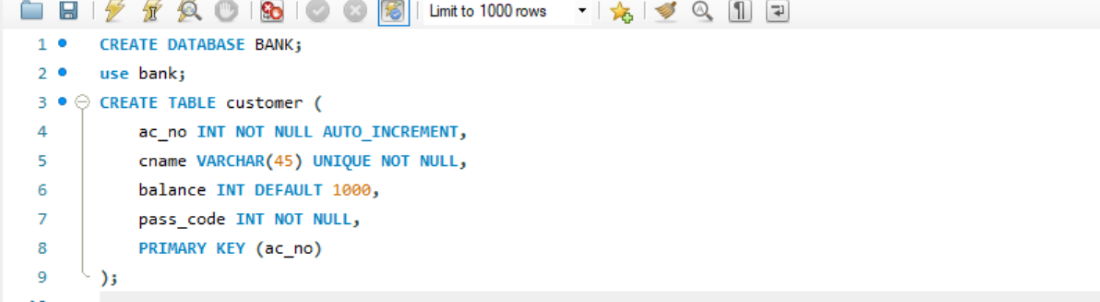
Create Database name bank
CREATE DATABASE BANK;
Create Table name customer
This class is used to load the JDBC driver and establish DB connection.And It use DriverManager.getConnection() with MySQL credentials.
connection.java
This class handles core operations like account creation and fund transfer. Use PreparedStatement for secure, parameterized queries.
bankManagement.java
This class provide a user-friendly, text-based menu to perform banking operations.
Options include.
bank.java
Run bank.java from Eclipse to launch the menu-driven interface. Test various features like account creation and money transfer.
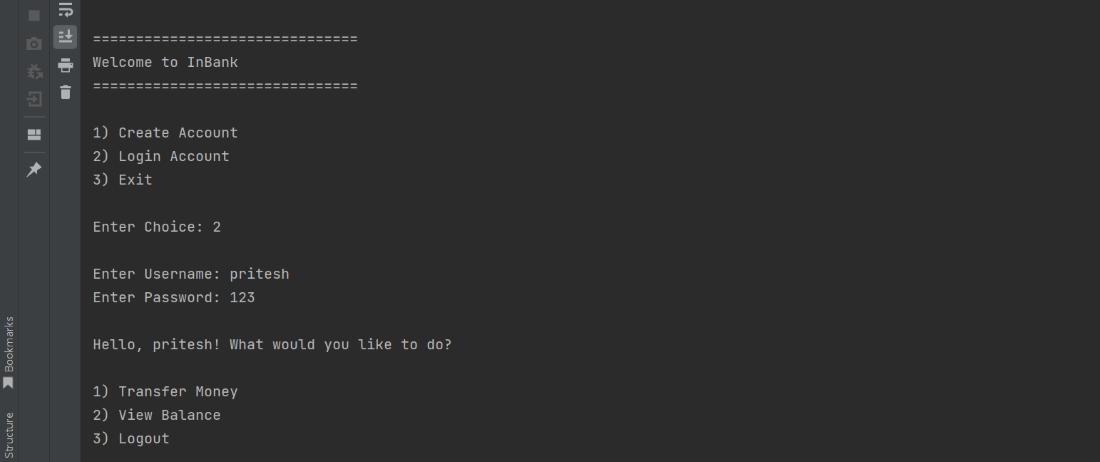
===============================
Welcome to InBank
===============================
1) Create Account
2) Login Account
3) Exit
Enter Choice: 2
Enter Username: pritesh
Enter Password: 123
Hello, pritesh! What would you like to do?
1) Transfer Money
2) View Balance
3) Logout
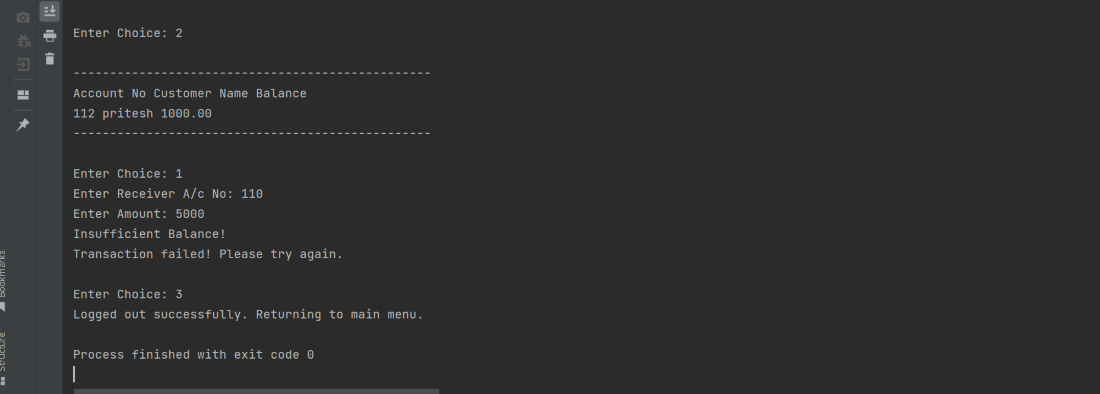
Enter Choice: 2
-------------------------------------------------
Account No Customer Name Balance
112 pritesh 1000.00
-------------------------------------------------
Enter Choice: 1
Enter Receiver A/c No: 110
Enter Amount: 5000
Insufficient Balance!
Transaction failed! Please try again.
Enter Choice: 3
Logged out successfully.
Returning to main menu.