Java is a fascinating programming language that provides its users with a plethora of features like OOP, platform independence, simplicity, GUI based programming, etc. One such feature is creating robust applications using the Swing toolkit provided by Java Foundation Classes. This can be used to create lightweight visual components for simple applications, such as EMI calculator, tax calculator, billing systems, record management systems, etc. This article aims to guide beginners on how to create a GUI based java application using Java Swing toolkit.
Consider a scenario of a local pizza shop that is shifting from its traditional approach of manually calculating bills to an automatic billing system. According to their requirements, the customer needs to choose two things
The pizza base type
Choice of toppings
Based on these, the total amount is calculated and printed. A pizza can have more than 1 topping but can have only one type of crust at a time. Below are the pricing details to create the application.
Pan Pizza
Stuffed
Regular
Onion
Cheese
Tomato
Baby Corn
Rs. 200
Rs. 300
Rs. 150
Rs. 60
Rs. 30
Rs. 40
Rs. 50
Advantage of Java swing over plain application
No need to handle large chunks of code, therefore decreasing the complexity of programming.
Provides GUI(graphical user interface) based editor for easier understanding
Netbeans is used to create GUI applications since it's a well crafted open-source IDE that provides features of a Component inspector, Drag-and-Drop of widgets, Debugger, Object browser, etc.
Steps to create the Pizza Shop Billing System:
Follow the steps to create the application.
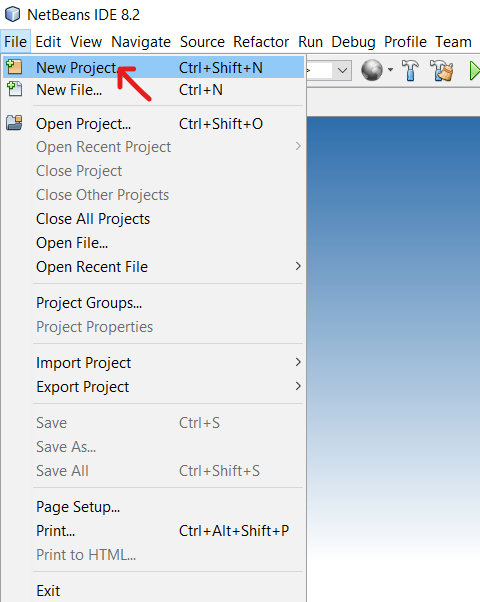
Create a new Java application by clicking on New Project -> Java -> Java Application and give a suitable project name. Eg: GeeksForGeeks and click Finish.
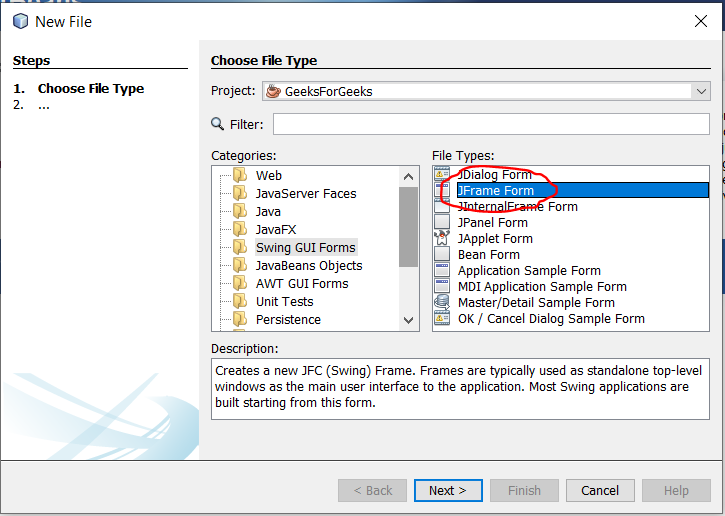
Now create a new file by going to the File option on the menu bar, then New File-> Swing GUI Forms -> JFrame Form, and give a suitable file name. Eg. PizzaBill.java and click Finish.
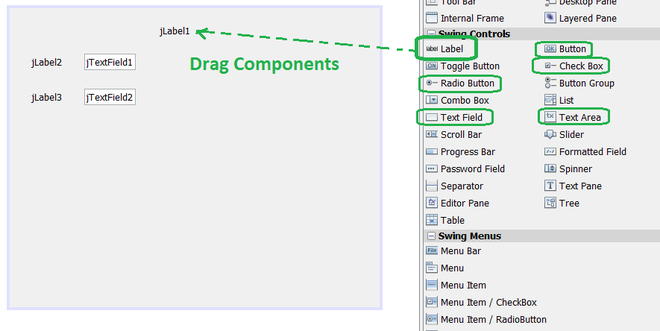
After successful file creation, you will now be presented with the following screen. The 3 important parts of this window are:
Design: This is the area where we will create the design/template of our application.
Source: This is where the logic code of the program is written.
Palette: This component contains all the widgets which we need to drag and drop on the design area.
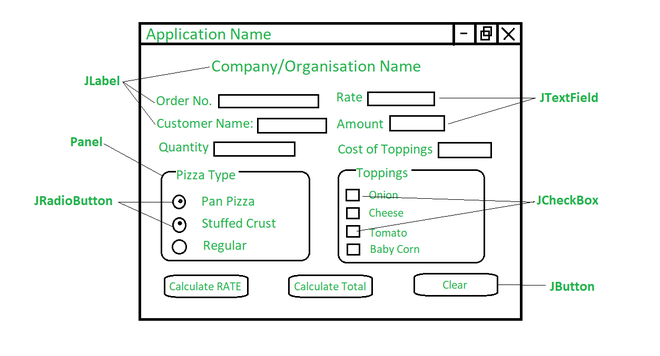
Now before coding and dragging out the widgets from the palette, create a rough design of what exactly is needed in the application. This gives the programmer a better understanding of what exactly is expected from the problem statement. Java Swing contains many components or controls but it is necessary to understand what is needed by our application. As per the rough diagram below, The application should display information that cannot be edited. For example Company name, Menu options, etc. This is where we use Jlabel (java Label control). Now as per user choice, information needs to be fed into the system, so we use a JTextField control. According to the problem, a pizza can have more than 1 topping but can have only one type of crust at a time. Hence, we use JCheckBox and JRadioButton controls respectively. Now, to group and hold all similar components like radio buttons and checkboxes, you can use JPanel. Lastly, we need a command/action button which is used to execute the program logic. This is done with the help of JButton.
Let us now quickly go through the usage of each component in the program tabulated below. Refer to the corresponding object numbers from the previous image.
No.
Object Type
Object Name
Description
1
Label
jLabel1: Bistro Pizza Bill Calculator
Describes title of the application
jLabel2: Order No.
Defines order number
jLabel3: Customer Name
Defines customer name
jLabel4: Quantity
Defines the quantity of pizza
jLabel5: Rate
Defines rate of each pizza type
jLabel6: Amount
Defines total payable amount
jLabel7: Cost of Toppings
Defines total cost of toppings
2
TextBox
jTextField1
Variable 1
jTextField2
Variable 2
jTextField3
Variable 3
jTextField4
Variable 4
jTextField5
Variable 5
jTextField6
Variable 6
3
Panel
jPanel1
Container to hold components
jPanel2
Container to hold components
4
RadioButtons
jRadioButton1
Choice of Pan Pizza
jRadioButton2
Choice of Stuffed Crust
jRadioButton3
Choice of Regular Pizza
5
CheckBox
jCheckBox1
Option for Onion
jCheckBox2
Option for Cheese
jCheckBox3
Option for Tomato
jCheckBox4
Option for Baby Corn
6
Command Button
jButton1
Generates bill
jButton2
Clears content of all components
7
TextArea (Optional)
jTextArea1
Displays customer related information and billing details
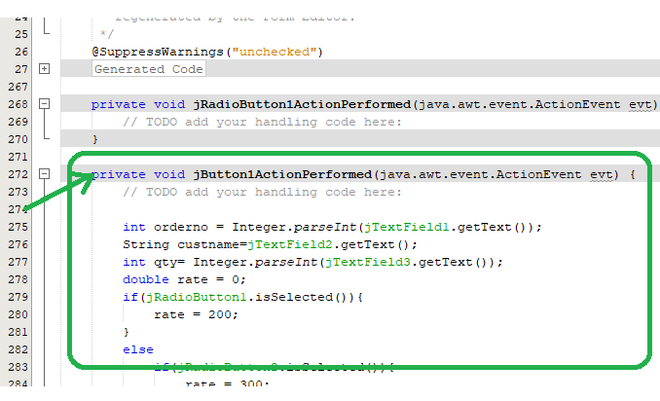
Now to type the code, double-click on jButton1, you will be directed to the source tab. Here type in the following code.
👁 Image Type in the code under JButton1 Action Button
Now to clear all textfields, textareas, radiobuttons, and checkboxes, write the following code under the jButton2 ActionPerformed option which can be achieved by clicking twice on Clear Button in the design area.
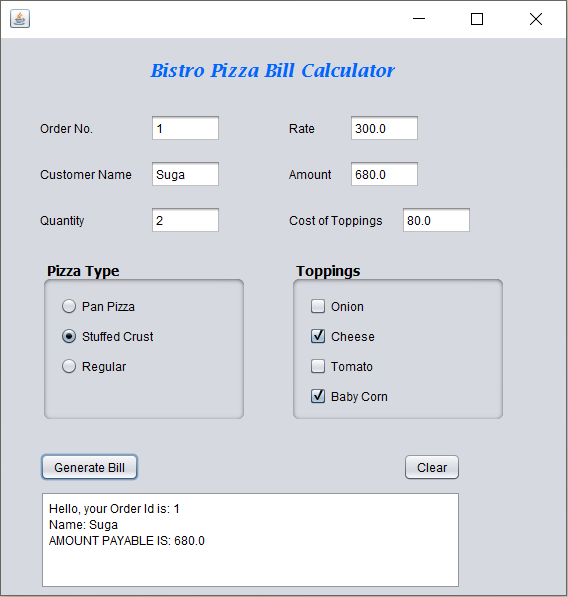
This completes the creation of the application. Input necessary details and select Run File option from the drop-down menu.
