 |
VOOZH | about |
|
VOOZH | about |
Apache Kafka is a distributed messaging system used for building real-time data pipelines and streaming applications. Spring Boot provides seamless integration with Kafka, allowing applications to publish structured messages such as JSON objects.
Follow the steps below to publish JSON messages to Apache Kafka using Spring Boot.
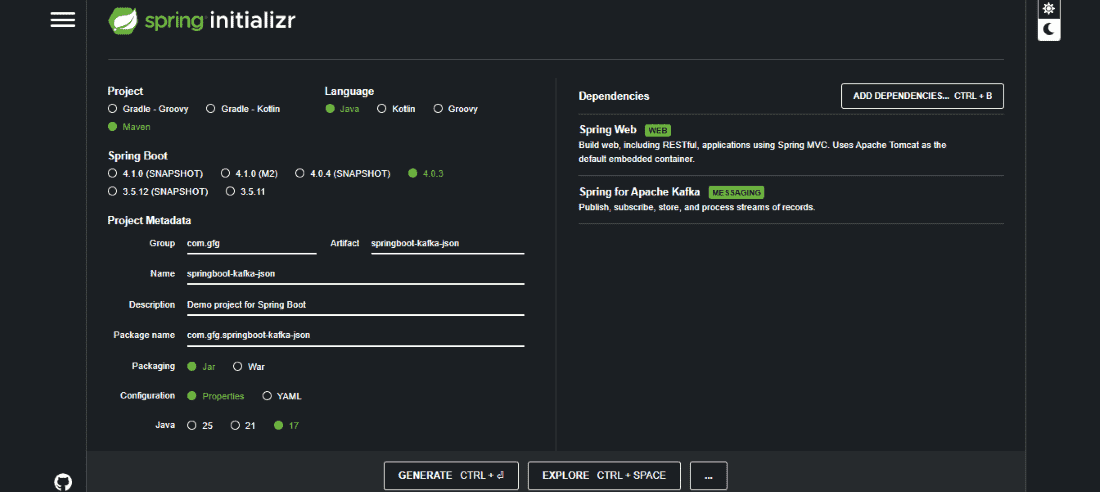
Go to Spring Initializr and create a new Spring Boot project.
Project Configuration:
Add Dependencies:
Select the following dependencies:
Download the project, extract it, and open it in your IDE.
Create a Student model class that represents the JSON message we want to send to Kafka.
Student.java
Create a configuration class StudentConfig.java to configure Kafka producer settings and enable JSON serialization.
StudentConfig.java
Create a REST controller that sends JSON messages to a Kafka topic.
UserResource.java
Before running the application, ensure Kafka and Zookeeper servers are running.
Start Zookeeper
C:\kafka>.\bin\windows\zookeeper-server-start.bat .\config\zookeeper.properties
Start Kafka Server
C:\kafka>.\bin\windows\kafka-server-start.bat .\config\server.properties
Create a topic named StudentExample.
Windows:
.\bin\windows\kafka-topics.bat --create --zookeeper localhost:2181 --replication-factor 1 --partitions 1 --topic StudentExample
Mac / Linux:
bin/kafka-topics.sh --create --zookeeper localhost:2181 --replication-factor 1 --partitions 1 --topic StudentExample
To monitor messages published to Kafka, run the following command.
Windows:
.\bin\windows\kafka-console-consumer.bat --bootstrap-server localhost:9092 --topic StudentExample --from-beginning
Mac / Linux:
bin/kafka-console-consumer.sh --bootstrap-server localhost:9092 --topic StudentExample --from-beginning
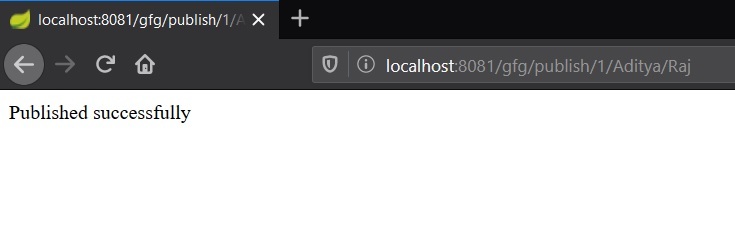
Run the Spring Boot application and open the following URL in a browser:
http://localhost:8080/gfg/publish/1/John/Doe
Output:👁 Image
Checking the message in real time: 👁 Image