 |
VOOZH | about |
|
VOOZH | about |
Spring Boot simplifies backend development by providing auto-configuration and embedded server support. Integrating it with MySQL allows developers to build robust, database-driven applications efficiently. Using Maven further helps manage dependencies and project structure easily.
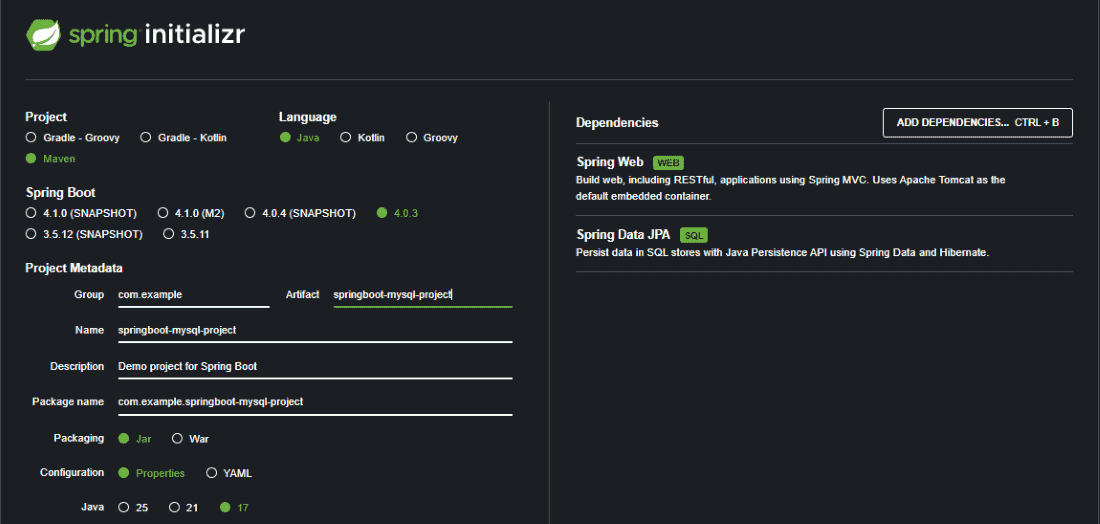
Generate a project using Spring Initializr and fill in the details as per the requirements. For this application:
Click on Generate which will download the starter project.
Project Structure:
Once the project open in your ide (Eclipse) the directory structure looks like as below
pom.xml
Add the MySQL database configuration in application.properties to connect Spring Boot with MySQL.
Create the main class (SampleAccessingOfMysqlApplication.java) to run the Spring Boot application as a Java application.
Create a bean/entity class (Book.java) that represents the book table in the database.
Book.java
Explanation: This class represents a JPA entity that maps to a database table for storing book details with an auto-generated ID.
Create BookRepository.java to handle database operations using Spring Data JPA.
BookRepository.java
Create BookController.java and define API endpoints such as /geek/addbook to add books and /geek/books to retrieve all books.
BookController.java
Explanation: This Spring boot controller handles adding and retrieving book data by interacting with the repository and exposing endpoints for saving and fetching books
Run the main class and wait for the server to start. The application will run on http://localhost:8080
The application can be run as follows :
Console Output:
Explanation: This log indicates that the Spring Boot application has successfully started, initialized Hibernate/JPA, and is running on Tomcat at port 8080.
Use Postman to send a POST request to to add book details.
We can check the same by executing the below URL
http://localhost:8080/geek/books
Similarly, we can add the books we want and can add
Let us check the same in MySQL as well
So it is easier to connect MySQL and Spring Boot. Efficiently we can integrate spring boot and MySQL as in the above sample project.