 |
VOOZH | about |
|
VOOZH | about |
In Spring Boot, ModelMapper is a library used to automatically map data between Entity objects and DTO (Data Transfer Object) classes. It simplifies the process of converting objects by reducing the need for manual mapping code. This helps keep the application clean, maintainable, and secure by controlling the data sent between layers.
A DTO (Data Transfer Object) is a simple Java class used to transfer data between layers of an application without exposing the internal entity structure.
Syntax:
Create a Spring Boot project using an IDE like Eclipse or IntelliJ.
Add the ModelMapper dependency in the pom.xml file to enable automatic mapping between Entity and DTO.
Syntax:
<dependency>
<groupId>org.modelmapper</groupId>
<artifactId>modelmapper</artifactId>
<version>3.1.1</version>
</dependency>
Create a database schema in MySQL to store application data.
Once, we add the name of our schema, we need to click on Apply button, it will pop up one more window where we need to click again on Apply button. This will create our schema.
👁 Fig 4 - Database SchemaConfigure database connection properties in application.properties.
Syntax:
server.port=9090
# Database configuration
spring.datasource.url=jdbc:mysql://localhost:3306/model_mapper_db
spring.datasource.username=root
spring.datasource.password=root
spring.jpa.properties.hibernate.dialect=org.hibernate.dialect.MySQL57Dialect
spring.jpa.hibernate.ddl-auto=update
spring.jpa.show-sql=true
Run the application to check whether the database is configured correctly. Go to the main class (ModelMapperApplication.java) and select Right Click -> Run As -> Java Application.
👁 Fig 5 - Run ApplicationOnce, we run our application as Java Application, we can see in the console that our application is started and set up the connection to the database.
👁 Fig 6 - DB Connection SetupCreate an Entity class representing the database table.
For our application, we will be using the User class as our entity class. It will have the following fields id, name, email, and password.
User.java
Once, we have written our entity class. We will run our application, As we have done the database configuration, JPA will create the User table in the database automatically using the annotation we have added to our entity class.
👁 Fig 7 - User TableCreate an interface and name it as UserRepository and extends this class to the JPA repository. So, we can have CRUD operations easily available.
UserRepository.java
Now, we will create a service interface and name it as UserService. We will add only two methods to it. One to add the user and the other to get the user.
UserService.java
UserServiceImpl.java
In this step, we will create a user controller for handling and mapping our request.
UserController.java
In this step, we will run our application and test restful services using postman.
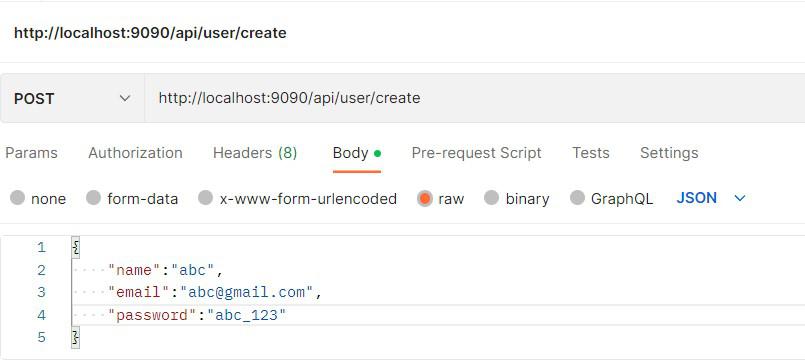
1. CREATE A USER:
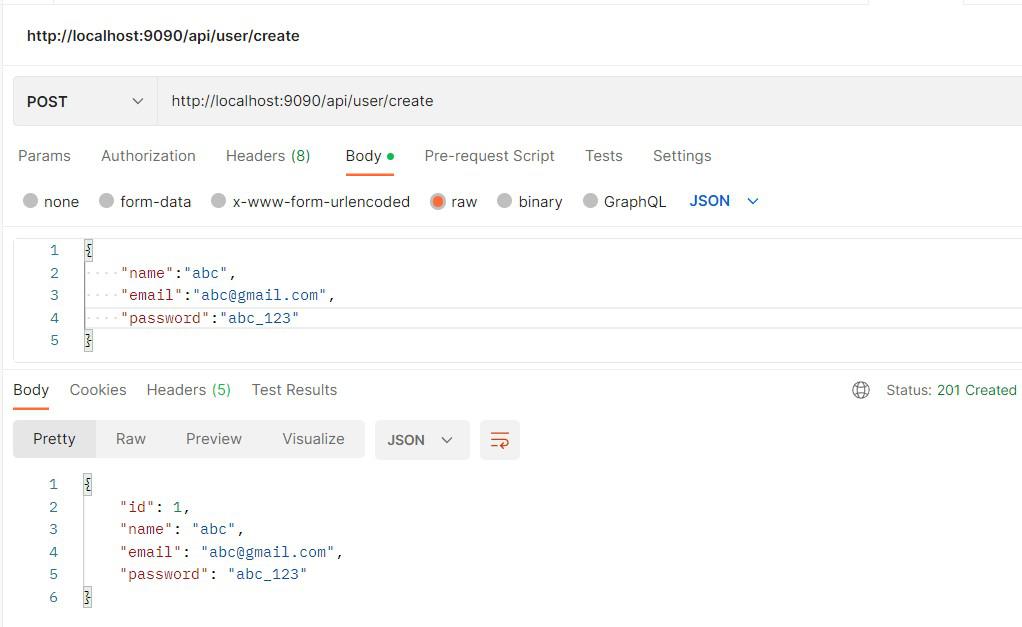
👁 Fig 8 - Create RequestOnce, we send our request. We will get the following output.
👁 Fig 9 - ResponseWe can also check our database for new user entries.
👁 Fig 10 - User Added To DB2. GET A USER:
We will be using the GET endpoint and userid to retrieve users from the database.
👁 Fig 11 - Get A UserAs we can see in the above response, we will also receive passwords which is not a good practice to write restful APIs. To overcome this problem, we will use DTO.
Create UserDTO class that will contain only those fields that are required and necessary for the web layer.
UserDto.java
We need to add the following dependency in our pom.xml file.
<dependency>
<groupId>org.modelmapper</groupId>
<artifactId>modelmapper</artifactId>
<version>3.1.1</version>
</dependency>
Now, to use UserDto, we need to modify our UserService, UserServiceImpl, and UserController class.
UserService.java
UserServiceImpl.java
UserController.java
In this step, we will add model mapper bean to our main spring boot class.
Now, we will again run our application and use the GET endpoint to see the response.
👁 Fig 12 - ResponseThe response now contains only the required fields for the web layer. Although the User is created with all fields, only the necessary fields are returned in the response.