 |
VOOZH | about |
|
VOOZH | about |
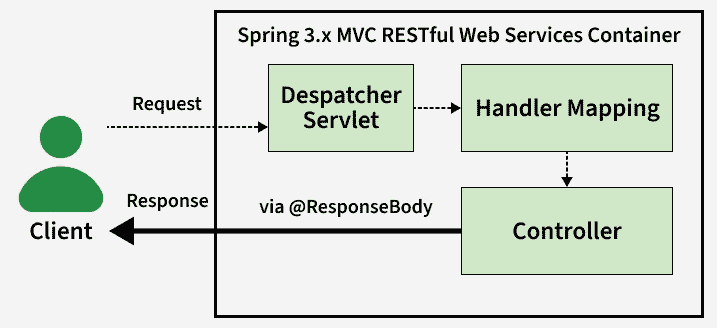
The @ResponseBody annotation in Spring is used to directly send the return value of a controller method as an HTTP response, instead of resolving it to a view. It helps in building RESTful web services where data is returned in JSON or XML format.
- Eclipse (EE version)/STS IDE
- Spring JAR Files
- Tomcat Apache latest version
Follow these steps to create @ResponseBody Annotation in Spring MVC.
Refer to this article Configuration of Apache Tomcat Server and configure the tomcat server with your application. Now we are ready to go.
Configuring Dispatcher Servlet: Go to the src > main > webapp > WEB-INF > web.xml file and the complete code for web.xml file is given below:
Now go to the src > main > webapp > WEB-INF and create an XML file. Actually, this is a Spring Configuration file like beans.xml file and the name of the file must be in this format -> frontcontroller-dispatcher-servlet.xml.
Add component scan in XML file:
<context:component-scan base-package="com.student.controllers"></context:component-scan>
In this step, the class is marked as a Spring MVC controller using @Controller to handle incoming HTTP requests. The method mapped with @RequestMapping returns data directly in the HTTP response using @ResponseBody instead of rendering a view.
Modern Approach (@RestController): In this modern approach, @RestController is used which combines @Controller and @ResponseBody into a single annotation. It directly returns the method response as HTTP output, making it ideal for building RESTful web services.
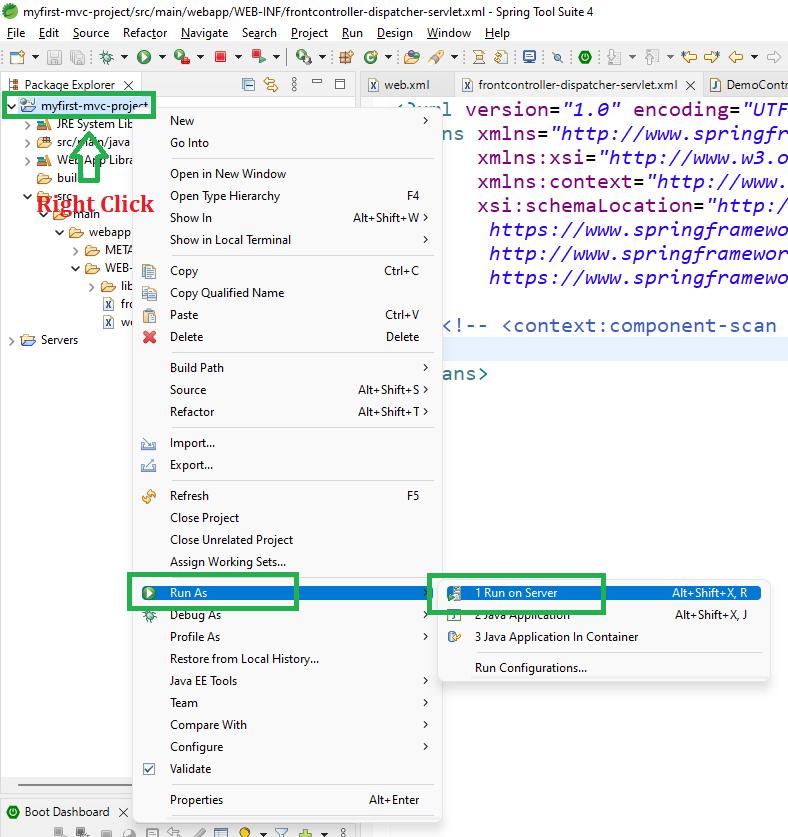
To run your Spring MVC Application right-click on your project > Run As > Run on Server and run your application as shown in the below image.
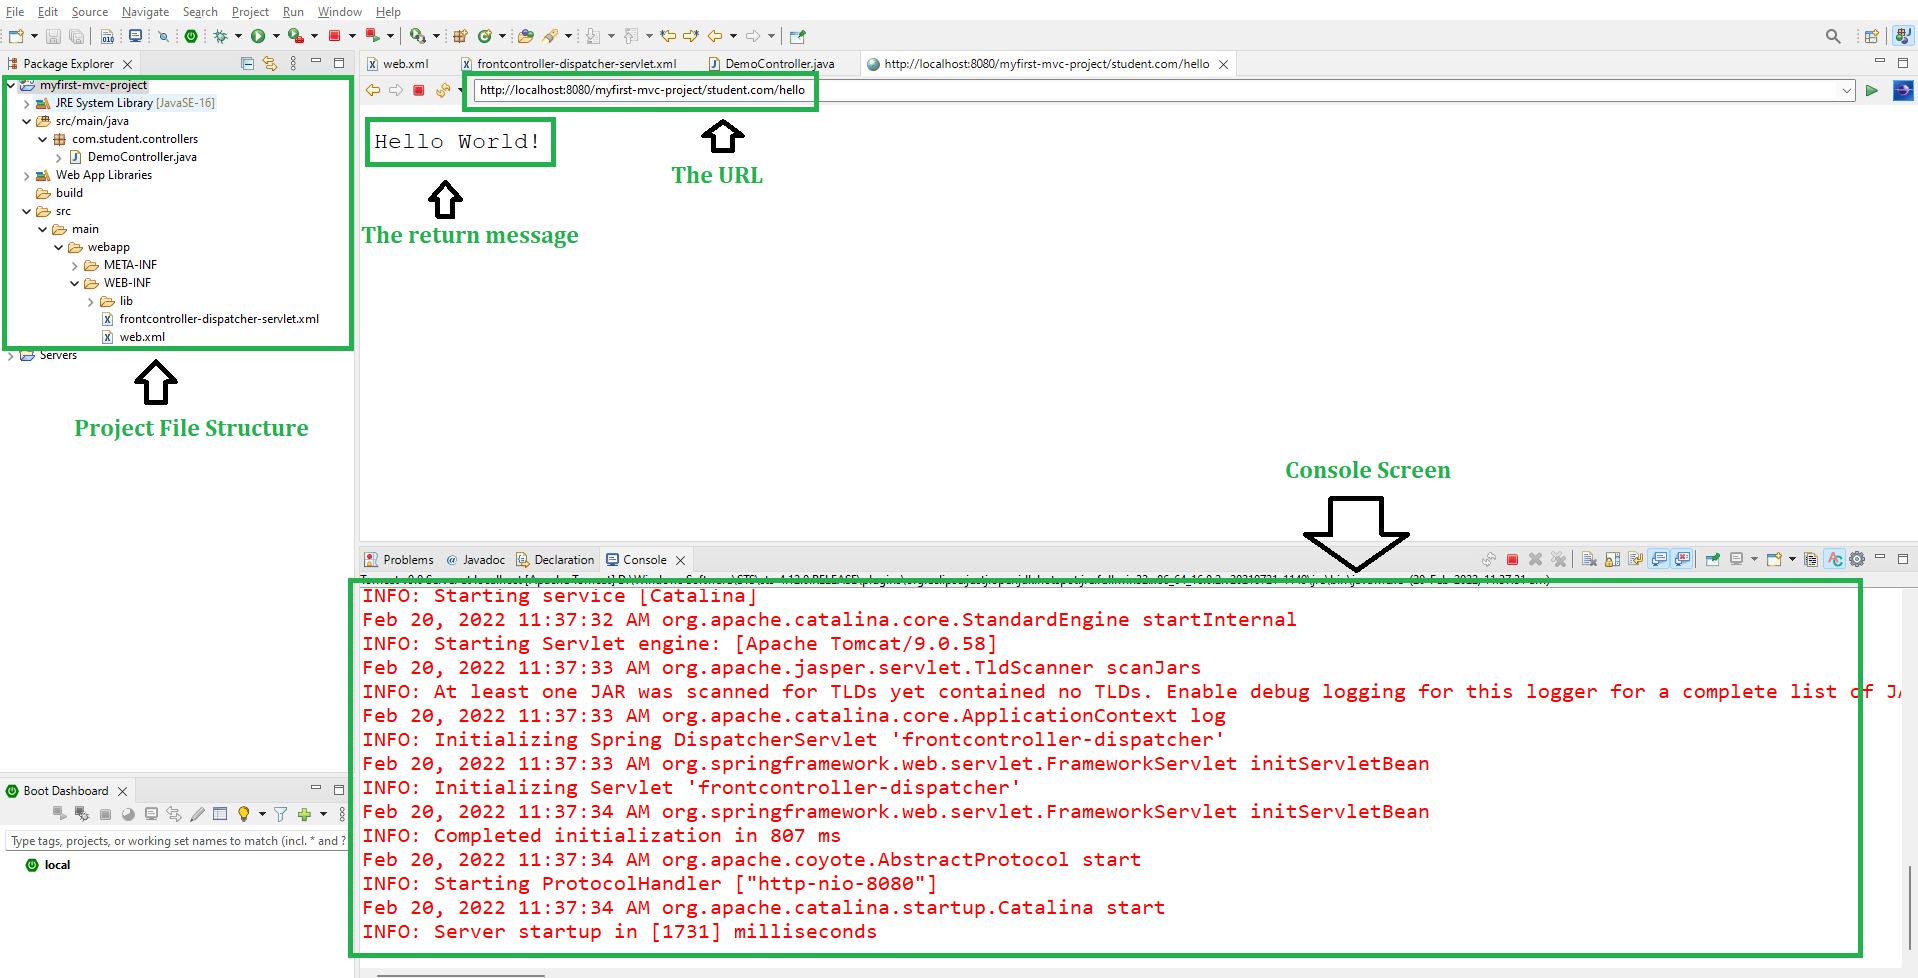
After that use the following URL to run your controller as shown in the below image. All other details are mentioned in the image.
http://localhost:8080/myfirst-mvc-project/student.com/hello
Output:
Explanation: When a client hits the /hello URL, the request is processed by DispatcherServlet, which maps it to the corresponding controller method. The method returns a string value, and because of @ResponseBody, Spring directly writes this return value into the HTTP response body instead of resolving a view. The client receives the output as plain text in the browser or API response.