 |
VOOZH | about |
|
VOOZH | about |
Firebase is a famous backend service provider of Google which is used to create and manage databases that are required while creating an android application. In this article, we will take a look at How to use the Firebase Firestore database for adding our data to it. A sample video is given below to get an idea about what we are going to do in this article.
To create a new project in the Android Studio, please refer to How to Create a new Project in Android Studio with Jetpack Compose.
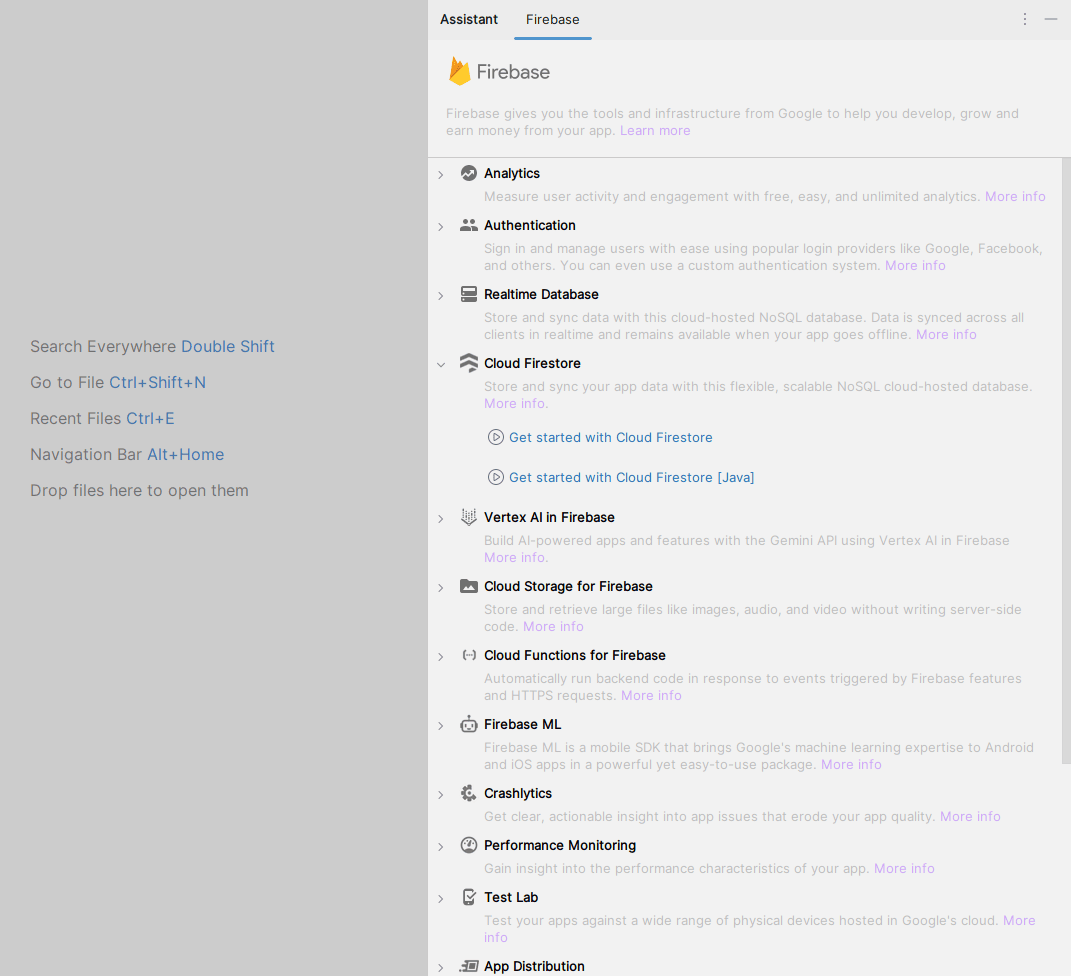
After creating a new project. Navigate to the Tools option on the top bar. Inside that click on Firebase. After clicking on Firebase, you can get to see the right column mentioned below in the screenshot.
Inside that column Navigate to Cloud Firestore. Click on that option and then select Get Started with Could Firestore. In the next screen, Click on Connect to Firebase option and your app will be connected to Firebase after you setup everything in the website. Then select Add the Cloud Firestore SDK to your app and then in the dialog box select Accept Changes.
For adding data to Firebase we should have to give permissions for accessing the internet. Navigate to app > manifests > AndroidManifest.xml. Inside that file add the below permissions to it.
<uses-permission android:name="android.permission.INTERNET" />Navigate to app > java+kotlin > {package-name}, Right click on it, New > Kotlin class/file and name it as Course and add the below code to it. Comments are added to it to get to know it in detail.
Course.kt:
Go to the MainActivity.kt file and refer to the following code. Below is the code for the MainActivity.kt file. Comments are added inside the code to understand the code in more detail.
MainActivity.kt:
Now, navigate to firebase console and open your project. On the left sidebar select Build > Firestore. Now, after the screen loads, click on Create Database. Now, follow the steps in the dialog box and create the database. After the database is create, you will be able see the table as shown in the output below.