 |
VOOZH | about |
|
VOOZH | about |
Many apps require their users to be authenticated. So for the purpose of authenticating the apps uses phone number authentication inside their apps. In phone, authentication user has to verify his identity with his phone number. Inside the app user has to enter his phone number after that he will receive a verification code on his mobile number. He has to enter that verification code and verify his identity. So this is how phone authentication works. Firebase provides so many ways for authentication users such as Google, Email and Password, Phone, and many more. In this article, we will take a look at the implementation of Phone Authentication inside our App using Firebase in Android using Jetpack Compose.
We will be creating a simple application which is having two screens. The first screen will be our Verification screen on which the user has to add his phone number. After adding his phone number, the user will click on the Get OTP button after that Firebase will send OTP to that number which is mentioned above. After receiving that OTP user has to enter that OTP in the below text field and click on the below button to verify with entered OTP. After clicking on verify button Firebase will verify the OTP and allow the user to enter into the home screen only when entered OTP is correct else the user will get an error message. A sample video is given below to get an idea about what we are going to do in this article.
Step 1: Create a New Project in Android Studio
To create a new project in Android Studio please refer to How to Create/Start a New Project in Android Studio. While choosing the template, select Empty Compose Activity. If you do not find this template, try upgrading the Android Studio to the latest version. We demonstrated the application in Kotlin, so make sure you select Kotlin as the primary language while creating a New Project.
Step 2: Adding a new color in the Color.kt file
Navigate to app > java > your app’s package name > ui.theme > Color.kt file and add the below code to it.
Step 3: Connect your app to Firebase
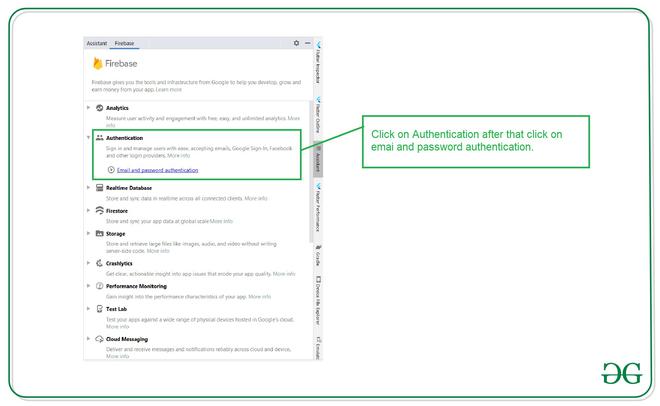
After creating a new project, navigate to the Tools option on the top bar. Inside that click on Firebase. After clicking on Firebase, you can get to see the right column mentioned below in the screenshot.
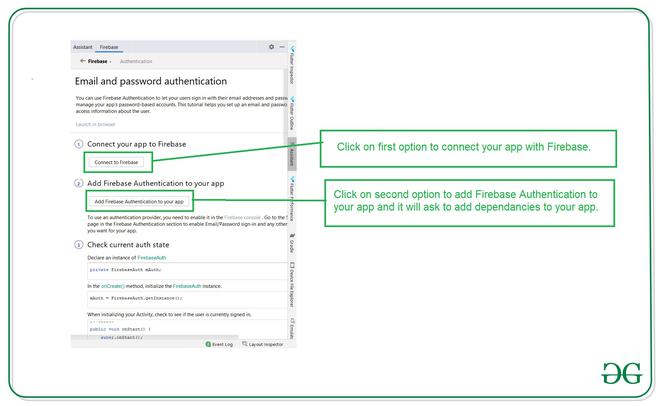
After clicking on email and password authentication you will get to see the below screen. Inside this screen click on the first option to connect to firebase and after that click on the second option to Add Firebase authentication to your app.
Step 4: Verify that dependency for Firebase authentication is added inside your app
After connecting your app to Firebase. Make sure to add this dependency in your build.gradle file if not added. After adding this dependency sync your project.
implementation 'com.google.firebase:firebase-auth:19.3.2'
Note: Make sure to add the exact dependency version in the above image because the latest dependency is not having the implementation for auto-detection of OTP.
Step 5: Adding internet permissions
Add internet permissions in AndroidManifest.xml.
Step 6: Working with the MainActivity.kt file
Go to the MainActivity.kt file and refer to the following code. Below is the code for the MainActivity.kt file. Comments are added inside the code to understand the code in more detail.
Step 7: Now we have to enable Firebase Phone Authentication in our Firebase Console
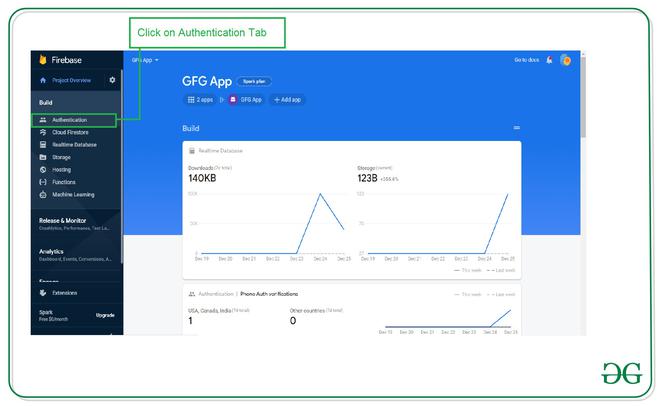
For enabling Phone authentication in the Firebase console. Go to the Firebase Console. Now click on the Go to Console option and navigate to your project. After that click on your project. You can get to see the below screen.
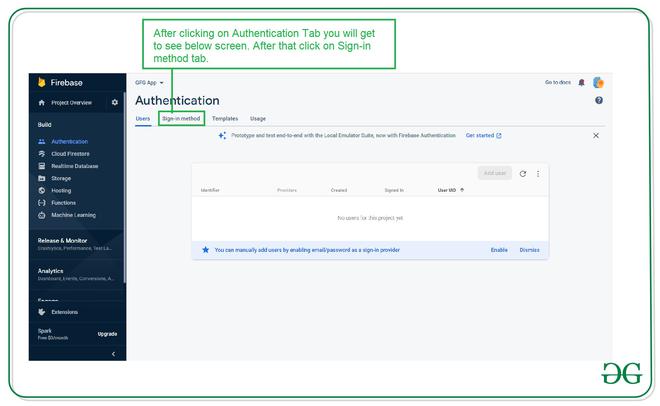
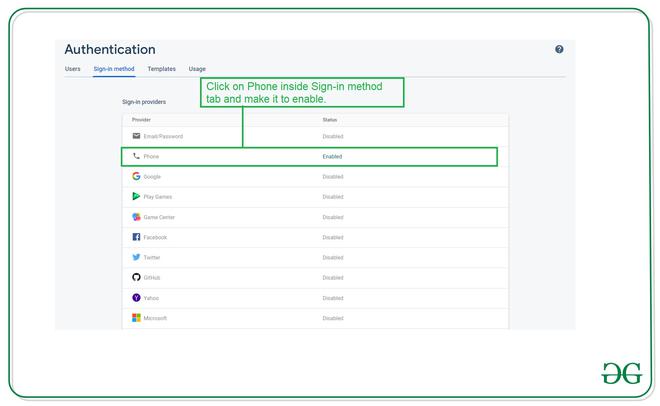
After clicking on Authentication you will get to see the below screen. On this screen click on the Sign-in method tab.
After clicking on Sign in-method you will get to see the below list of authentication screens. Click on the Phone option and enable it.
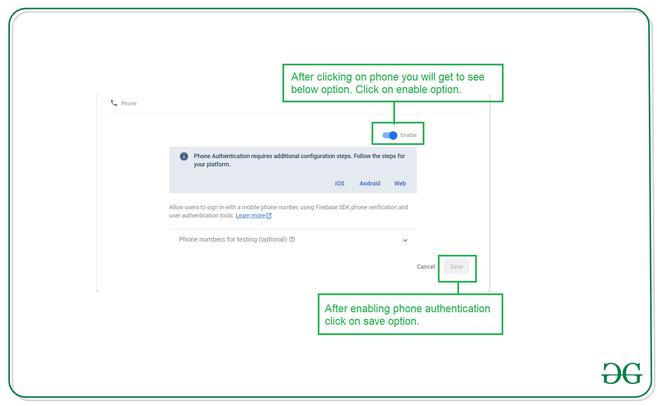
Click on the Phone option and you will get to see the below pop-up screen. Inside this screen click on enable the option and save it.
After this Run your app on a real device and see the output of the app.
Note: For getting OTP don't enter your phone number with your country code because we are already adding that country code to our code itself.
Output: