
In this tutorial, we will walk through the steps to install Fedora 25 workstation edition on your machine. This guide contains screen shots taken from every step in the whole installation process, therefore, carefully follow it.
What’s New in Fedora 25 Workstation?
As expected, this latest version of Fedora comes with multiple bug fixes and changes to the basic components, additionally, it brings new and enhanced software as listed below:
- GNOME 3.22 which enables multiple file renaming, redesigned keyboard settings tool and plus several user interface enhancements.
- Replaces X11 system with Wayland for modern graphics hardware.
- Decoding support for the MP3 media format.
- Docker 1.12
- Node.js 6.9.1
- Support for Rust system programming language.
- Numerous versions of Python programming language, that is 2.6, 2.7, 3.3, 3.4 and 3.5.
- GNOME Shell extensions are also no longer checked for compatibility with the current version of the Shell and many more.
Note: If you already using previous version of Fedora 24, you may consider following much more easier steps to upgrade Fedora 24 to Fedora 25 to avoid a fresh installation process.
Installation of Fedora 25 Workstation Edition
Start by downloading the ISO image from the links below, for the purpose of this tutorial, we will use the 64-bit edition.
After downloading Fedora 25, the first is to create a bootbale media, that is either a DVD or USB drive using the install Linux from USB Device using Unetbootin and dd Command or any other method of your choice.
1. After creating bootable media, plug-in and boot into the bootable media (DVD/USB drive), you should be able to see the Fedora Workstation Live 25 start screen below.
Select “Start Fedora-Workstation-Live 25” option and hit the Enter button.
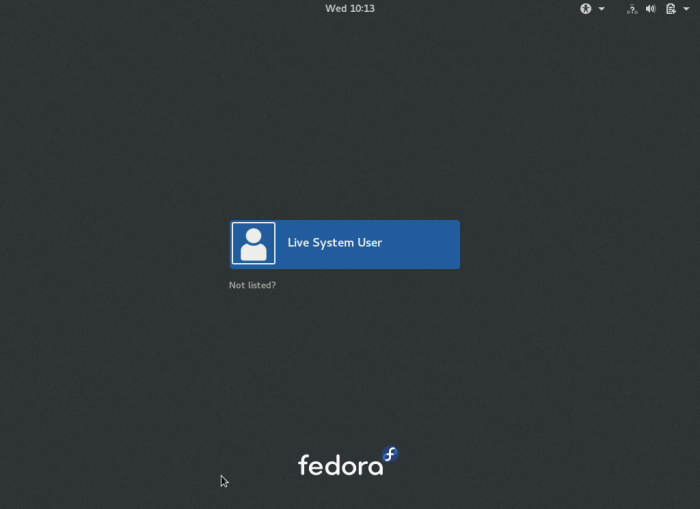
2. Next, you will be at the login interface below, click on “Live System User” to login as a Live user.
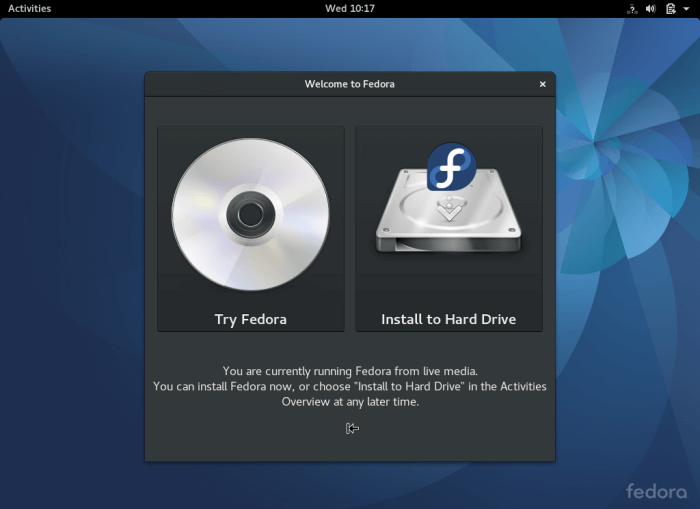
3. After logging in, the welcome interface below will appear after a few seconds on the desktop, if you wish to try Fedora before installing it, click on “Try Fedora” otherwise, click on “Install to Hard Disk” to proceed with the fresh installation process.
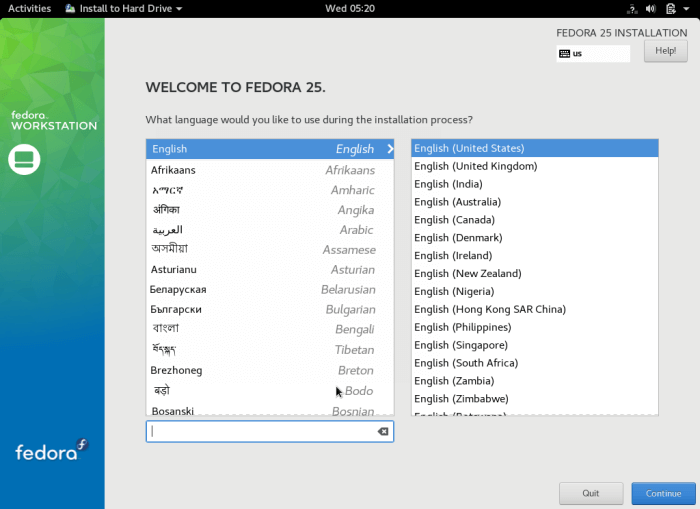
4. In the screen below, select the installation language you want to use and click on “Continue” to advance to the installation summary screen.
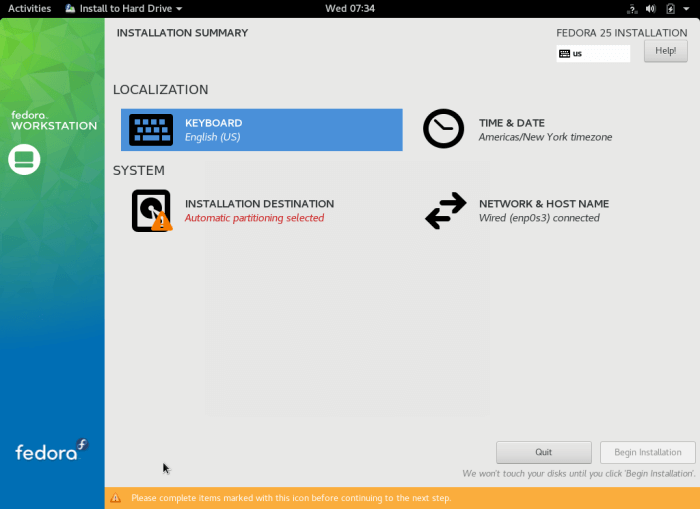
5. The following is a screen shot showing the installation summary screen with default localization and system settings. You need to customize the localization and system settings as per your location and preferences.
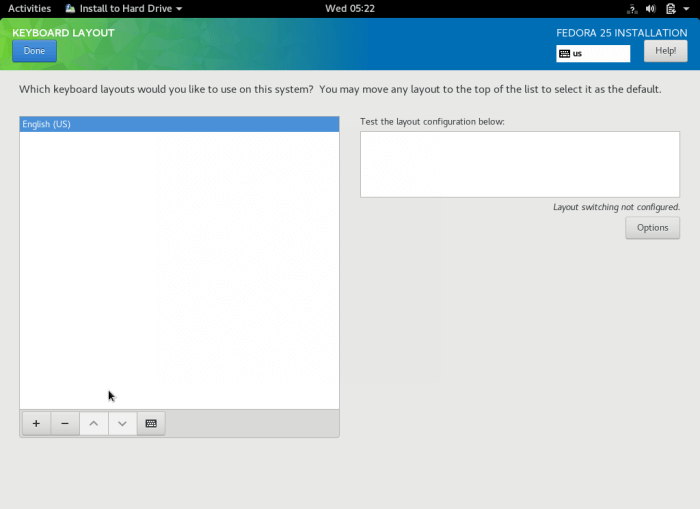
Start with the Keyboard settings. Click on “KEYBOARD” to move into the keyboard layout customization screen.
6. From the interface below, add the keyboard layout you want to use according to the origin of your machine using the + sign. After adding it, click on “Done” to get back to the installation summary screen.
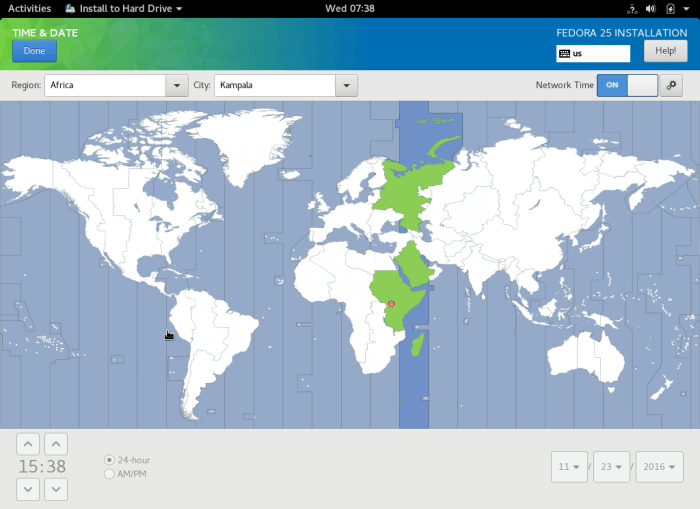
7. Next off, click on “TIME & DATE” to adjust your system time and date. Type the region and city to set the timezone or simply select them from the map.
Note that you can also enable or disable network time from the top right corner. After setting your system time and date, click on “Done” to move back to the installation summary screen.
8. Back at the installation summary screen, click on “NETWORK & HOSTNAME” to set your system network settings and hostname.
Once you have set the hostname, click on the Apply button to check if the hostname is valid, if that is the case, click on “Done”.
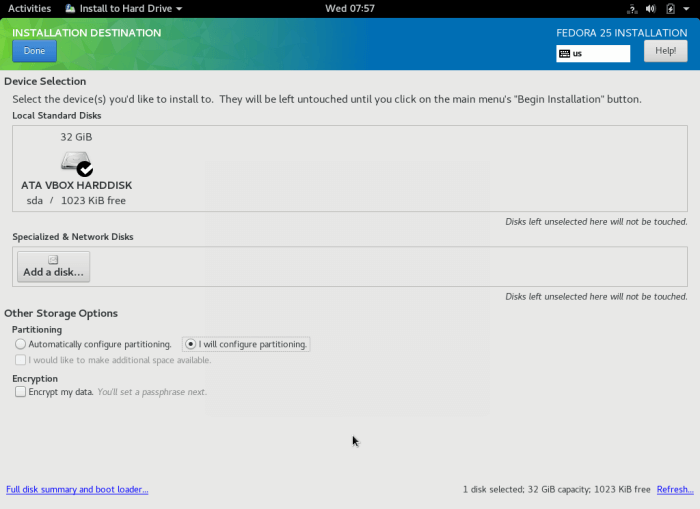
9. At this point, you need to now create the installation space for your system files, at the installation summary screen, click on “INSTALLATION DESTINATION”.
Choose “I will configure partitioning” under Other Storage Options to perform manual partitioning and click Done to move forward to the manual partitioning interface.
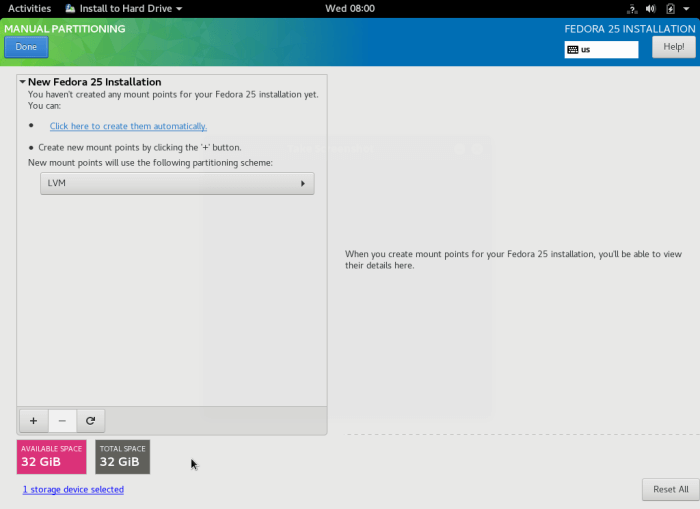
10. Below is the manual partitioning interface, select “Standard Partition” as the new partitioning scheme for the installation.
11. Now create a /root partition by clicking on the + sign to add a new mount point.
Mount Point: /root
Desired Capacity: set appropriate size( eg 100 GB)
After that, click Add mount point to add the just created partition/mount point.
The interface below shows the settings of the /root partition mount point.
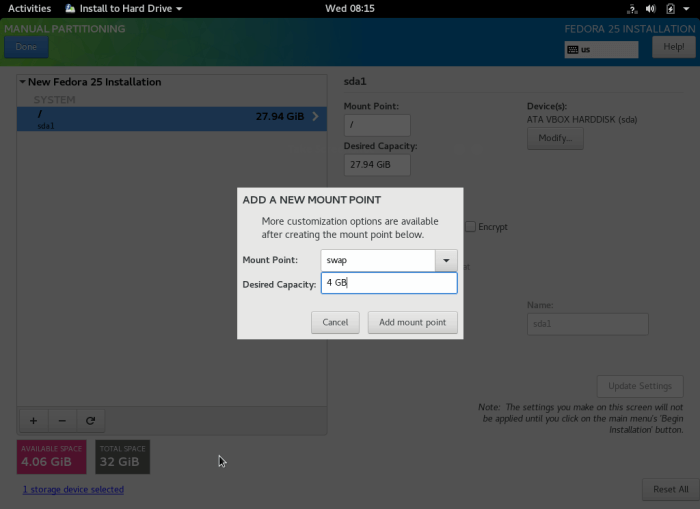
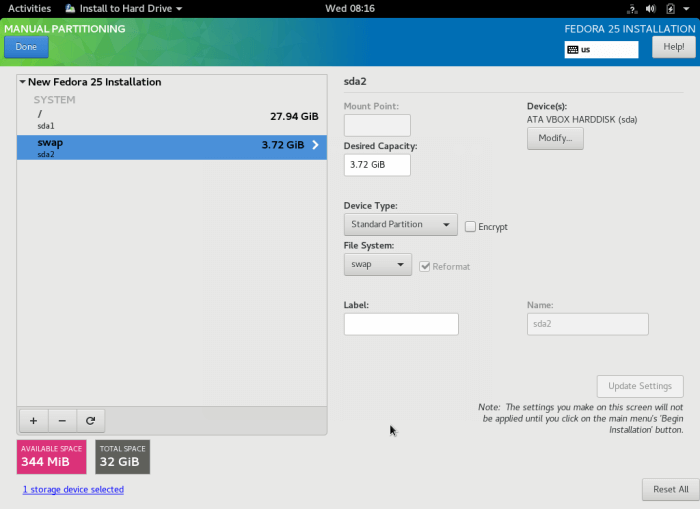
12. Next, create a swap partition by clicking on the + sign to add a another mount point, that is the swap area.
Swap area is a virtual space on your hard disk that temporarily stores data which is not currently being worked on by the CPU from the system RAM.
Mount Point: swap
Desired Capacity: set appropriate size( eg 4 GB)
To add the swap area, click Add mount point.
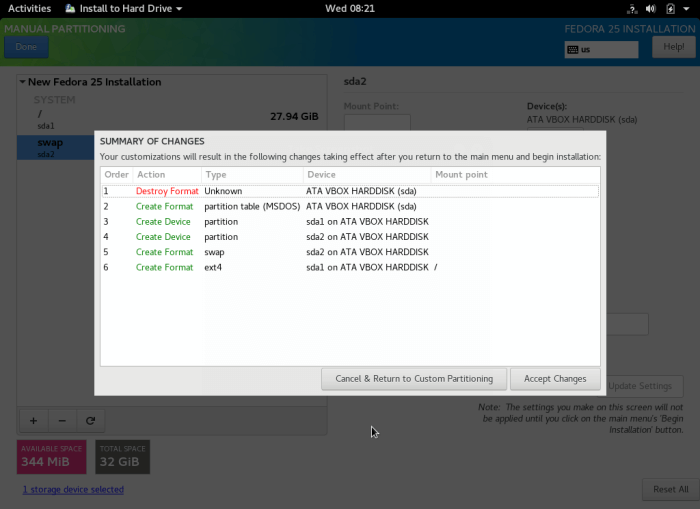
13. Once you have created the root partition and swap area, click on Done to view the possible changes to be made to your hard disk. Click Accept Changes to permit execution of the various changes.
14. Your final installation summary should look similar to this with custom settings. To begin the actual installation of system files, click on “Begin Installation”.
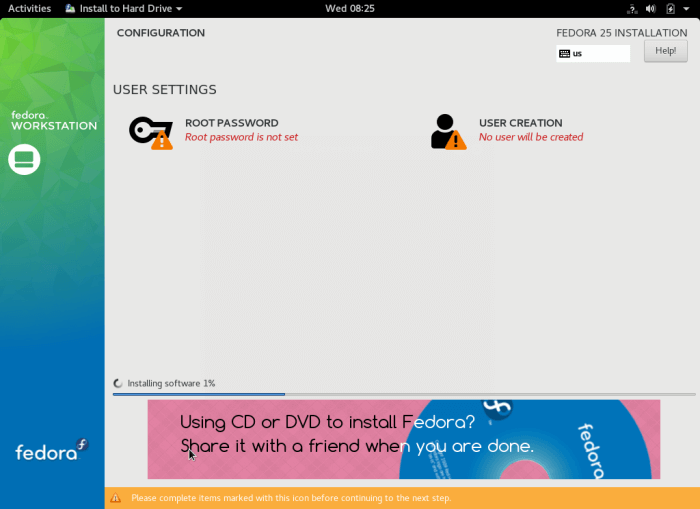
15. After the installation of system files starts, you can create a regular system user and add a password for the root user from the interface below.
16. Therefore, click on ROOT PASSWORD to set the root user’s password. As before, click Done afterwards to move back to the user configuration interface.
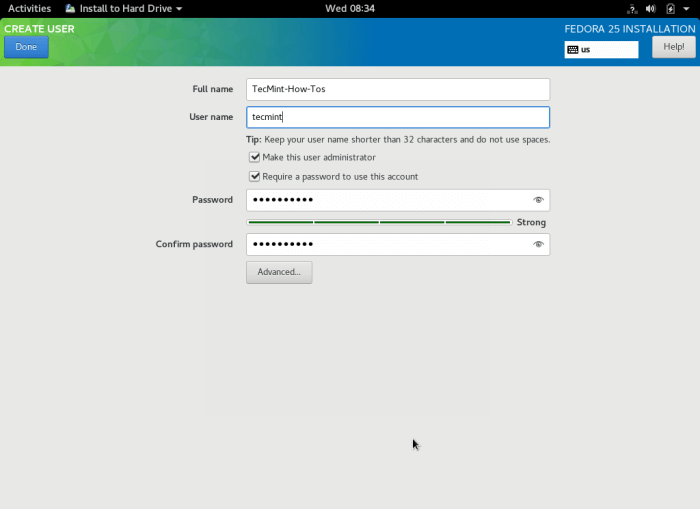
17. Subsequently click on USER CREATION at the user configuration interface to create a regular system user. You can as well make the regular user a system administrator by marking the option “Make the user administrator”.
One more time, click Done to continue..
18. The installation process will continue for a while, sit back and relax. When it is complete, click on Quit to reboot the system and eject the bootable media you used. Finally, log in into your new Fedora 25 workstation.
That’s all! To ask any question or make comments concerning this guide, use the feedback form below.
If this article helped you solve a problem, consider buying a coffee. It helps keep TecMint free, supports the authors, and keeps the project going.
Got Something to Say? Join the Discussion... Cancel reply