
I've been out of the media server game for a long time, despite being really into apps like Xbox Media Player (XBMC), which evolved into Plex, and TVersity, a server app that doesn't even exist anymore, back in the late 2000s and early 2010s.
Subscribing to legitimate streaming services like Netflix, Disney+, Paramount+, and more has just been easier as my life has become increasingly busy over the past decade or so. Even paying for a couple of services a month has been pretty reasonable, at least until the more recent substantial streamer price hikes.
If you're looking to get back into the world of media servers, these simple tips will likely come in handy.
Now that streaming platforms are starting to feel like a version of cable that's easier to cancel, I've decided it's time to get back on Plex for at least some select content. I plan to build a NAS and run Docker, but for now, I've dusted off an M4 Mac mini with a 4TB SSD and set it up as a simple Plex server.
I should have expected it, but to my surprise, Plex feels and looks very different from what it did back in 2013. At the same time, many of the features I remember are still present and work just as they always have. With this in mind, as soon as I got my Plex server up and running, I changed a few key settings.
If you're looking to get back into the world of media servers, you'll likely find these straightforward tips useful.
Streaming used to feel like freedom, now it's just cable again
Over the past few years, the value streaming apps once offered has rapidly disappeared.
Make TV shows and movies that require transcoding look great with high-quality settings
As long as the device you're hosting your media server on is powerful, the days of being locked to 720p streaming are gone
Back in the day, I needed to be careful when selecting transcoding quality because my ancient Toshiba Satellite laptop with an Intel Core 2 Duo CPU and 8GB of RAM, could barely handle 1080p video. Fast-forward to 2025 and the powerful M4 Mac mini I'm using as my media server now, and that's no longer an issue. Still, I wanted to make sure that I'm getting as much as I can out of Apple's pint-sized desktop.
If you want movies and TV shows to look as good as possible, first open a web browser and enter your Plex server's IP address. Next, in the left menu, select Transcoder under Settings after accessing your account settings. Open the Transcoder Quality drop-down and pick an option that makes sense for you. Naturally, I went with Make My CPU Hurt because I can, but if you're using an older PC or Mac or a NAS with lackluster onboard hardware, you'll probably want to select a more reasonable option like Automatic or Prefer Higher Speed Encoding. On top of this, I also turned on Use Hardware Acceleration When Available, which uses hardware-accelerated video codecs for encoding and decoding.
I've been pretty much exclusively watching 4K movies and TV shows, and I haven't encountered any issues yet, even when transcoding is happening on the fly in the rare situation where I'm streaming content to a more niche set-top box that doesn't offer support for a wide variety of video file formats. However, I usually stream to the Apple TV 4K, so I don't need to use transcoding often, unless it's a really high-quality 4K video file with 5.1 surround sound.
It's important to note that hardware-accelerated transcoding is locked behind Plex Pass, which costs $7 a month, $70 a year, or $250 for a lifetime subscription.
Get rid of all that pretend streaming app cruft
No, I don't want to rent movies on Plex
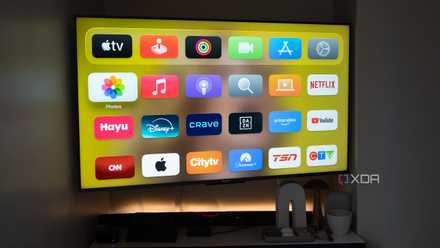
I'd heard that Plex had pivoted over the last few years to become more of a real streaming platform rather than just a media server, but I didn't realize the extent of that change until now. Movie rentals on Plex? B-movies from the early 2000s starring Sylvester Stallone? (okay, maybe I'm somewhat into that one) Cross-streaming platform streaming content recommendations? None of this really interests me, and it all just clutters up my navigation bar on both the server and the Plex app I'm using, whether on the Apple TV 4K or the Fire TV Stick 4K Max.
Getting rid of this content is simple. Just click on Discover, Rentals, Live TV, or whatever else you want to remove, and select the three-line button beside it. Next, click Unpin, and all the content you don't want to see disappears. It's still there under the More option if you need it, but your overall Plex sidebar should be cleaned up and streamlined. This only works on the server side of Plex. If you want to remove these left-menu items from individual Plex apps, like on your smart TV or Nvidia Shield, you'll need to do this manually with each app (the steps are usually very similar, though it depends on what Plex app you're using).
Micron says quitting the DIY memory industry will actually "help consumers"
In a recent interview, a Micron executive said that the company still supplied DRAM to PC manufacturers like Dell, Asus, and more.
Enable remote access for on-the-go watching
I don't use this feature often, but it's useful when I'm not at home
Over the past few weeks, I've run into a few situations where I'm not home and I want to either finish a TV show episode I already started, or kick back and watch a movie I recently acquired. Thankfully, Plex offers a straightforward Remote Access feature (you can also share server access with friends) that allows you to adjust the quality of your remote stream based on your home internet connection's upload speed.
To find this feature, head over to the Settings bar on the left side of the screen and select Remote Access. From here, you can Enable/Disable Remote Access, set an Upload Speed, or, in my case, limit the remote stream bitrate to the content's original quality. I don't have a great upload speed with my home internet connection, but it's typically between 20Mbps and 25Mbps, which is more than fast enough to stream high-quality 4K content remotely from an upload perspective. If your home internet upload speed is slow, set it to a speed that makes sense for you (you can test your internet connection speed directly in Plex using speedtest.net).
If you plan to use Plex's remote streaming feature, you'll need to purchase a Plex Pass. It's important to make sure the device hosting your media server is always on and awake; otherwise, you won't be able to access its library. I changed this on my M4 Mac by going to System Settings > Lock Screen and setting Turn Display Off On Power Adapter When Inactive to Never.
- OS
- Windows, macOS, Linux
- Individual pricing
- Free, $6.99/month, $250/lifetime
Save yourself time by turning on automatic library scanning
The days of manually updating my library are a thing of the past
This feature is typically enabled by default in Plex, but for some reason, it wasn't in my case. To hunt it down, navigate to the Settings panel once again, and then select Library. The first option you'll see is "Scan My Library Automatically," which scans for changes in any folder.
This works best for me, since I'm usually only adding a few movies or an episode or two of a TV show at a time, but you can also set up your library to be scanned at various intervals, including 15 minutes, 30 minutes, hourly, every two hours, and more. With this feature enabled, your library will always stay up to date whenever you add new media to your media server.
Back in the day, I remember always having to refresh my library manually whenever I added new content (and in many cases, it wouldn't even work).
Verizon is finally back up following a nation-wide service outage
It's still unclear what caused the lengthy service outage.