
My NAS proved to be the epitome of independence from tens of subscriptions and hundreds of online services. I didn’t need to rely on any third-party service, earning me the bragging rights of running everything myself, from Plex to backups to various Docker apps I didn’t even know existed. The idea of having my own private cloud was becoming a reality at long last.
But the reality soon hit me, and it wasn’t as rosy. As I piled on more services, I discovered the pitfalls I learned about while experimenting with self-hosting. Here are the biggest headaches I’ve run into while trying to self-host everything on my NAS.
Noise and heat
It got worse and worse
I set up my NAS on my desk in its early days, close to my computer for easy direct access. It hummed along quietly in the corner, barely noticeable. It was like a white noise machine that helped me sleep. But as things grew and I added more drives, that noise level went up and became noticeably annoying, especially in the evenings when everything else was quiet.
As a result, the fans spun louder, the enclosure warmed up more than ever, and my NAS suddenly wasn’t a silent home server anymore. It’s not unbearable, but it wasn’t nothing either. I could feel the heat coming my way. Unless you have a separate server closet, noise and heat will eventually become noticeable.
Your NAS doesn't have to be noisy, these 6 changes made my NAS quieter
A NAS doesn’t need to sound like it’s taking off
Uptime stress
Running a server ain’t easy
We expect cloud services to be available all day, every day. But when we’re self-hosting the same services, it’s up to us to match that uptime. Your NAS isn’t just a box of disks anymore — it becomes the backbone of your digital life. There have been moments where the NAS rebooted after an update and services like Plex failed to load, only for me to find out when I sat down on the couch with popcorn.
Things at times got even worse. For instance, the power tripped, and suddenly my backups, photo library, and work files all went dark at once. Compared to real cloud storage, my NAS had several points of failure that I had to take care of.
5 tips to prepare for your inevitable NAS drive failure
Your HDD or SSD will fail, but how can you prepare your NAS for this event?
Security headaches
The internet isn’t that safe a place
Opening ports for enabling remote access to my NAS is always scary, no matter how many times I’ve done it. It opens the NAS to the internet, and one wrong move can leave it vulnerable to external attacks. Bots can start poking around the moment they find an open service. It always feels like leaving the front door wide open.
To keep things safe on my end, I had to juggle SSL certificates, firewalls, constant updates, and most importantly, VPNs. And every new Docker app adds to the burden. Security isn’t impossible, sure, but it demands constant vigilance, which sometimes gets tough for someone running a small home server.
Maintenance
It requires constant tinkering
If you think that you’ll be done once you’ve set everything up, then you’d be in for a major surprise. One thing that self-hosting teaches you is that nothing stays smooth forever. Drives fail, and rebuilding a RAID array is a task that you want to avoid. With so many moving parts, especially with the complications of hosting several Docker containers, you will often find yourself googling stuff at 2 AM.
Even scheduled software updates can break things out of the blue. There have been occasions where, instead of using the NAS, I spent time babysitting it, fixing things that I didn’t even break. Then there are things that I do break too, and that’s also on me to fix.
7 things I learned the hard way after using a NAS for a year
Some small mistakes, some big lessons
Storage just vanishes
Your drives hit red before you know
When I first slotted two 8TB drives, I thought I had more space than I’d ever need. But it didn’t go as planned, to say the least. With RAID, multiple laptops backing up to the NAS, my growing media library, applications, and containers, that very space quickly started to feel too limited.
And unlike the cloud, where you can rent more storage with just a click of a button (and extra load on your monthly credit card bill), expanding your NAS often means buying new drives, expansion units, or even migrating to a beefier NAS. These are neither cheap nor easy to implement. But one day, we all will have to do that.
I've mapped my TrueNAS storage server to my home lab for easy access, and here's the right way to do it
Thanks to SMB, NFS, and iSCSI shares, I can use my TrueNAS Scale server with the rest of my home lab paraphernalia
Remote access friction
It’s far from easy
Perhaps the most tempting part of self-hosting is that you can access your files from anywhere, just like you do with Google Drive. But in reality, you have to deal with so much more than the security issues we discussed earlier just to get remote access working. The process is rarely seamless and involves setting up VPNs, dynamic DNS, and reverse proxies — things you’ve got to spend hours googling to understand fully.
On odd days, some certificate expires, while on even days, the VPN drops, and you find yourself finding ways to make it work just when you urgently need a file. From your own side, you’ve put together a foolproof system that should work all the time, but that’s rarely the case, unfortunately.
I use Tailscale to remotely access my self-hosted services - here's how
Tailscale provides an easy way to access your home server from external networks
I love my NAS, but...
Don’t get me wrong, I love my NAS for what it can do and how it has made my workflow far more seamless than before. It gives me the kind of control over my data that no cloud service can match — oh, and the peace of mind of hosting everything locally! However, I have to draw a line and realize when my own system is working against me; instead of working for me, it’s making me adjust to the system. That’s the reason I’ve gone for a hybrid approach, which balances convenience and control in a way that works best for my needs.
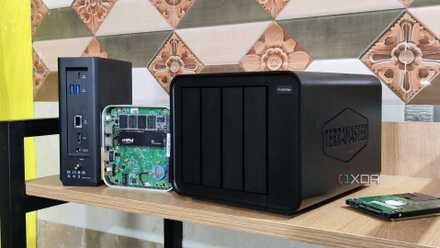
TerraMaster F4-424 Max
- CPU
- Intel Core i5-1235U
- Memory
- 8GB DDR5 non-ECC SODIMM (up to 64GB)
- Drive Bays
- 4 HDD bays + 2 NVMe SSD slots
- Ports
- 2x USB Type-A (10Gbps), 1x USB Type-C (10Gbps), 1x HDMI 2.0, 2x 10GbE RJ45
The TerraMaster F4-424 Max is a premium hybrid NAS enclosure that combines a solid Intel Core i5-1235U processor with ultra-fast 10GbE ports and ample storage capacity. It also supports up to 64GB RAM and is as amazing for home lab workloads as it is for storing your precious data,