 |
VOOZH | about |
|
VOOZH | about |
Podman is the next-generation containerization tool that has risen in popularity as a Docker alternative. Podman works in a way that is different from Docker: the tool does not have a daemon and users are able to work with containers as ordinary processes; this approach is more flexible and safe. Podman images are an important aspect that developers and system administrators need to understand for them to effectively manage, secure and scale the applications running in containers. In this article, we will review different approaches and tips on how to work with Podman images in the most optimum way.
Before diving into the management strategies, let's define some key terminologies related to Podman:
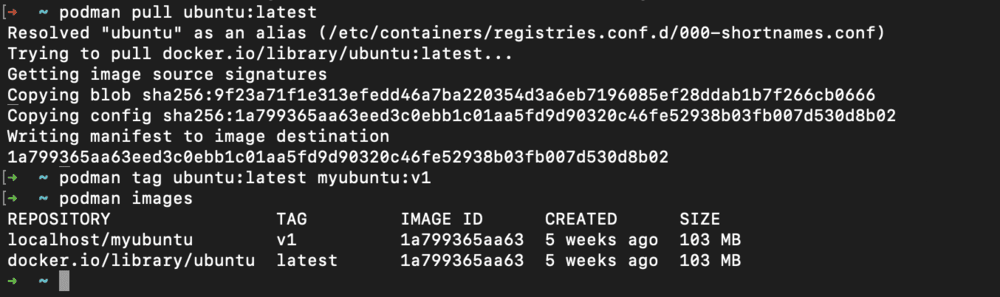
The first thing that you need to do when you want to start using Podman images, is to fetch the images from a registry. You can pull an image using the following command:
podman pull <image-name>:<tag>
For example, to pull the latest Ubuntu image, you would use:
podman pull ubuntu:latest
When you have pulled the images, it is also important to know the images which are present in your system. You can list all images using the following command:
podman images
This command will display repository name, tag, image ID, creation date and size of the images available.
Tagging images is useful in comparing versions of similar applications so that one can tell the difference between different stages of the same application. To tag an image, use the following command:
podman tag <image-id> <new-image-name>:<new-tag>
For instance, to tag the Ubuntu image with a custom name and tag:
podman tag ubuntu:latest myubuntu:v1
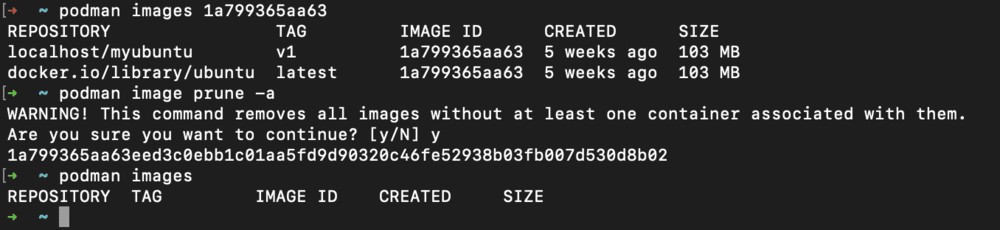
As time passes, many users may have those images which they do not need anymore and these take up disk space. You can remove unused images with:
podman rmi <image-id>
To remove all unused images:
podman image prune -a
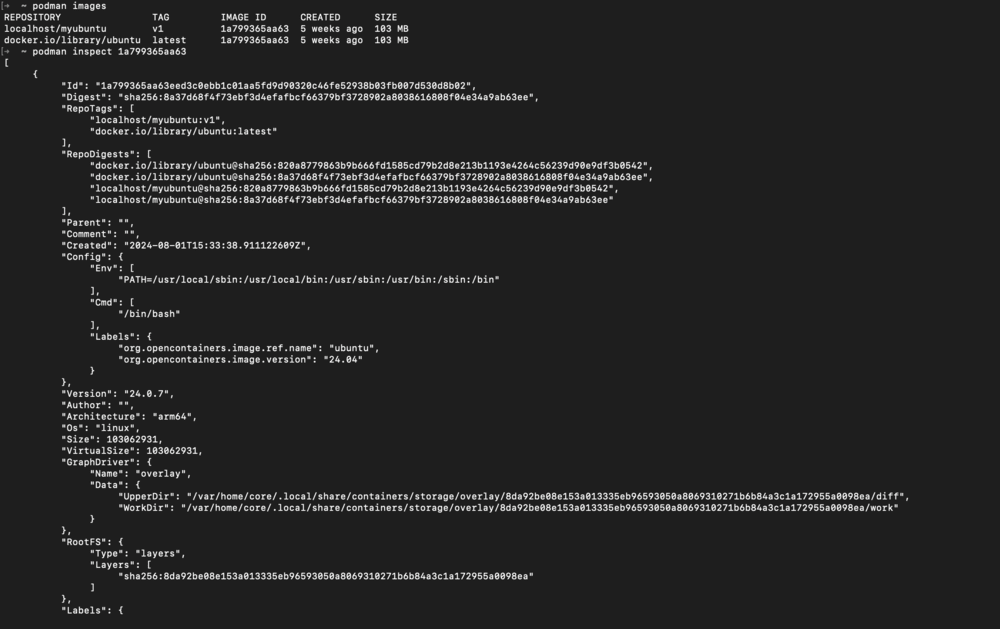
To understand an image's configuration, you can inspect it using:
podman inspect <image-id>
The command gives extra details about the image including the environment variables, entry points, and the layers.
Creation of new images based on your application is one of the most important tasks of containers. For this purpose, Podman uses a Containerfile which is similar to the Dockerfile used by Docker.
Here’s a basic example of a Containerfile to create a custom Ubuntu image with additional packages:
FROM ubuntu:latest
RUN apt-get update && apt-get install -y nginx
CMD ["nginx", "-g", "daemon off;"]
To Build the image run command
podman build -t custom-nginx:latest -f Containerfile .
After developing and examining your custom images you may wish to distribute them through a service known as a container registry. To push an image:
podman push <image-name>:<tag>
For example:
podman push custom-nginx:latest myregistry. com/myproject/custom-nginx:latest
Podman enables you to work with the multiple containers in one pod. You can create a pod and run an image inside it as follows:
podman pod create –name mypod
podman run --pod mypod -d nginx:most recent
This command will create a pod named mypod and inside that pod, it will create and run an Nginx container.
It is very important to manage the Podman images well so that it will not lead to cluttering and possible security breaches in the container environment. It is now possible for every person to manage the images in the best way possible for improving the chances of the applications to be reliable, secure, and scalable through the best practices highlighted in this article. Regardless of whether you are a developer or a system administrator, these techniques will improve your skill set of how to work with containerized solutions using Podman.