 |
VOOZH | about |
|
VOOZH | about |
Spring Boot simplifies Java application development by providing auto-configuration, embedded servers, and minimal setup requirements. Developers can quickly create and run applications without manually configuring external servers like Tomcat.
Eclipse is a widely used Java IDE that supports Spring Boot development with plugins and Maven integration.
Prerequisites:Download and Install Eclipse.
Create a Spring Boot project using Spring Initializr or import an existing project into Eclipse IDE.
Add the following dependency in your pom.xml:
<dependency>
<groupId>org.springframework.boot</groupId>
<artifactId>spring-boot-starter-web</artifactId>
</dependency>
Create a package named controller and add the following class.
Open the main application class and run it.
To run the application, click on the green icon as seen in the below image.
👁 Run the applicationAfter successfully running the application, you can see the console as shown in the below image. Your Tomcat server started on port 8989.
👁 Application StartedIntelliJ IDEA provides excellent support for Spring Boot applications with built-in Maven and Gradle integration.
Prerequisite: Step by Step guide to install Intellij Idea.
Create a Spring Boot project using Spring Initializr or open an existing project in IntelliJ IDEA.
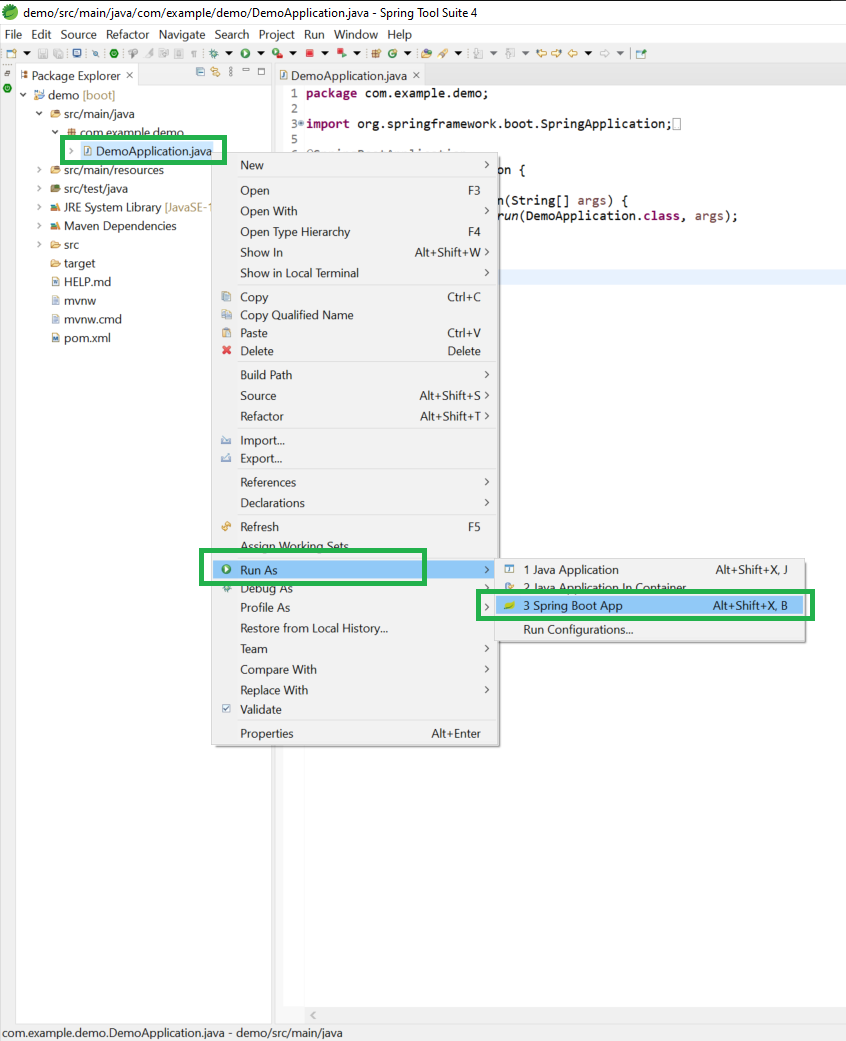
Method 1: Right-click DemoApplication.java -> Run 'DemoApplication.main()'.
👁 Run ApplicationShortcut: Ctrl + Shift + F10 (Windows/Linux).
Method 2: Click the green Run icon in the toolbar.
👁 Right click then RunAfter successfully running the application, you can see the console as shown in the below image. Your Tomcat server started on port 8080.
👁 Application StartedThe default port of the Tomcat server is 8080.
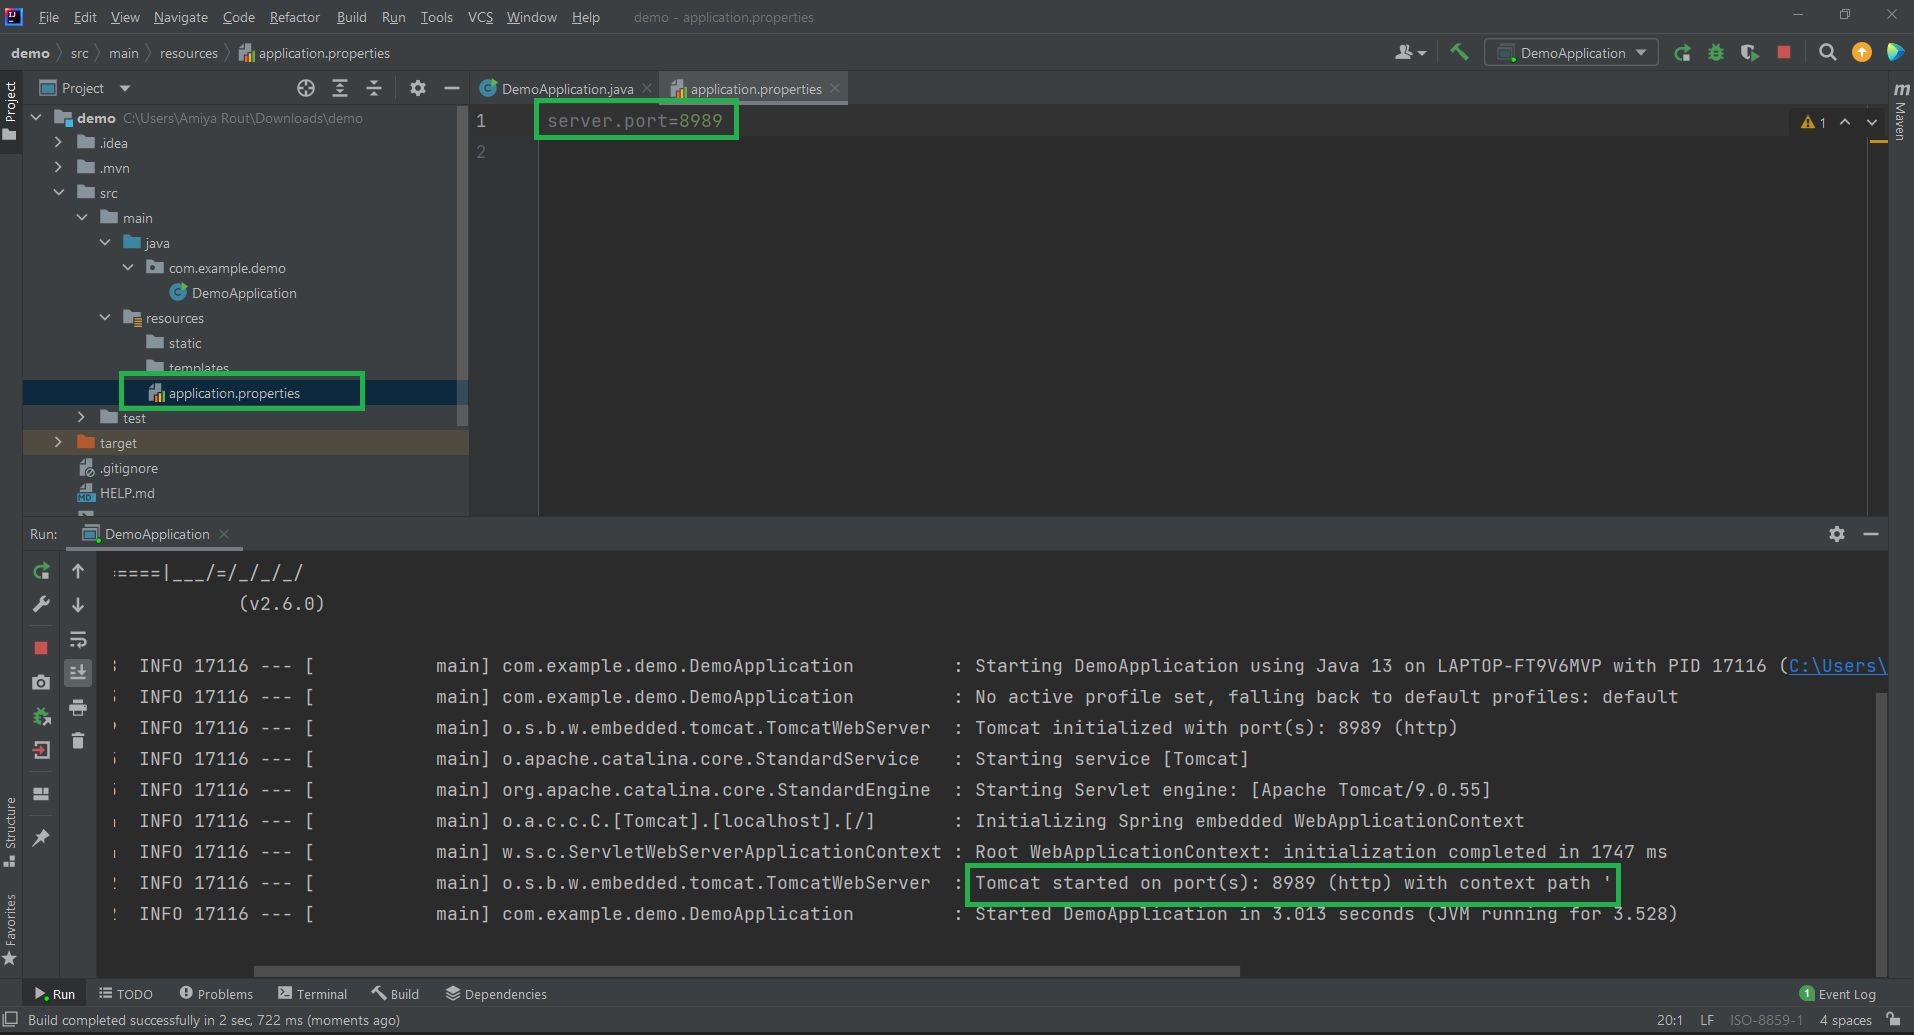
Open the application.properties file and add:
server.port=8989
Re-run the application. Now access the application using:
👁 application.propertieshttp://localhost:8989/hello
Spring Tool Suite (STS) is an IDE built specifically for Spring development, based on Eclipse.
Prerequisite: How to Download and Install Spring Tool Suite.
After successfully creating or importing the spring boot project a file name Application.java (Here DemoApplication) will be created automatically and this is your entry point. You can consider it as the main method of a Spring Boot application.
👁 Main ClassAfter successfully running the application, you can see the console where the Tomcat server starts on default port number 8080 as shown in the below image. By default, STS starts on port 8080.
👁 Application StartedOpen application.properties and add:
server.port=8989
Now re-run the application again and you can see Your Tomcat server started on the port that you have given like the below image.
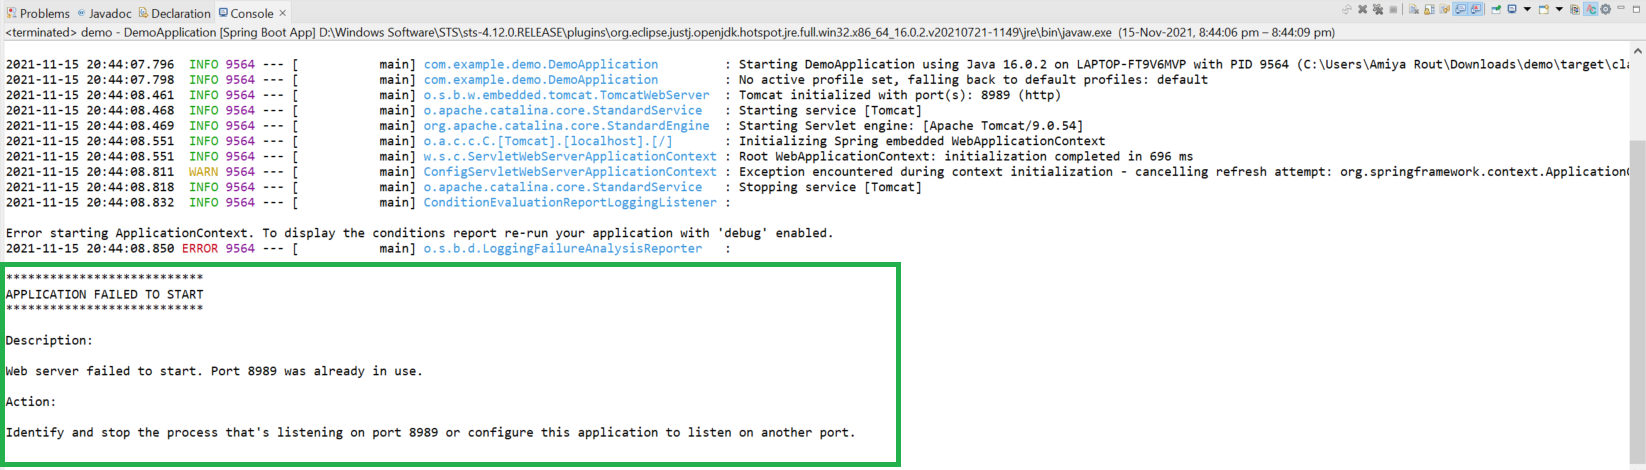
👁 Tomcat Server StartedIf you are encountered with the following error then it is highly recommended that you should change your port number.
👁 Change Port Number