 |
VOOZH | about |
|
VOOZH | about |
How to Make a Discord Server - Quick Steps
- Open Discord and log in to your account
- Click on the "+" icon on the left sidebar
- Select "Create My Own" or choose a template
- Enter your server name and upload an icon if desired
- Click "Create" to finish.
Creating a Discord server is an excellent way to build a community, collaborate with friends, or organize groups around shared interests. Whether you're a gamer wanting a space to connect with teammates, a business professional creating a collaborative hub, or simply someone looking to engage with like-minded people, setting up your own Discord server offers the flexibility to tailor channels, roles, and rules to fit your needs.
Imagine having a place where everyone can voice chat, share files, and chat seamlessly—all in one hub. This guide will walk you through the step-by-step process of creating, customizing, and managing your Discord server, helping you build a welcoming and interactive environment for your community. Explore the guide to discover how you can make your server stand out and foster meaningful connections.
Table of Content
Discord is a communication platform designed for creating communities, allowing users to connect via text, voice, and video. Originally popularized among gamers for coordinating gameplay, Discord has grown into a universal space used by people worldwide, including professionals, educators, amateurs, and more. Users can create or join servers—customizable spaces with different channels for chatting, sharing files, or voice communication.
Discord’s features like voice channels, private messaging, integrations with other apps, and custom roles make it ideal for growing connections and building vibrant communities. Whether you’re looking to game, work, or simply hang out, Discord offers a dynamic way to connect and collaborate.
Discord servers are dedicated spaces within the Discord platform where users can gather, communicate, and collaborate around specific interests or communities. Each server acts as its own mini-community, complete with customizable channels for text, voice, video chats, file sharing, and more. Servers are often created for a variety of purposes, such as gaming groups, study communities, work projects, fan clubs, or social hubs.
Within a Discord server, you can organize content through different channels (like general chat, announcements, or topic-specific threads) and control access using roles and permissions for different members. Whether for casual conversations, serious projects, or specialized discussions, Discord servers offer a flexible and interactive space for building connections and managing communities.
To create a Discord server on Laptop follow the steps given below:
To launch the Discord application on your desktop, locate the Discord icon and give it a click or you can simply access Discord directly through any web browser on your desktop.
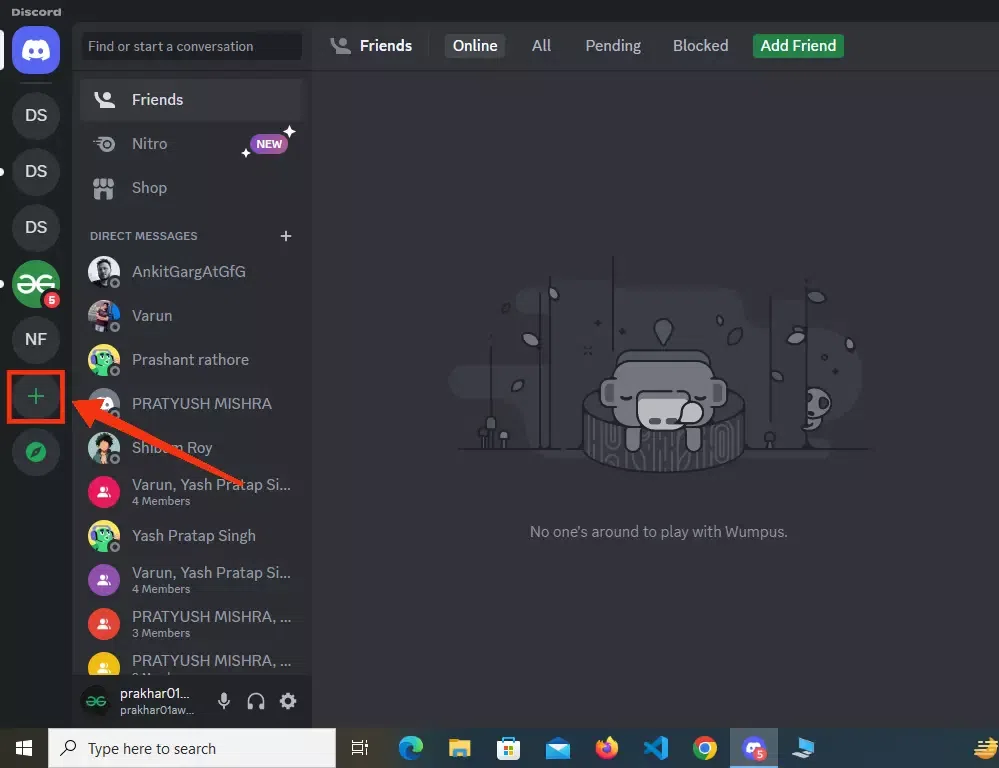
After launching the Discord app on your desktop navigate to your home page and click on the "+" icon present at the bottom of the server list.
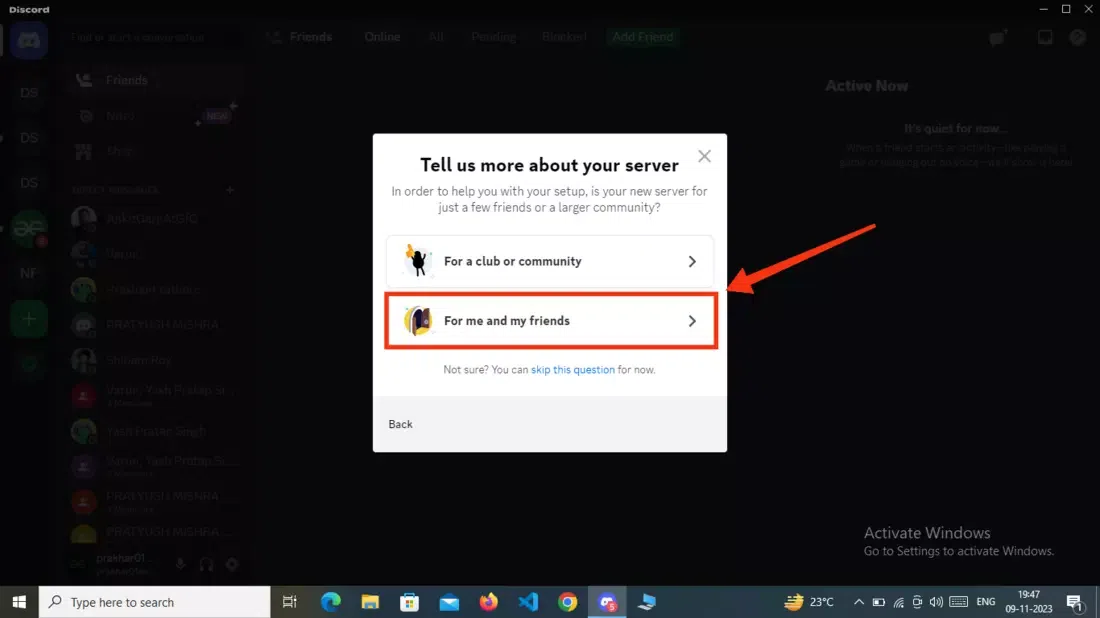
In this step you have to select for whom you are created the server so select the "Create My Own" button to continue and you can also go with the templates available.
Now select the "For me and my Friends" button to continue with a server creation.
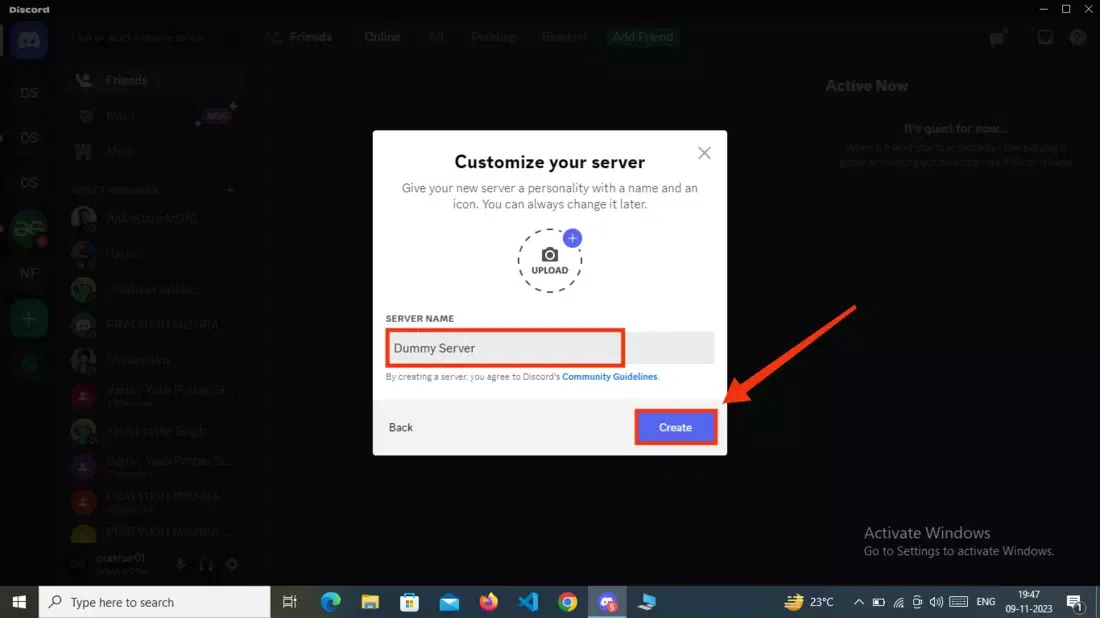
Now you have to give your server a name and you can also upload a profile picture in this step. After giving your server a name and uploading a profile picture click on the "Create" button to move towards the next step.
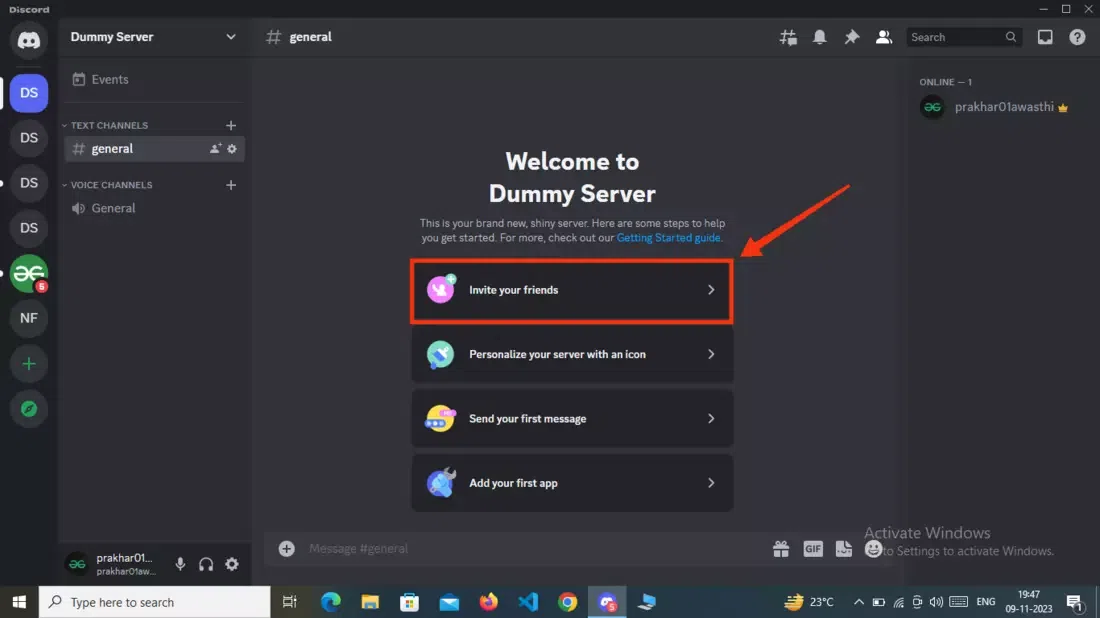
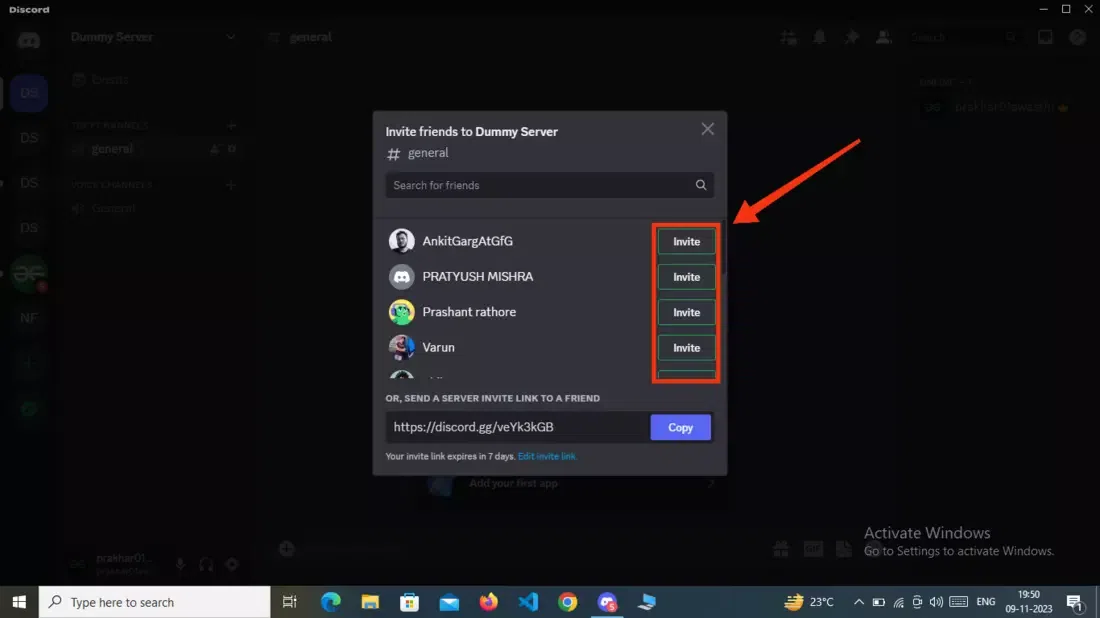
Now your discord server has been created and next you can invite your friends to your server to do so click on the "Invite Friends" button and send the invitation to them, you can also copy the link and can share with your friends.
Click on the Invite button located next to your friend's name to send them invitation of the server.
Creating a Discord server on mobile is quick and easy. Follow these steps to set up your Discord server using the Discord app on Android or iOS.
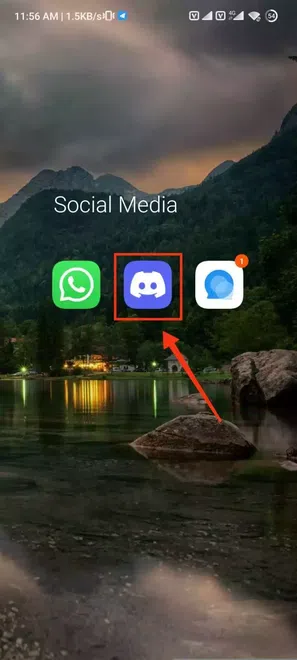
To launch the Discord app on your mobile, locate the Discord icon and give it a click.
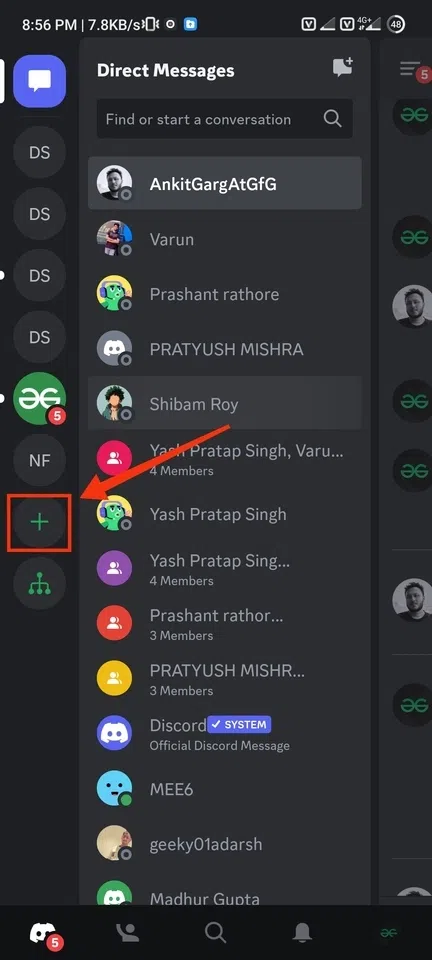
After launching the Discord app find the "+" icon present at the bottom of the server and chat list and give it a click.
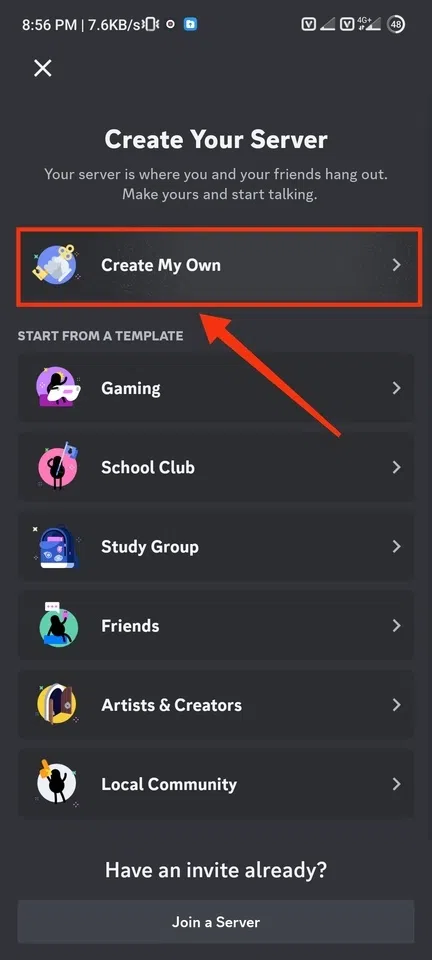
After clicking on the "+" icon now select the "Create My Own" button to create a server for yourself or you can also go with the templates available which will help you a lot.
Now click on "Me and my Friends" button to specify that you are creating a server for them. After clicking on the "Me and My Friends" button you will be directed to the next step.
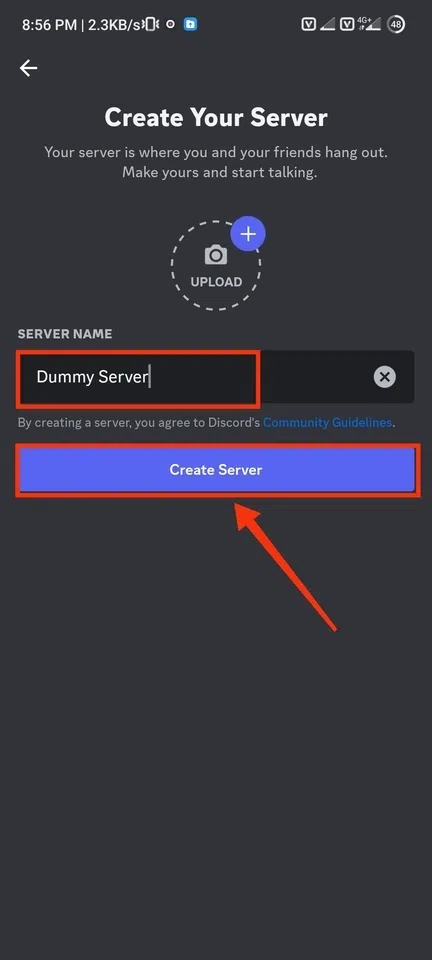
Now enter your desired server name in the text box which will reflect as a name of the server and in this step, you can also upload a profile picture for your server. So, after giving a server name and uploading a profile picture click on the "Create Server" button.
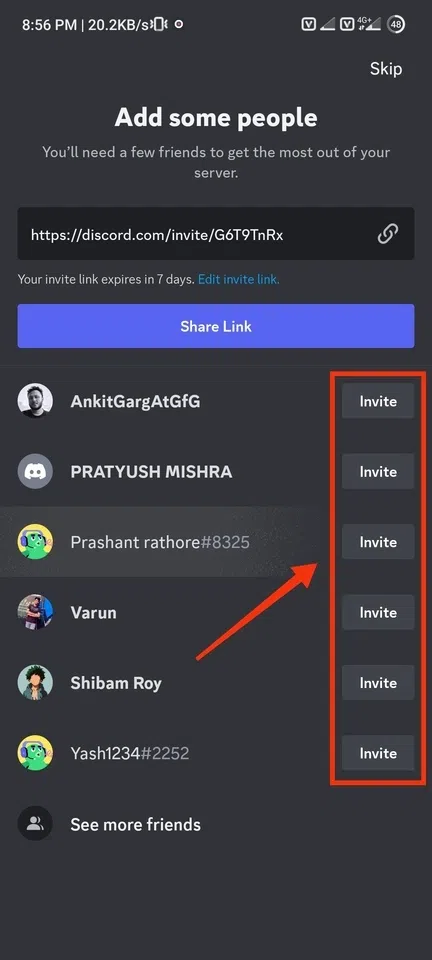
Now your discord server has been created and you can invite your friends into the server by clicking on the "Invite" button located next to their name and you can also make a discord groupchat.
Also Read
- How to create account on Discord
- How to Download Video and Image from Discord
- How to make a Discord Public
You can easily setup a Discord server by learning some tips & tricks of a Discord server:
Creating a Discord server is a simple yet powerful way to build a community, whether for gaming, business, or personal interests. By learning how to make a Discord server, you can customize channels rules, set up roles, add bots, and manage permissions to keep your server organized and engaging. If you’re setting up on desktop or mobile, this article provides all the steps you need to get your server up and running. As you grow your community, understanding how to set up a successful Discord server will help you keep your members active and involved. So dive in, start creating, and turn your server into a thriving hub that keeps your audience connected and engaged.