
The Community Enterprise Operating System (CentOS) has proudly announced the availability of first point release of CentOS 7. Derived from Red Hat Enterprise Linux 7.1, this release has been tagged as 1503 and it is available for x86 compatible x86_64 bit machines.
Major Changes
- Automatic Bug Reporting Tool (ABRT) can report bugs directly to bugs.centos.org
- Support for new Processor and Graphics.
- Logical Volume Manager (LVM) cache fully supported.
- Ceph block devices can be mounted.
- Hyper-V network driver updated
- OpenJDK-1.8.0 fully supported
- Enhanced clock stability
- Updated version of OpenSSH, docker, Network Manager and Thunderbird.
- Updated drivers for network and graphics card.
- Btrfs, OverlayFS and Cisco VIC Kernel driver added as technology preview.
For those who are new to CentOS and installing it for the first time, the may download CentOS from this link. Download DVD ISO if you are not sure what to download.
Minimum Requirements
- 1024 MB of RAM to install and use CentOS (1503).
- 1280 MB of RAM for Live CD Install.
- 1344 MB of RAM for Live GNOME or Live KDE install.
CentOS 7.1 Installation Steps
1. Once downloaded, check the sha256sum against the one provided by official site to ensure integrity of downloaded ISO.
$ sha256sum /downloaded_iso_image_path/CentOS-7-x86_64-DVD-1503.iso
2. Burn the image to a DVD or make a boot-able USB stick. If you interested in knowing how to make a boot-able USB stick you may like to refer to Unetbootin tool.
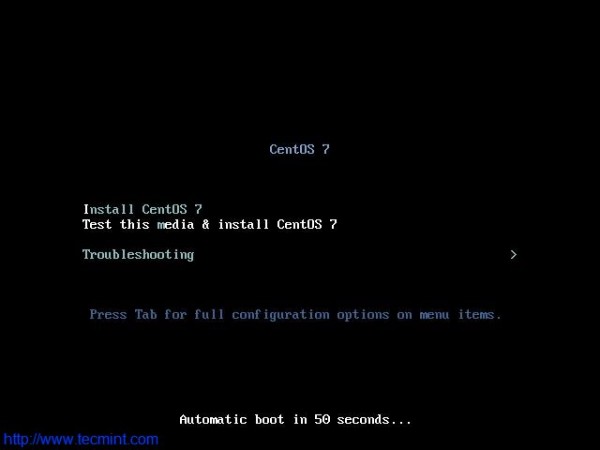
3. Select the device to boot from, in your BIOS option. As soon as CentOS 7.1 (1503) boots, select Install Centos 7.
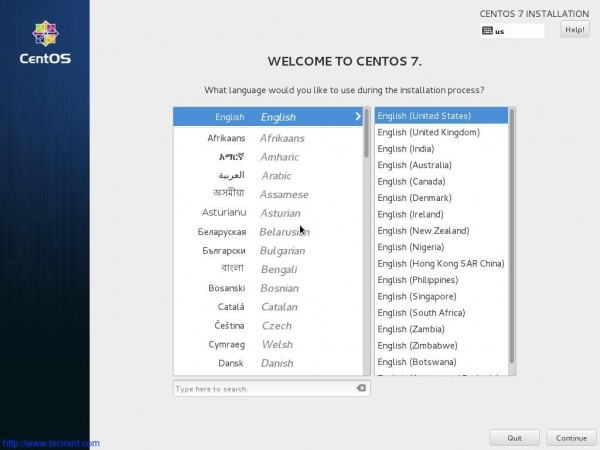
4. Select the desired Language for the installation process.
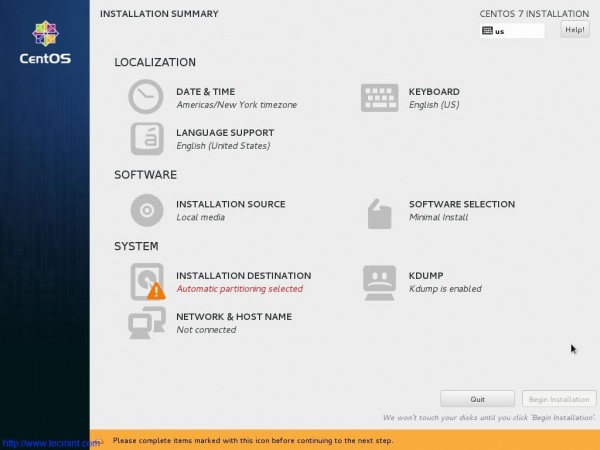
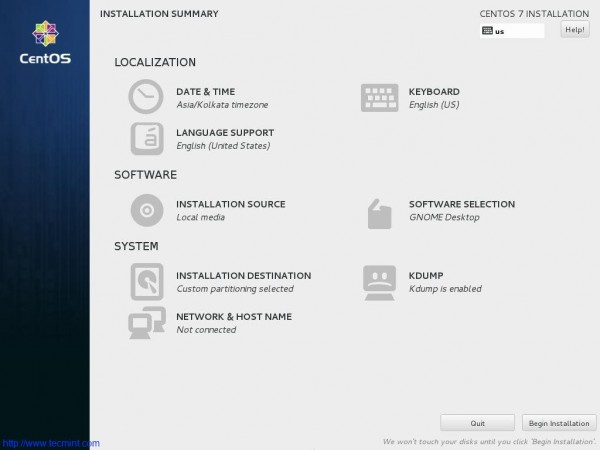
5. The interface to configure Date, Time, Keyboard, Language, Installation Source, Software selection, Installation Destination, Kdump, Networks and Hostname.
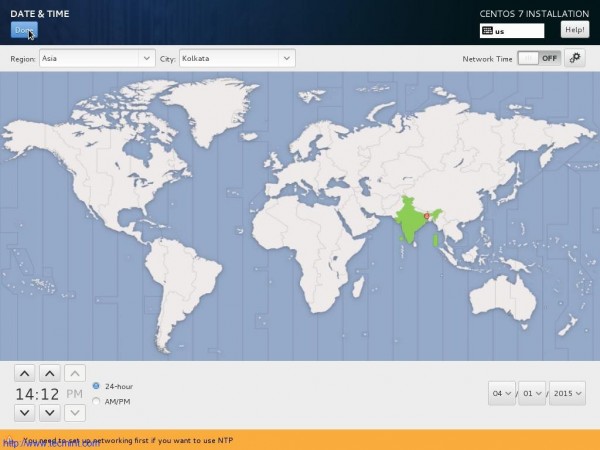
6. Set Date and Time. Click done.
7. Set Installation Source. You may include network source as well. If you are not sure of network source better stick to auto-detected Installation Media. Click Done.
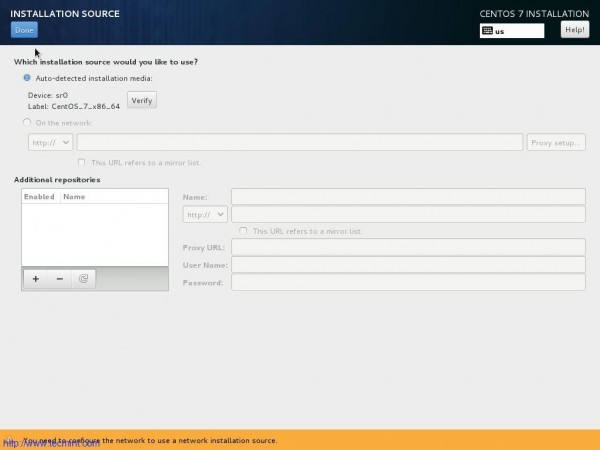
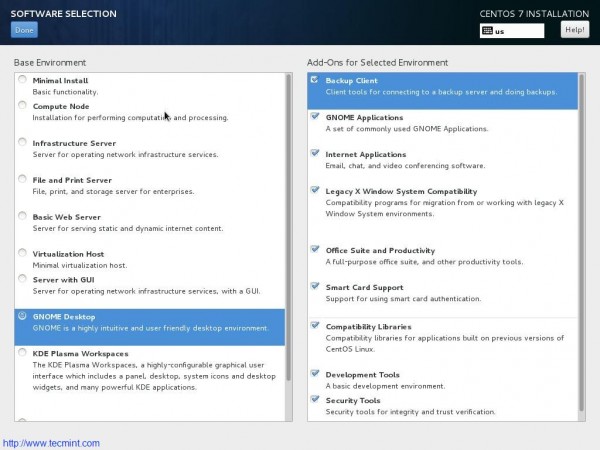
8. Next select Software selection. If you are setting up production server, You should go with Minimal Install.
Minimal Install will install just the basic software and services required for basic setup and nothing extra. This way you can configure your server and packages, more on a monolithic side. (I am selecting Gnome Desktop, since I will be using GUI and I will not be using it in production).
9. Next is Installation Destination. Select disk and Choose “I will configure Partitioning”. You may encrypt your data with paraphrase for additional security. Click done.
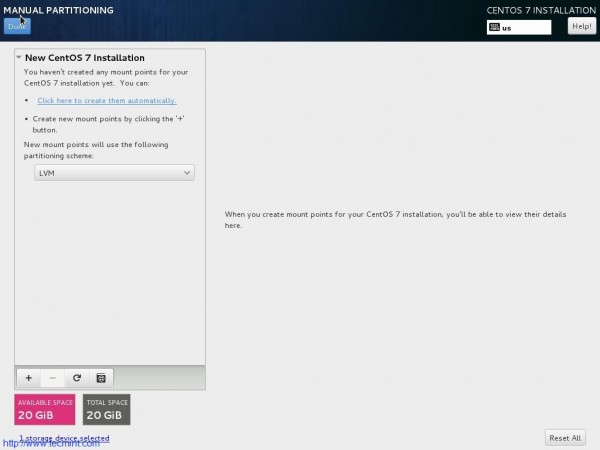
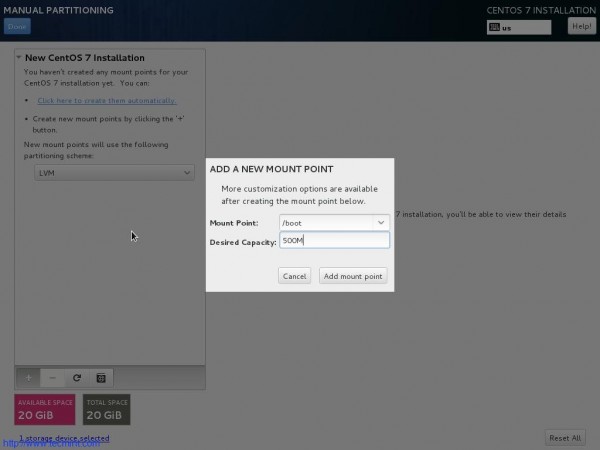
10. Time to partition Manually. Select LVM in Partitioning Scheme.
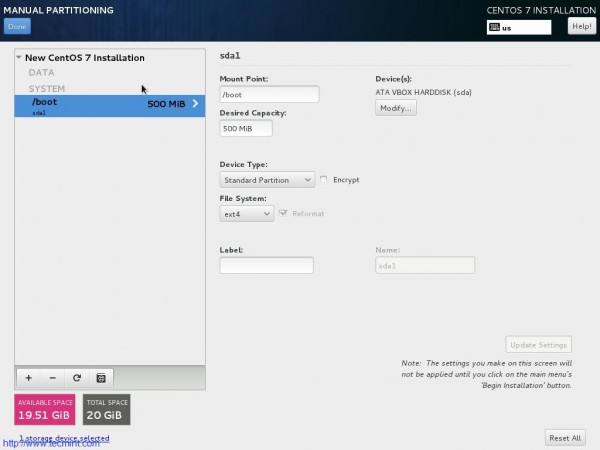
11. Add a new Mount Point (/boot) by clicking on + also enter Desired Capacity. Finally Click “Add Mount Point”.
12. From the resulting interface change file system to ext4 and click “Update Settings”.
13. Click on + and add another Mount Point (/). Enter Desired Capacity and Click “Add Mount Point”.
14. Again, from the resulting interface select ‘ext4‘ as file System and Click “Update Settings”.
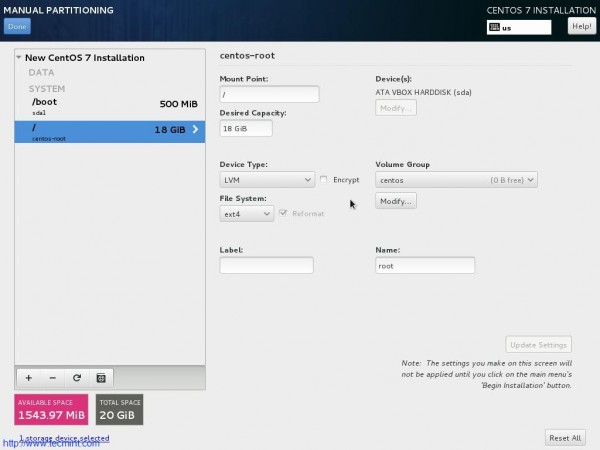
15. Again Click on + icon and add another mount point (swap). Enter Desired capacity and click “Add Mount Point”.
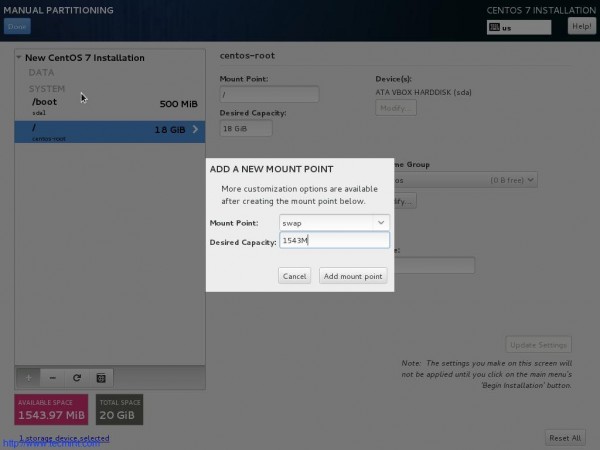
16. Finally “Accept Changes” when prompted for disk format and create.
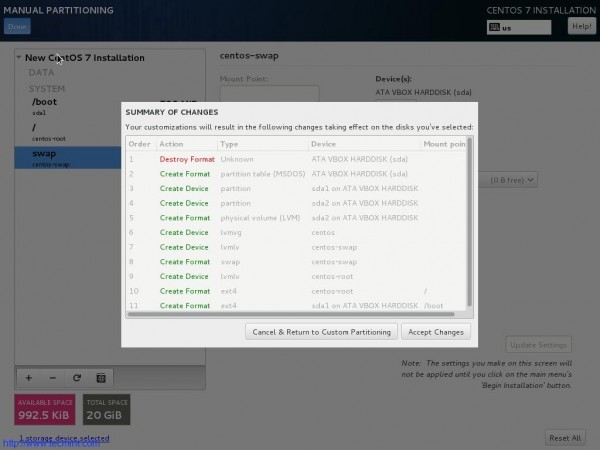
17. Back to the Installation Summary Interface. Now everything seems at its place. Click “Begin Installation”.
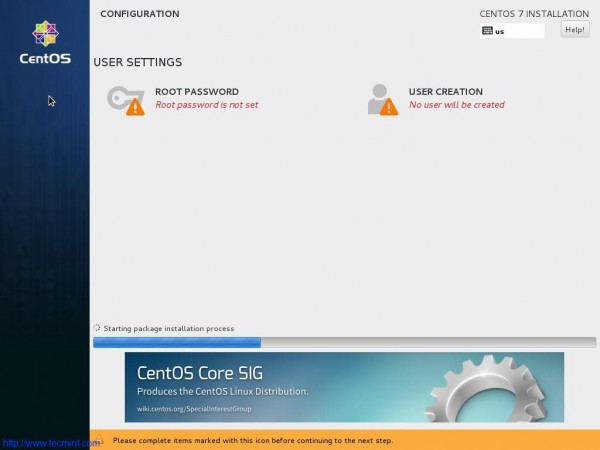
18. Now packages will start installing. Time to set Root Password and create a new user.
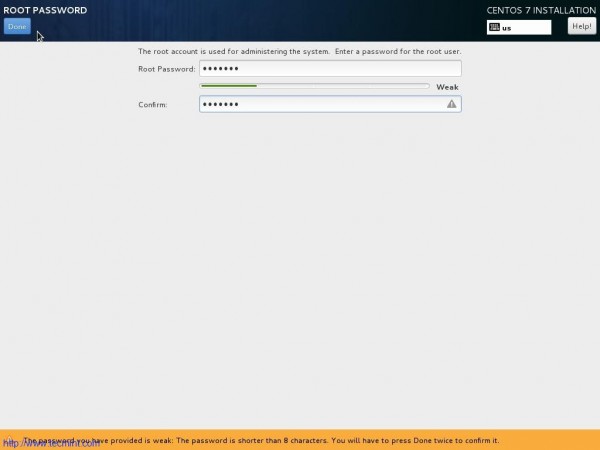
19. Enter Root password and click done.
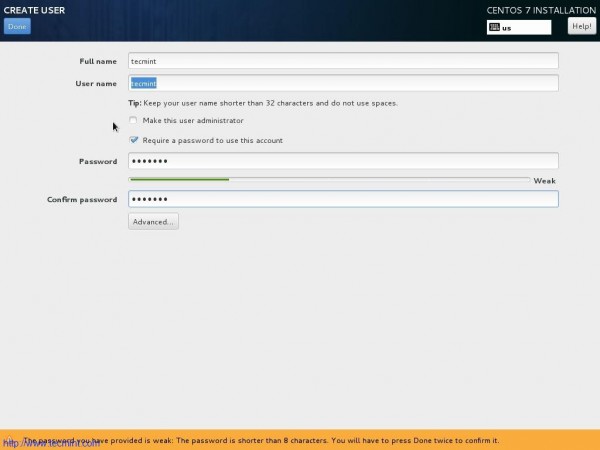
20. Create a new user. Provide name, user_name and password. Click Done.
21. Complete!!! Time to reboot the machine.
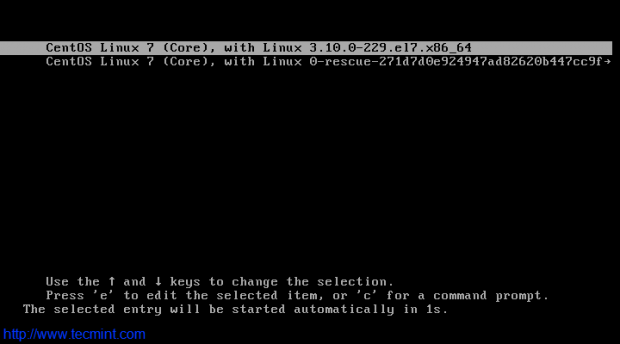
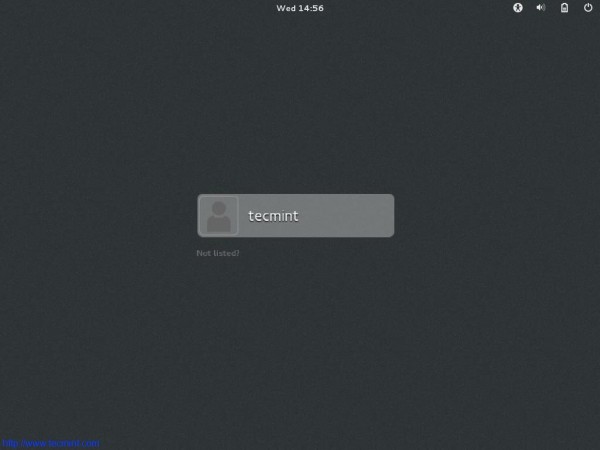
22. After Successful Installation, here is the boot prompt and login screen.
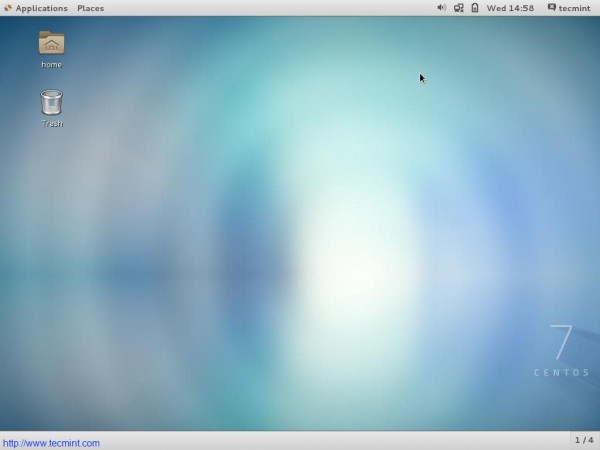
23. The first Impression – Interface After successful login.
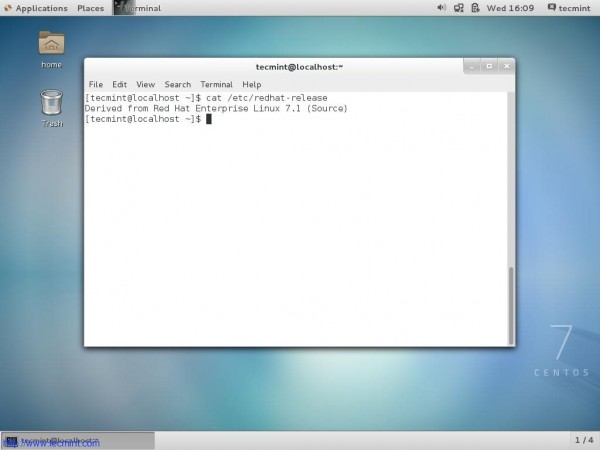
24. Check the release information.
For those who are not new to CentOS and have installed and using a previous version of CentOS can update it to latest point Release CentOS 7.1 (1503).
Upgrade CentOS 7.0 to CentOS 7.1
1. Make sure you have backup of everything. So that is anything goes bad you can just restore.
2. Have a stable Internet connection. You know you cant update with that ;)
3. Fire the below command.
# yum clean all && yum update
OR
# yum -y upgrade
Note: Using ‘-y‘ option with Yum is discouraged. You must review the changes that are going to take place in your system.
Conclusion
CentOS is so popular and so widely used as Sever Operating System. CentOS is a very stable, manageable, Predictable and reproducible derivative of Commercial RHEL. Available for free (as in terms of free in beer as well as free in speech) and a wonderful community support makes it very suited for Server platforms and General use. Nothing needs to be said after that and anything said past it is just a gossip.
That’s all for now. I’ll be here again with another interesting article. Till then stay tuned and connected to Tecmint. Don’t Forget to provide us with your valuable feedback in the comments below. Like and share us and help us get spread.
If this article helped you solve a problem, consider buying a coffee. It helps keep TecMint free, supports the authors, and keeps the project going.
Got Something to Say? Join the Discussion... Cancel reply