 |
VOOZH | about |
|
VOOZH | about |
This article was published as a part of the Data Science Blogathon.
In this article, we will be working to develop an application that will help in the image-segmentation. It is very easy to use this application, on the first window with mouse drag we will select a part of the picture, and then on the other window, we will be able to see that part of the image only i.e. image segmentation.
So, let’s get started!
Firstly we will import all the libraries.
Python Code:
The following function will draw the bounding box in real-time on the image. First, let’s check what kind of parameters it has.
def draw_bounding_box(click, x, y, flag_param, parameters):
 global x_pt, y_pt, drawing, top_left_point, bottom_right_point, original_image

 if click == cv2.EVENT_LBUTTONDOWN:
 drawing = True
 x_pt, y_pt = x, y

 elif click == cv2.EVENT_MOUSEMOVE:
 if drawing:
 top_left_point, bottom_right_point = (x_pt,y_pt), (x,y)
 image[y_pt:y, x_pt:x] = 255 - original_image[y_pt:y, x_pt:x]
 cv2.rectangle(image, top_left_point, bottom_right_point, (0,255,0), 2)

 elif click == cv2.EVENT_LBUTTONUP:
 drawing = False
 top_left_point, bottom_right_point = (x_pt,y_pt), (x,y)
 image[y_pt:y, x_pt:x] = 255 - image[y_pt:y, x_pt:x]
 cv2.rectangle(image, top_left_point, bottom_right_point, (0,255,0), 2)
 bounding_box = (x_pt, y_pt, x-x_pt, y-y_pt)

grabcut_algorithm(original_image, bounding_box)cv2.rectangle function to draw the bounding box.Grab algorithm function – which we will discuss later.Image Source: OpenCV documentation
What is the Grabcut algorithm in OpenCV?
A few things may get clear with the name itself i.e. The user will be grabbing the particular part of the image and cut it down by making the bounding box around that part this is not the only thing that the Grabcut algorithm performs there is also some technicalities behind this, This algorithm keeps the note of colour attribution of that object by using the Gaussian model.
This function will take only 2 parameters:
draw_bounding_box the function which was holding the values of top-left and bottom-right.def grabcut_algorithm(original_image, bounding_box):
segment = np.zeros(original_image.shape[:2],np.uint8)
x,y,width,height = bounding_box
segment[y:y+height, x:x+width] = 1
background_mdl = np.zeros((1,65), np.float64)
foreground_mdl = np.zeros((1,65), np.float64)
cv2.grabCut(original_image, segment, bounding_box, background_mdl, foreground_mdl, 5,
cv2.GC_INIT_WITH_RECT)
new_mask = np.where((segment==2)|(segment==0),0,1).astype('uint8')
original_image = original_image*new_mask[:,:,np.newaxis]
cv2.imshow('Result', original_image)cv.grabCut to perform our main work and it will take all the valid parameters like the main image, segmented variable, both foreground, and background model and GC_INIT_WITH_RECT this is very important to notice as this means we are going with the rectangle segmentation and not the masking segmentation.if __name__=='__main__':
drawing = False
top_left_point, bottom_right_point = (-1,-1), (-1,-1)
original_image = cv2.imread("robert.jpg")
original_image = cv2.resize( original_image ,(500,500))
image = original_image.copy()
cv2.namedWindow('Frame')
cv2.setMouseCallback('Frame', draw_bounding_box)
while True:
cv2.imshow('Frame', image)
c = cv2.waitKey(1)
if c == 27:
break
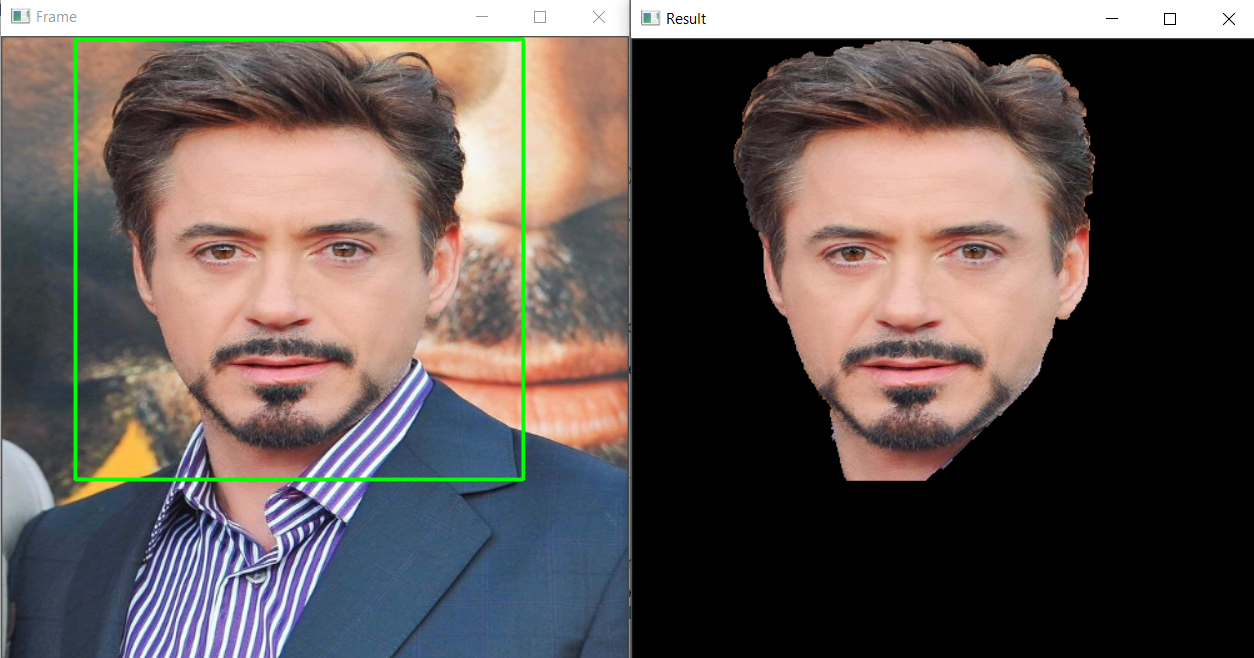
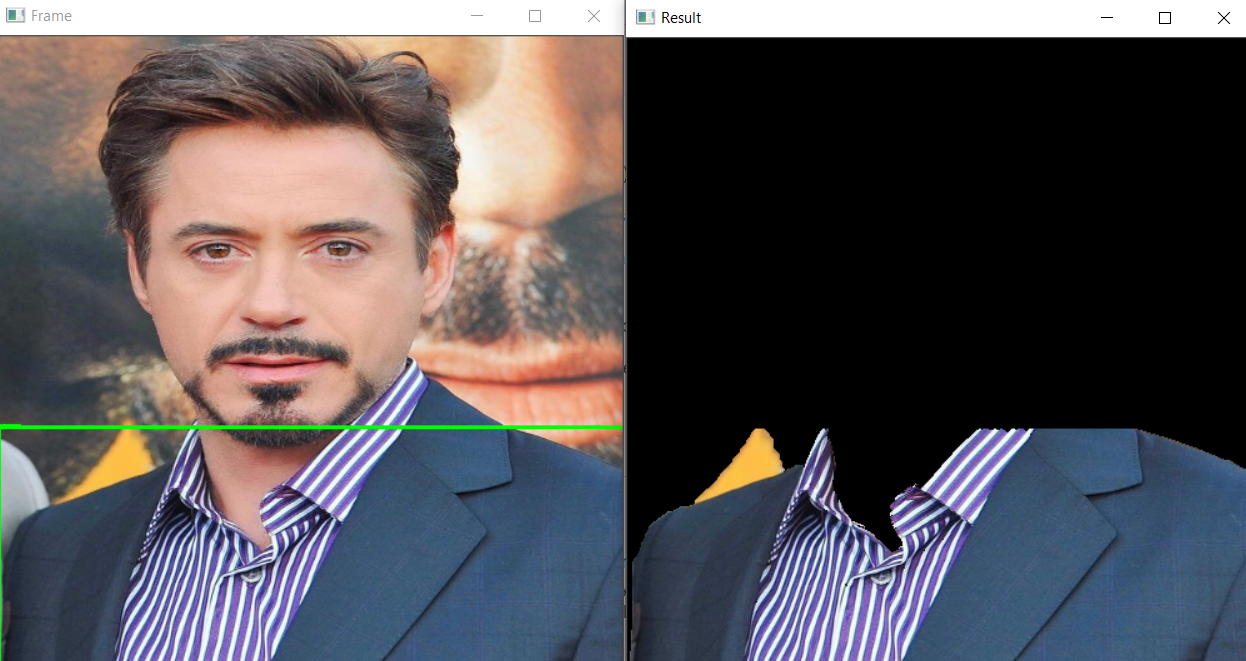
cv2.destroyAllWindows()Output:
This is the part of the code that will be executed first (name == ‘main‘)
cv2.imread()) on which we will apply all the segmentation techniques and resize the image using cv2.resize() function.cv2.namedWindow() function.draw_bounding_box the function we will use is the Callback function it will help to call the function only when the button is clicked.esc the key is pressed and the application will be closed.Here’s the repo link to this article. Hope you liked my article on Image Segmentation using OpenCV. If you have any opinions or questions, then comment below.
Read the latest articles on the AV blog.
GPT-4 vs. Llama 3.1 – Which Model is Better?
Llama-3.1-Storm-8B: The 8B LLM Powerhouse Surpa...
A Comprehensive Guide to Building Agentic RAG S...
Top 10 Machine Learning Algorithms in 2026
45 Questions to Test a Data Scientist on Basics...
90+ Python Interview Questions and Answers (202...
8 Easy Ways to Access ChatGPT for Free
Prompt Engineering: Definition, Examples, Tips ...
What is LangChain?
What is Retrieval-Augmented Generation (RAG)?
Edit
Resend OTP
Resend OTP in 45s