 |
VOOZH | about |
|
VOOZH | about |
Managing expenses efficiently is very important for personal finance. In this article, we'll walk through creating a simple yet effective Expense Tracker application using Angular 17. This project will showcase Angular's powerful features and provide a hands-on example of how to manage financial data.
First, let's set up our Angular project and install the necessary modules. Open your terminal and run the following commands:
ng new expense-tracker
cd expense-tracker
npm install tailwindcss
npm install postcss
1. Create a tailwind.config.js file in the root directory by using the following command and add the following code in the file.
npx tailwindcss initmodule.exports = {
content: ['./src/**/*.{html,ts}'],
theme: {
extend: {},
},
plugins: [],
};
2. Create a postcss.config.js(src/postcss.config.js) file in the root directory:
module.exports = {
 plugins: {
 tailwindcss: {},
 autoprefixer: {},
 },
};
3. Add TailwindCSS to your styles.css/ style.less:
@tailwind base;
@tailwind components;
@tailwind utilities;
Next, let’s initialize our project and set up the basic components:
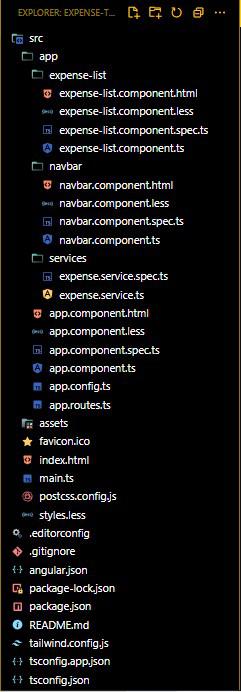
1. Create components for adding and listing expenses:
ng generate component expense-list
ng generate component navbar
2: Create a service to handle expense data. Run:
ng generate service services/expense "dependencies": {
"@angular/animations": "^17.3.0",
"@angular/common": "^17.3.0",
"@angular/compiler": "^17.3.0",
"@angular/core": "^17.3.0",
"@angular/forms": "^17.3.0",
"@angular/platform-browser": "^17.3.0",
"@angular/platform-browser-dynamic": "^17.3.0",
"@angular/router": "^17.3.0",
"postcss": "^8.4.41",
"rxjs": "~7.8.0",
"tailwindcss": "^3.4.9",
"tslib": "^2.3.0",
"zone.js": "~0.14.3"
}
Below mentioned is the App Component which is the first component which gets loaded which an Angular Application is built. It initalizes all other components in order to run them.
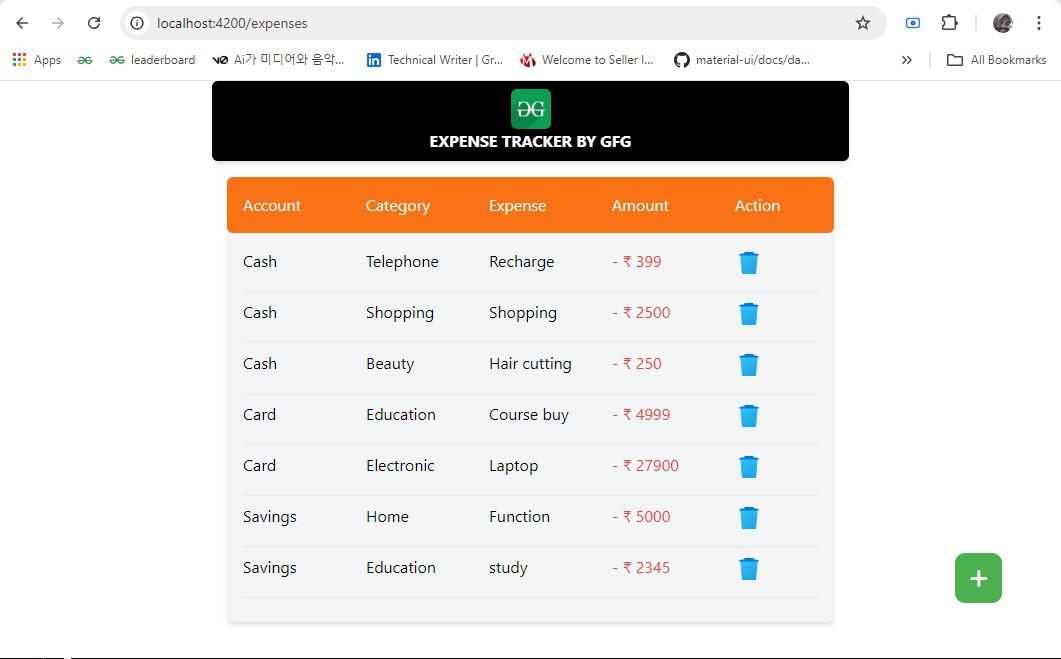
Below mentioned is the Expense-List Component through which displays the list of Expenses added by the user having Account, Category, Expense, Amount and Action as the details of the expenses.
Below mentioned is the Navbar Component through which we are demonstrating the navbar of our Expense Tracker which displays Expense Tracker by GFG as heading for the application having a white color text and Black Coloured Background.
Below mentioned is the Expenses Service through which we are demonstrating an interface named as 'Expense' through which we can add and delete expenses.
ng serve --open Open your browser and navigate to http://localhost:4200