 |
VOOZH | about |
|
VOOZH | about |
Unit testing in Angular involves testing individual components, services, pipes, or directives in isolation to ensure they behave correctly. By writing unit tests, developers can catch bugs early, make refactoring safer, and ensure that each part of the application works as intended.
Testing is an essential aspect of software development that ensures the reliability and functionality of your applications. In Angular, three key tools are commonly used for testing: Jasmine, Karma, and TestBed. Each of these tools plays a specific role in the testing process, providing developers with the means to write, execute, and manage tests effectively.
Jasmine is a popular behaviour-driven development (BDD) framework for testing JavaScript code. It provides a clean and simple syntax for writing tests, known as "specs," which are easy to read and understand. Jasmine is widely used in Angular applications due to its seamless integration and powerful features.
Key Features:
Example:
describe('MyComponent', () => {
 it('should have a defined title', () => {
 const title = component.title;
 expect(title).toBeDefined();
 });
});
Karma is a test runner developed by the Angular team. It is responsible for executing tests in real browsers, making it an essential tool for testing Angular applications in different environments. Karma is often used in conjunction with Jasmine to run tests and generate test reports.
Key Features:
Example Configuration (karma.conf.js):
module.exports = function (config) {
 config.set({
 frameworks: ['jasmine'],
 browsers: ['Chrome'],
 files: ['src/**/*.spec.js'],
 reporters: ['progress'],
 singleRun: false,
 autoWatch: true
 });
};
TestBed is a testing utility provided by Angular for configuring and initializing the environment for unit tests. It allows you to create and configure components, services, and modules in an isolated environment. TestBed is essential for testing Angular components and services with minimal setup.
Key Features:
Example:
import { TestBed } from '@angular/core/testing';
import { MyComponent } from './my-component.component';

describe('MyComponent', () => {
 beforeEach(() => {
 TestBed.configureTestingModule({
 declarations: [MyComponent]
 }).compileComponents();
 });

 it('should create the component', () => {
 const fixture = TestBed.createComponent(MyComponent);
 const component = fixture.componentInstance;
 expect(component).toBeTruthy();
 });
});
Table of Content
Syntax Example:
it('should return expected data', () => {
 const data = service.getData();
 expect(data).toEqual('Expected Data');
});
Unit testing involves testing individual units of your application in isolation, ensuring that each component, service, or pipe functions as intended. This approach is essential for catching bugs early in the development process.
Syntax Example:
it('should integrate component and service', () => {
 const fixture = TestBed.createComponent(MyComponent);
 const component = fixture.componentInstance;
 const service = TestBed.inject(MyService);
 fixture.detectChanges();

 const data = service.getData();
 expect(component.processData(data)).toBe(true);
});
Integration Testing focuses on testing the interaction between different parts of the application. Unlike unit tests, which isolate components, integration tests verify that components or services work together correctly. This approach is crucial for detecting issues that might arise when integrating various parts of the application.
Syntax Example:
describe('MyComponent TDD', () => {
 it('should initially fail', () => {
 expect(true).toBe(false);
 });

 it('should pass after implementation', () => {
 expect(true).toBe(true);
 });
});
TDD is a development methodology where tests are written before the actual code. The process involves writing a failing test, implementing the minimum code required to pass the test, and then refactoring the code to meet quality standards. This cycle ensures that code is well-tested and designed from the outset.
Syntax Example :
describe('MyComponent BDD', () => {
 it('should behave as expected', () => {
 const fixture = TestBed.createComponent(MyComponent);
 const component = fixture.componentInstance;
 component.someAction();
 expect(component.someProperty).toEqual('expected value');
 });
});
BDD extends TDD by focusing on the behavior of the application from the user’s perspective. BDD encourages writing tests in a language that closely resembles natural language, making it easier to describe and understand the expected behavior of the application.
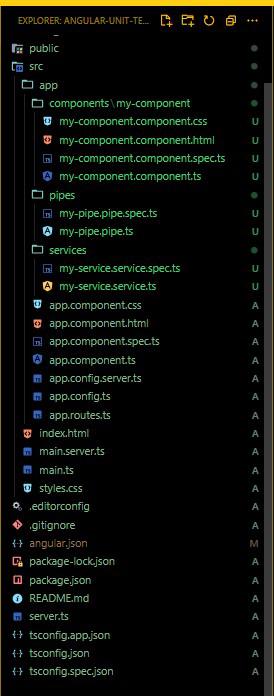
Follow these steps to create an Angular application with unit testing:
npm install -g @angular/cling new angular-unit-testing
cd angular-unit-testing
ng generate component components/my-component
ng generate service services/my-service
ng generate pipe pipes/my-pipe
"dependencies": {
 "@angular/animations": "^18.2.0",
 "@angular/common": "^18.2.0",
 "@angular/compiler": "^18.2.0",
 "@angular/core": "^18.2.0",
 "@angular/forms": "^18.2.0",
 "@angular/platform-browser": "^18.2.0",
 "@angular/platform-browser-dynamic": "^18.2.0",
 "@angular/platform-server": "^18.2.0",
 "@angular/router": "^18.2.0",
 "@angular/ssr": "^18.2.0",
 "express": "^4.18.2",
 "rxjs": "~7.8.0",
 "tslib": "^2.3.0",
 "zone.js": "~0.14.10"
}
Example
1. Testing Components
This is where you write unit tests for your Angular component. The file is automatically generated when you create a new component using Angular CLI. Replace or add the following code:
In this example, we test that the component is created successfully and that it displays the correct title.
2. Testing Services
This is where you write unit tests for your Angular service. When you generate a service using Angular CLI, the .spec.ts file is automatically created. Replace or add the following code:
3. Testing Pipes
This is where you write unit tests for your Angularpipe. When you generate a pipe using Angular CLI, the .spec.ts file is created automatically. Replace or add the following code:
To start the test run the following command.
ng test