 |
VOOZH | about |
|
VOOZH | about |
In Angular applications, it is often necessary to protect certain routes to prevent unauthorized access. The Angular Router provides a feature called Route Guards, which allows you to control access to routes based on specific conditions. One of the commonly used Route Guards is AuthGuard, which checks if the user is authenticated before allowing access to a particular route. In this article, we will explore how to set up and use the AuthGuard in an Angular 17 application.
CanActivate interface to control access to routes based on user authentication.canActivate property of the route definition.Step 1: Create an angular application
Once you have the prerequisites, you can use the below commands to create an angular application.
ng new auth-gaurds
cd auth-gaurds
Step 2: Create routes to protect
Before we create and implement the auth guard, first we need to make some components we need to protect. We will create two components auth and dashboard,
ng g c auth
ng g c dashboard
We will create a simple auth service file so it will be easy to manage auth state in our application. Also we will update our app.router.ts and app, auth and dashboard components to have a basic skeleton of a real world application.
Step 3: Create Auth Service:
We can use the below command to create the service file using angular cli.
ng g s authFolder Structure:
👁 Screenshot-2024-04-17-192026
Dependencies:
"dependencies": {
 "@angular/animations": "^17.2.0",
 "@angular/common": "^17.2.0",
 "@angular/compiler": "^17.2.0",
 "@angular/core": "^17.2.0",
 "@angular/forms": "^17.2.0",
 "@angular/platform-browser": "^17.2.0",
 "@angular/platform-browser-dynamic": "^17.2.0",
 "@angular/router": "^17.2.0",
 "rxjs": "~7.8.0",
 "tslib": "^2.3.0",
 "zone.js": "~0.14.3"
 }
Example: This example demonsrates Angular routes.
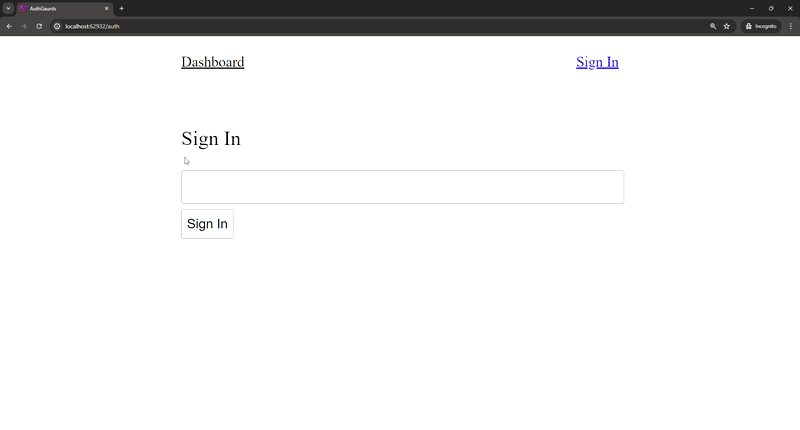
Once you have made this changes, you should have a simple working application as shown below.
Step 4: Protecting dashboard route
Notice that when we are not signed in and we try to click the dashboard nav anchor, we can still see the dashboard component. Well, we will need to create an auth guard in order to protect it.
Before we create the file let us see types of auth guard available in angular.
We will of course create a CanActivate guard in order to protect the dashboard route.
ng g g authYou will be prompted to select type for the guard, you can select CanActivate here.
Step 5: Implementing the auth gaurd
Now we need to use the guard we created, for this we can update our app.router.ts as below
Once we have added authGuard to canActivate property, we can see that we can no longer visit the dashboard route when we aren't signed in.