 |
VOOZH | about |
|
VOOZH | about |
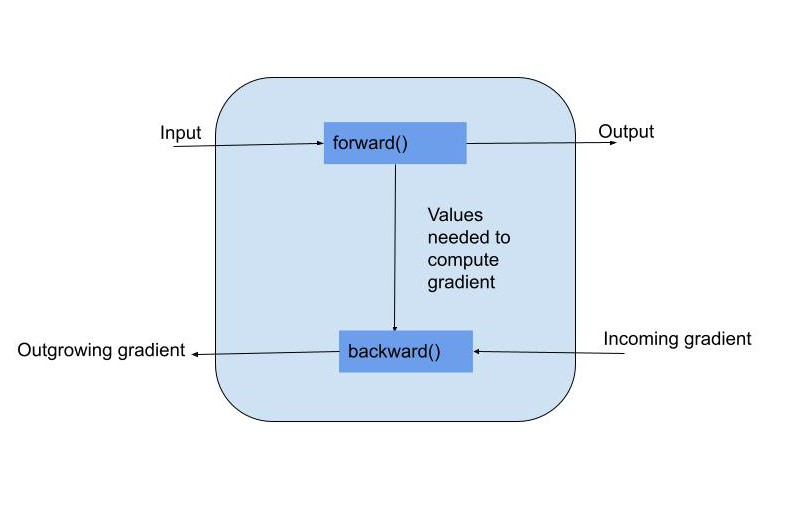
Autograd is PyTorch’s automatic differentiation engine. It allows you to compute gradients automatically by tracking operations on tensors. Training machine learning models involves iteratively updating their parameters to minimize a loss function. While high-level APIs like PyTorch’s nn.Module and torch.optim offer abstractions to simplify this, there are times especially for research, education, or fine control where building a custom training loop using Autograd becomes beneficial.
Basic Building Blocks: To build a custom training loop from scratch using PyTorch and Autograd, you’ll typically need: Dataset, Model, Loss function, Optimizer and Training loop with forward and backward passes.
We’ll build a simple regression model on a synthetic dataset:
Here, we are building a synthetic dataset with 500 samples, 10 features and 500 targets. Further, we are Creating a Data Loader as a Dataset.
Instead of using nn.Module, we define parameters directly:
Here, Mean Squared Error (MSE) is used to calculate the average of squared differences between predicted and actual values, penalizing larger errors more heavily. The optimizer updates the model to minimize the loss during training
The code iterates over a fixed number of epochs, using mini-batch training. In each iteration, model predictions are made and the loss between predicted and actual outputs is computed. Gradients are reset, computed and Weights are updated using an optimizer to minimize loss.
The total loss for each epoch is calculated by summing batch losses and averaging over the number of batches. This gives a stable view of the model’s performance across an epoch.
Output
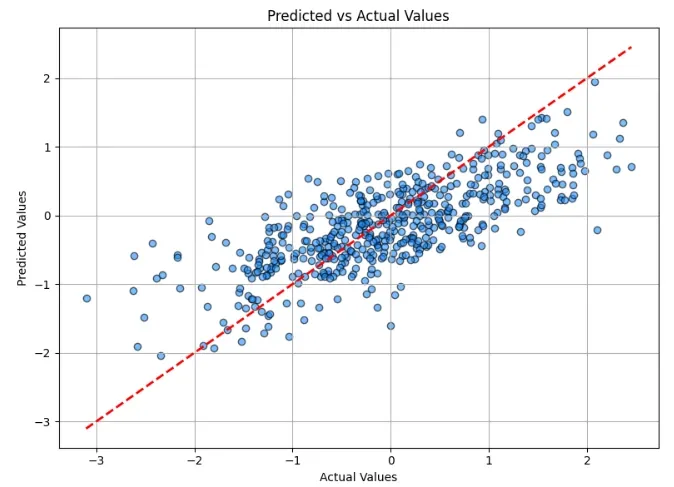
In the above plot, we can analyze the actual vs predicted values for data points. We can further work on fine-tuning the code and optimizing the training results obtained.
You can download the source code from .
Building a custom training loop with Autograd in PyTorch is a rewarding experience that deepens your understanding of neural networks. It helps demystify what goes on under the hood during training, builds intuition for gradient descent and gives you the power to explore novel ideas beyond existing APIs.