VOOZH about

URL: https://www.geeksforgeeks.org/c-sharp/timeline-and-cinemachine-in-unity/

⇱ Timeline and Cinemachine In Unity - GeeksforGeeks


  • Courses
  • Tutorials
  • Interview Prep

Timeline and Cinemachine In Unity

Last Updated : 4 May, 2026

Timeline is a Visual tool for creating cutscenes, animations, and sequences. You drag and drop clips on a timeline. Cinemachine is a Smart camera system. Cameras can follow players, switch between angles, and create smooth movements.

Installing Cinemachine

  • Window -> Package Manager.
  • Search "Cinemachine" -> Install.

Timeline comes built-in with Unity.

👁 Installing-Cinemachine-In-Unity
Installing Cinemachine In Unity

Cinemachine Basic Follow Camera

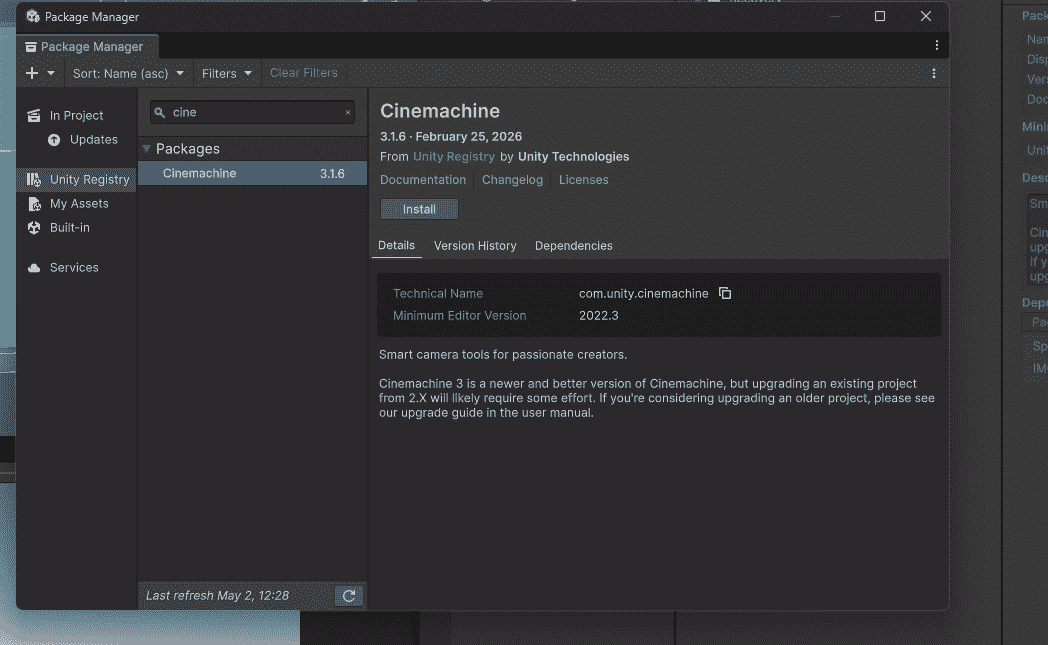
Step 1: Cinemachine - Create Virtual Camera.

Step 2: Select virtual camera - In Inspector:

  • Follow: Drag your player.
  • Look At: Drag your player.

Step 3: Adjust Body settings (how camera follows):

  • Binding Mode: Lock to Target (world space)
  • Follow Offset: Distance from player (ex: 0, 2, -5)

Step 4: Adjust Aim settings (where camera looks): Dead Zone – Small movement without camera moving

Step 5: Disable Main Camera (Cinemachine takes over) - Press Play. Camera follows player smoothly.

👁 Cinemachine-Basic-Follow-Camera-In-Unity
Cinemachine Basic Follow Camera In Unity

Cinemachine Camera Shake (Impulse)

Add shake for explosions or hits.

Add Cinemachine Impulse Source component to camera. Call ShakeCamera() when needed.

Timeline – Creating a Cutscene

  • Window -> Sequencing -> Timeline.
  • Select a GameObject in Hierarchy -> Click "Create" in Timeline window.
  • Name and save the Timeline asset.

Adding Animation to Timeline

  • Add track -> Animation Track.
  • Drag your character into the track (assigns as binding).
  • Right-click track -> Add Animation Clip.
  • Record animation or drag existing clip.

Adding Camera Movement to Timeline

  • Add track -> Cinemachine Track
  • Drag your Cinemachine camera into track
  • Right-click -> Add Cinemachine Shot Clip
  • Another camera -> Add another clip –> camera switches automatically

Adding Audio to Timeline

  • Add track -> Audio Track.
  • Drag GameObject with Audio Source or add audio clip directly.
  • Right-click -> Add Audio Clip -> Select your sound.

Playing Timeline from Script

Example:

PlayableDirector controls the Timeline. Play() starts the cutscene.

Complete Example: Door Opening Cutscene

  • Camera 1: Wide shot showing character approaching door.
  • Camera 2: Close up of door opening.
  • Character Animation: Walking to door.
  • Door Animation: Swinging open.
  • Audio: Door creak sound.

Timeline setup:

  • Cinemachine Track with 2 shots (Camera 1 - Camera 2).
  • Animation Track (Character walking).
  • Animation Track (Door opening).
  • Audio Track (Door sound).

Cinemachine Basic Cameras

  • Virtual Camera: Follow player, cutscene shots.
  • Free Look Camera: Orbit around player (RPG style).
  • Group Camera: Follow multiple targets (racing games).

Timeline Tracks

  • Animation Track: Controls character animations.
  • Audio Track: Handles music and sound effects.
  • Cinemachine Track: Manages camera shots and transitions.
  • Activation Track: Enables/disables GameObjects.
  • Signal Track: Triggers events (calls functions).

Cinemachine vs Manual Camera Code

CinemachineManual Camera Code
No coding neededMust write movement logic
Built-in smooth followNeed to implement Lerp
Easy camera switchingComplex state machine
Impulse shake readyManual shake code required
Comment
Article Tags:
Article Tags:

Explore