 |
VOOZH | about |
|
VOOZH | about |
Practical Geometry is a crucial aspect of mathematics introduced in Class 8. Chapter 4 of the NCERT textbook delves into the various geometric constructions and principles that are essential for understanding the spatial properties of shapes. Exercise 4.5 specifically focuses on applying these principles to solve problems related to practical geometry. This exercise is important as it helps students master geometric constructions enhancing their spatial reasoning and problem-solving skills.
The Practical Geometry involves the drawing and construction of the geometric figures based on the given conditions. It is a vital skill in understanding shapes, sizes, and their properties. In Class 8, this chapter introduces students to the basic geometric constructions using tools like a compass, ruler, and protractor. Exercise 4.5 challenges students to apply these techniques to solve specific problems reinforcing their understanding of the geometric concepts and precision in drawing.
Steps of construction:
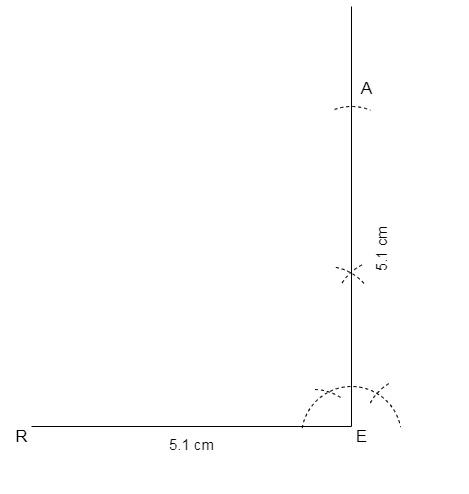
Step 1: Draw one side of the square RE = 5.1 cm.
Step 2: From E draw an angle of 90°.
Step 3: From E cut EA of 5.1 cm.
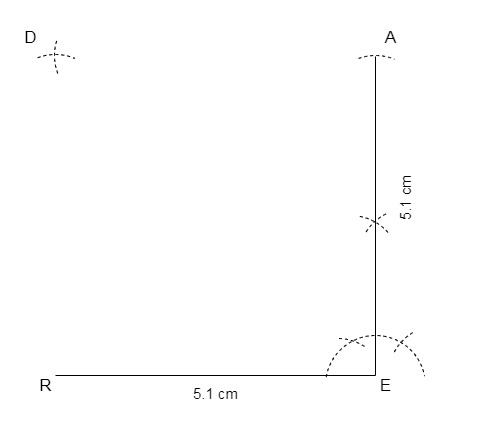
👁 ImageStep 4: Now draw an arc of 5.1 cm from both A and R, intersect them and mark the intersection point as D.
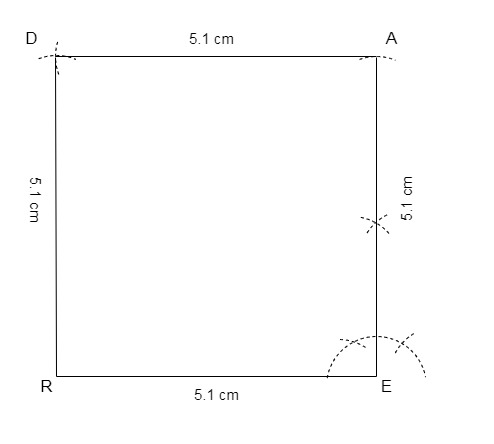
👁 ImageStep 5: Join RD and ED.
👁 ImageThus, we have the required square READ.
Steps of construction:
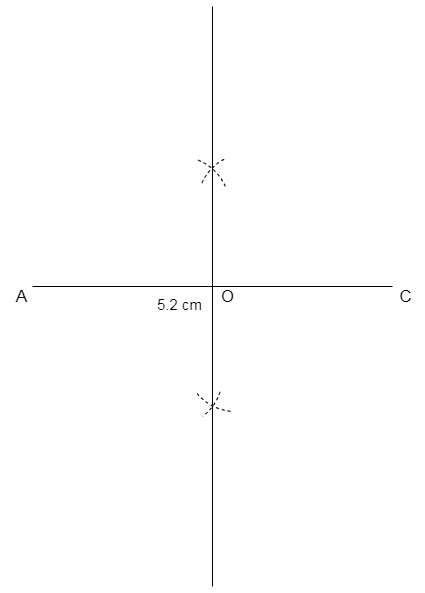
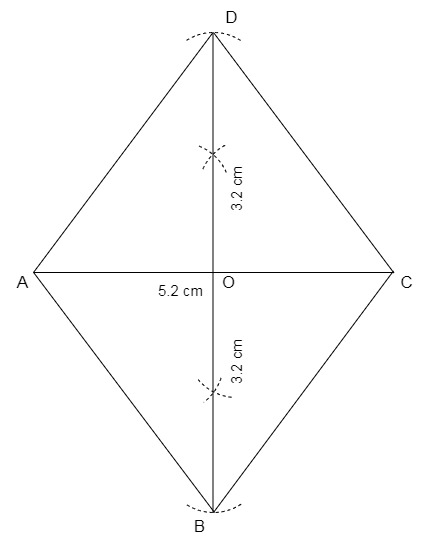
Let the rhombus be ABCD with diagonals, AC = 5.2 cm and BD = 6.4 cm.
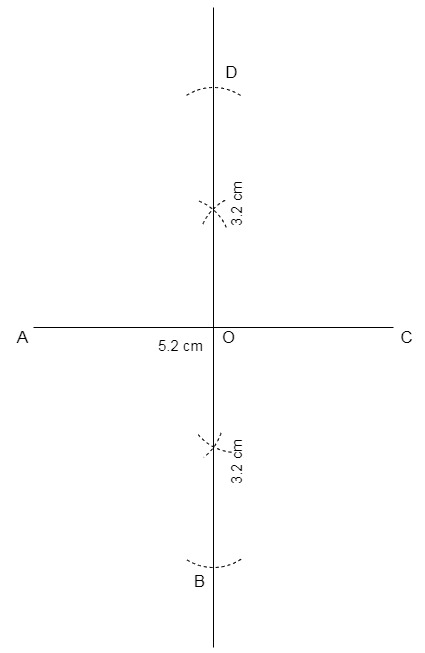
Step 1: Draw a line AC of 5.2 cm
Step 2: Draw perpendicular bisector of AC and mark the bisector point as O
👁 Image
Step 3: Draw two arcs with centre O of radius 1/2 × BD = 1/2 × 6.4 cm = 3.2 cm and these arcs will meet the bisector at point B and D
Step 4: Join AB, BC, CD and AD.
Hence, we have the required rhombus ABCD.
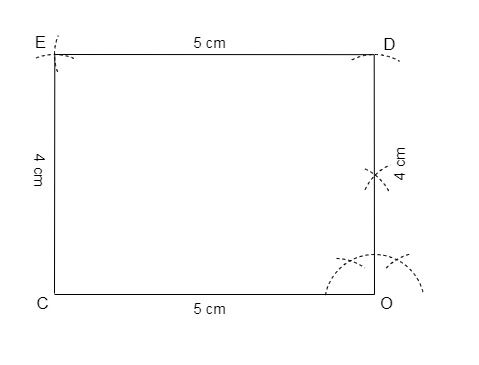
Steps of construction:
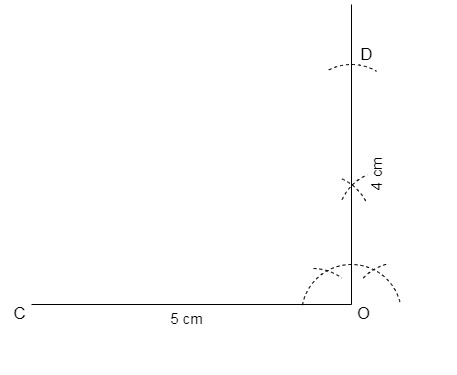
Step 1: Let the rectangle be CODE with adjacent sides CO = 5 cm and OD = 4 cm.
Step 2: Draw CO = 5 cm.
Step 3: From O draw an angle of 90°.
Step 4: From O cut OD = 4 cm.
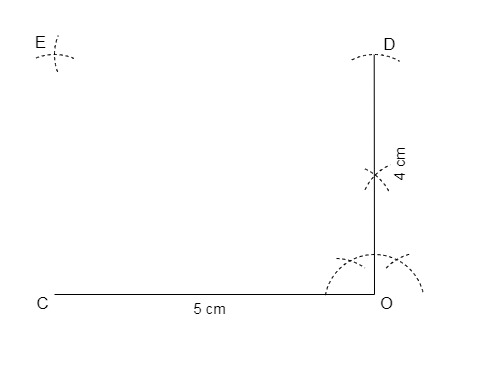
👁 ImageStep 5: From C draw an arc of 4 cm and from D draw an arc of 5 cm, intersect both the arcs and mark the point as E.
👁 ImageStep 6: Join CE and DE.
👁 ImageThus, we have the required rectangle CODE.
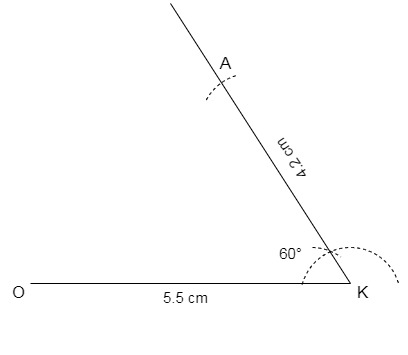
Steps of construction:
Step 1: Draw a line OK of 5.5 cm.
Step 2: Draw a ray at K at any convenient angle, let the angle be 60°.
Step 3: Now cut the ray at 4.2 cm and mark the point as A.
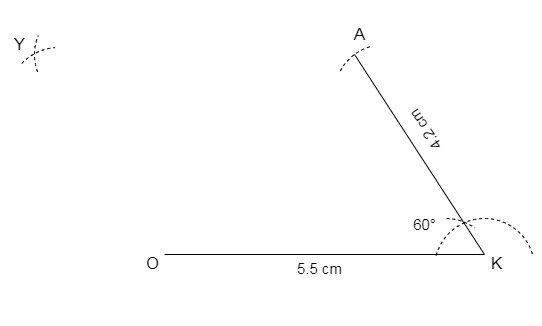
👁 ImageStep 4: From A draw an arc of 5.5 cm and from O draw an arc of 4.2 cm, intersect both the arcs at Y.
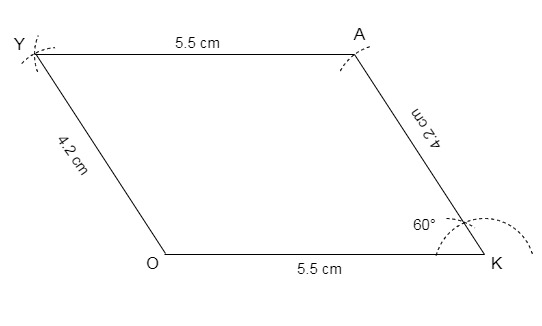
👁 ImageStep 5: Join OY and AY.
👁 ImageThus, we have the required parallelogram OKAY.
No, it is not unique as angle K can be any angle.
Read More: