Bill/Invoice Generator website using React helps users easily make, customize, and print invoices and can add or delete items. It uses React's building blocks to make the design easy to update and reuse. The user also has a feature of downloading the pdf version of the generated bill
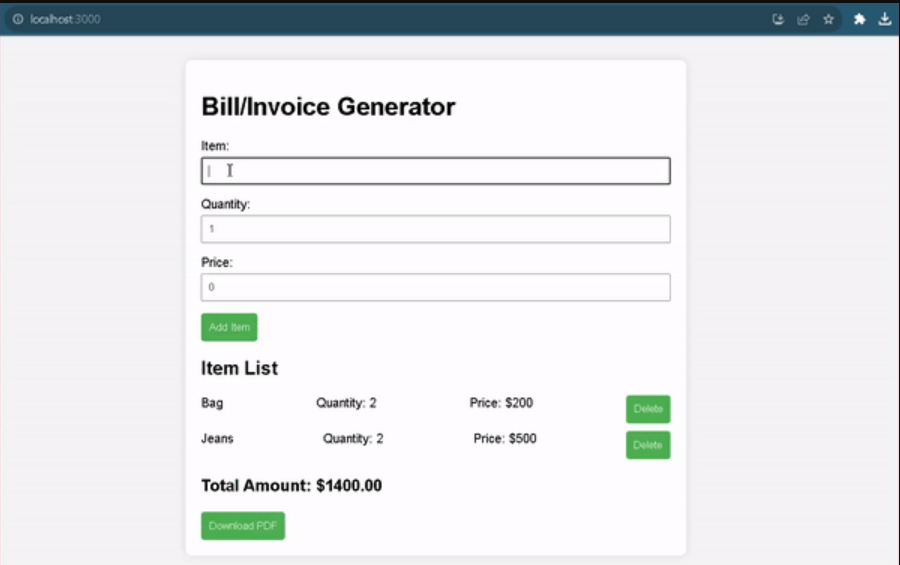
Preview of final output: Let us have a look at how the final output will look like.
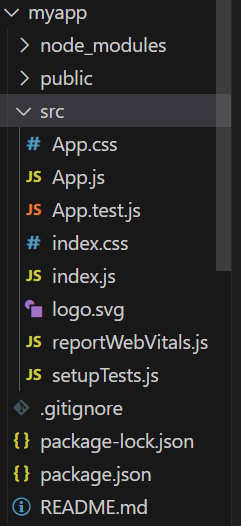
Create a component (React Component) folder in src folder and inside that folder make three JS file i.e.
In file it is responsible for capturing user input for individual items in a bill or invoice. It includes fields for item names, quantities, and prices, along with functionality for adding items to the list and deleting the last entered item.
In file is dynamically renders and displays the list of items in a bill or invoice.
The file is for calculating and displaying the total amount of the bill or invoice. It receives the list of items as props (Props), performs the necessary calculations, and presents the total amount in a clear and formatted manner.
file is the main React component for the the project. It manages the overall state, handles user interactions such as adding and deleting items, calculates the total amount, and integrates PDF generation functionality, providing the core logic for the entire web application.
file is the entry point for a React application. It uses the ReactDOM library to render the root component (in this case, the App component) into the HTML document. And similarly index.css is the main css of web application for giving designing and animation to projects.
Once all the code is done and compiled successfully , you will see a page where you have to input item name then its quantity and each price.
Then click on Add item button to add on the list. and you also delete the items according to your wish.
Also you can download the bill in pdf form by clicking on download button.
Steps to Create the React App
Step 1: Set up React Project using the Command:
npm create vite@latest <name of project> --template react
Step 2: Navigate to the Project folder using:
cd <name of project>
Step 3: Installing the dependencies.
npm install jspdf
Step 3: Create a folder “components” and add three new files in it namely BillDetails.js, ItemList.js and TotalAmount.js.
