 |
VOOZH | about |
|
VOOZH | about |
Migrating from Vite to Next. By utilizing Next, your React app can benefit from an increase in performance. js has some power full features like server-side rendering(SSR), static site generation (SSG) and built-in API routes. There are some steps in this migration to move your project structure and components step by step, with zero downtime for starting new code.
Table of Content
Migrating from Vite to Next. js might give you a bunch of wins depending on what is your project requirements and goals.
Next. js has built-in SSR support, which is why it's often used for larger projects that require a versatile framework and are not limited to the functionality of GatsbyJS or Nuxt.js.
The other feature of the current development environments, preposterously known as Integrated Build-in CSS or Sass Support.
This is about the transition of Vite to Next. The processes of js are widely considered to incorporate a number of significant stages. Below is a step-by-step guide that should help one in the consideration of personal savings.
npm create-vite@latestcd vite-projectnpm installWhile creating the Vite project there is an option to select the template (vanilla, vue, react, etc. ).
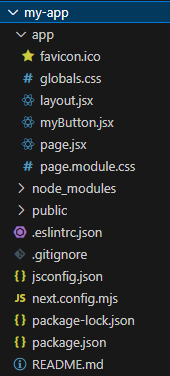
Move source files from src directory of your Vite project to the appropriate directories in your Next.js project. example:
Dependencies: Copy dependencies from package.json of your Vite project and install them in your Next.js project.
npm install <dependency-name>
npm install next
Next.js Configuration: If you had custom Vite configurations, modify the next.config.js in your Next.js project accordingly.
If you used absolute imports or module path aliases in Vite, configure jsconfig.json or tsconfig.json in Next.js.
// jsconfig.json
{
 "compilerOptions": {
 "baseUrl": ".",
 "paths": {
 "@components/": ["components/"],
 "@pages/": ["pages/"]
 }
 }
}
javascript
// pages/_app.js
import '../styles/globals.css';

function MyApp({ Component, pageProps }) {
 return ;
}

export default MyApp;
Move static assets to the public directory in Next.js and update paths in your code.
Modify the environment variable:
import.meta.env.MODE ⇒ process.env.NODE_ENV
import.meta.env.PROD ⇒ process.env.NODE_ENV === 'production'
import.meta.env.DEV ⇒ process.env.NODE_ENV !== 'production'
import.meta.env.SSR ⇒ typeof window !== 'undefined'
change the variables with prefix 'VITE_" to "NEXT_PUBLIC_"
VITE_BASE_PATH = "/path" ⇒ NEXT_PUBLIC_BASE_PATH = "/path"
VITE_API_URL=https://api.example.com ⇒ NEXT_PUBLIC_API_URL=https://api.example.com
Update the scripts section in your package.json to use Next.js commands:
"scripts": {
 "dev": "next dev",
 "build": "next build",
 "start": "next start",
 "lint": "next lint"
}
npm run devnpm run build
npm start
There is no need for any additional comments or output statements About workflow : An example of a specific task is to refactor the code whenever required and then go with Next. js features such as Image Optimization, Static Generation and API Routes.
Add new goals instead of updating based on them and scratch out all Vite-related configurations and files, including documents.
When moving a project to Vite, managing environment variables and . There are two extreme options: either one does not use .gitignore at all and then all files can be source controlled and then there is the other option which is to have .gitignore set up correctly to ensure that source controlling is not a nightmare. Here’s a guide to help you manage these aspects effectively:Here’s a guide to help you manage these aspects effectively:
Defining Variables:
In these files, you define your environment variables with the VITE_ prefix. This prefix is required for Vite to expose the variables to your application.
Example .env file:
NEXT_PUBLIC_API_URL=https://api.example.com
NEXT_PUBLIC_NAME=MyApp
Variables without the VITE_ prefix will not be exposed to your code, which is a security feature.
Accessing Variables in Code:
You can access these variables in your application using import.meta.env.
Example in a component:
Using Different Environment Files:
Vite automatically loads the appropriate .env file based on the mode you are running. For instance, when running vite build or vite --mode production, Vite will load variables from .env.production.
1. Ignoring Environment Files:
It’s essential to avoid committing sensitive environment files to your repository. Add the .env files to your .gitignore to prevent them from being tracked by Git.
Example .gitignore entries:
# Environment files
.env
.env.*
2. Other Common Entries:
Besides environment files, you might also want to ignore other common Vite-related files and directories:
# Node modules
node_modules/

# Build output
dist/

# Local IDE config
.idea/
.vscode/

# System files
.DS_Store
.npm/
.cache/
Migrating from Vite to every other build device or framework may be a complicated process, relying on what you’re migrating to. Here’s a entire walking code example that demonstrates how you might migrate a Vite challenge to a simple configuration using Webpack. This instance includes setup, configuration files, and dealing with surroundings variables.
Project Structure:
Example: This code creates a simple button in next.js
Output:
👁 ezgif-4-78659a839cMigrating from Vite to Next.js involves transitioning to a more powerful framework for React, offering built-in routing, SSR, and SEO optimization while retaining modern development features like fast refresh and module bundling.