Real-time Notification System using Next.js and Socket.io
Last Updated : 23 Jul, 2025
This article explains the process of creating a Real Time Notification System using Next.js and socket.io. In a typical scenario, imagine the need to create a user-friendly application. This application helps the user to send and receive notifications and can be used in multiple projects like E-commerce, chat applications, etc.
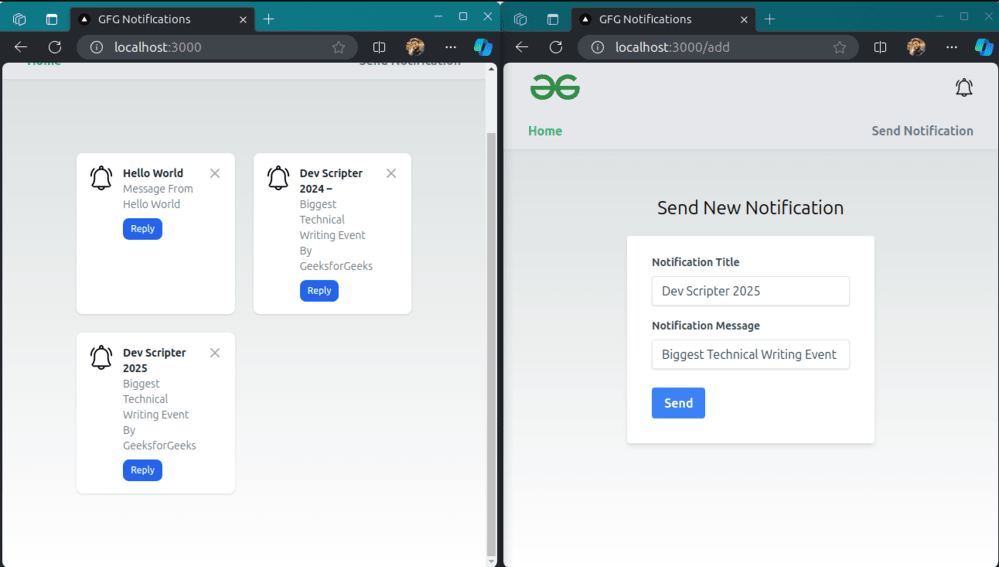
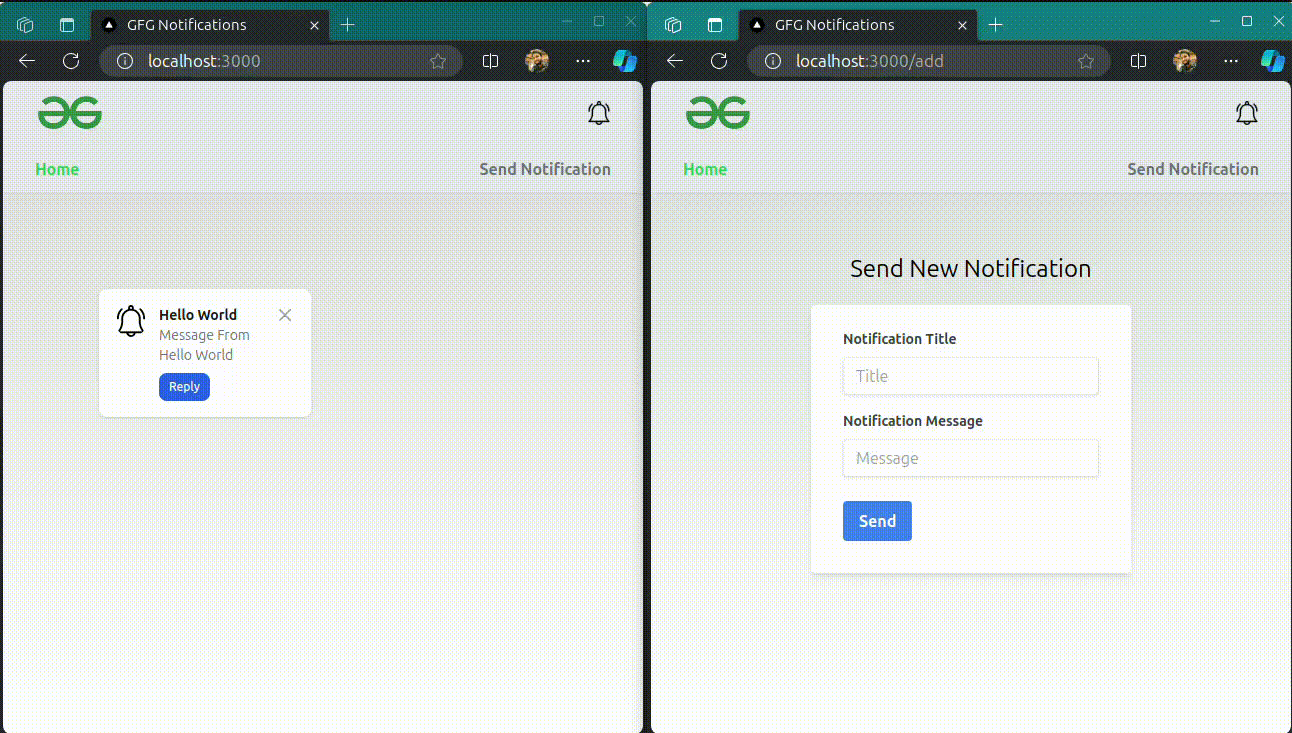
Output Preview: Let us have a look at how the final output will look like.
It receives real-time updates via a WebSocket connection using the socket.io-client library.
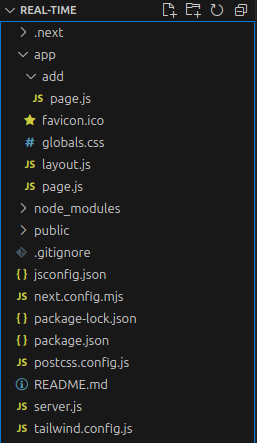
app/page.js is a page component that uses the socket.io-client library to connect to the server and listen for notifications. When a notification is received, it is displayed on the page.
app/layout.js is a wrapper for all pages in the app. It's a good place to put shared components and styles.
app/add/page.js is the page component for the add route. It is a React component that is rendered when the user navigates to /add. It contains a form that allows the user to add a new notification. When the form is submitted, the handleSubmit function is called, which sends a POST request to the server with the notification data.
Establishes a WebSocket connection using io('http://localhost:4000') via useMemo.
Uses useEffect to handle connection events and attempts to reconnect in case of errors.
Creates an Express server and a Socket.io server.
server.js is the file that will handle the POST request from the client and emit the notification to the client.
Handles WebSocket connections and updates in real-time.
Logs user connections, emits initial data, and updates data on send notification.
Steps to create the NextJS Application
Step 1: Create a Next.js project using the following command:
npx create-next-app RealTime
cd RealTime
Step 2: Create a file server.js inside root directory.
Step 3: Install the required dependency in your server using the following command.
