 |
VOOZH | about |
|
VOOZH | about |
In this article, we will create an Interactive and Responsive Shopping Cart Project Application using the famous JavaScript FrontEnd library ReactJS. We have named or Application as "GeeksforGeeks Shopping Cart". The application or project which we have developed mainly focuses on the functional components and also, manages the various state of the application. The developed project provides the feature to the user to browse different products or items, add the items to their cart, and also process the purchases. Users can also see the real-time amount of their purchase, and they can be able to remove the product added to the cart efficiently.
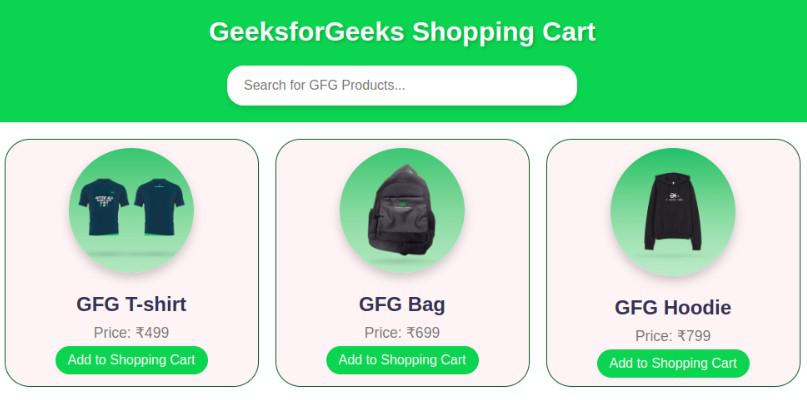
Let's have an interactive look at what our final project will look like:
The given code presents the simple but functional full Shopping Cart project which we have named "GeeksforGeeks Shopping Cart". This project is completely developed using ReactJS and styling is applied in CSS. The developed interface allows users to perform different activities that Amazon cart and Flipkart cart provides like browsing the courses, adding that course to their cart, removing the course, seeing the real-time purchase amount, and projecting to the checkout. Integration of different functionalities can be easily done in this application like adding a payment gateway or adding more products or courses.
The dependencies in package.json will look likethis:
{
 "name": "gfg-shopping-cart",
 "version": "0.1.0",
 "private": true,
 "dependencies": {
 "react": "^18.2.0",
 "react-dom": "^18.2.0",
 "vite": "^4.0.0",
 "@vitejs/plugin-react": "^3.0.0"
 }
}
Steps to create the application:
Step 1: Set up React project using the below command in VSCode IDE.
npm create vite@latest <<name-of-project>> --template react
Step 2: Navigate to the newly created project folder by executing the below command.
cd <<Name_of_project>>
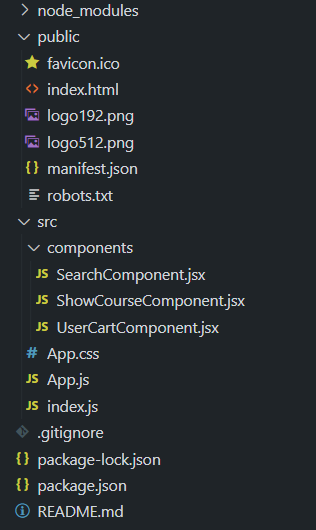
Step 3: Create the components directory and create files SearchComponent.js, ShowCourseComponent.js, UserCartComponent.js
Example: Insert the below code in the App.js and App.css files mentioned in the above directory structure.
Steps to run the application:
1. Run the application by executing the following command in the terminal.
npm run dev2. Open a web browser like Chrome or Firefox and type the following URL in the address bar.
http://localhost:5173/Output: