 |
VOOZH | about |
|
VOOZH | about |
A flowchart in Microsoft Word is a visual diagram that represents processes and decisions using shapes like rectangles, diamonds, and arrows. It simplifies complex information and can be created using Shapes for full customization or SmartArt for quick, structured layouts.
This Microsoft Word flowchart tutorial will guide you through two easy methods to create flowcharts in Word:
To know how to build a flowchart in Word, follow the steps given below:
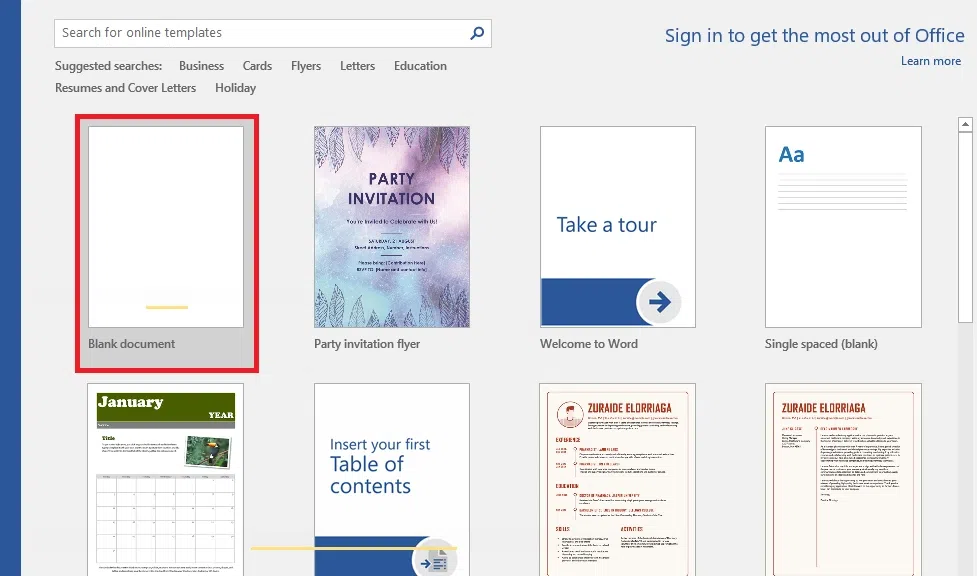
Step 1: Open a Blank Document
Launch Microsoft Word and open a new blank document to start your flowchart.
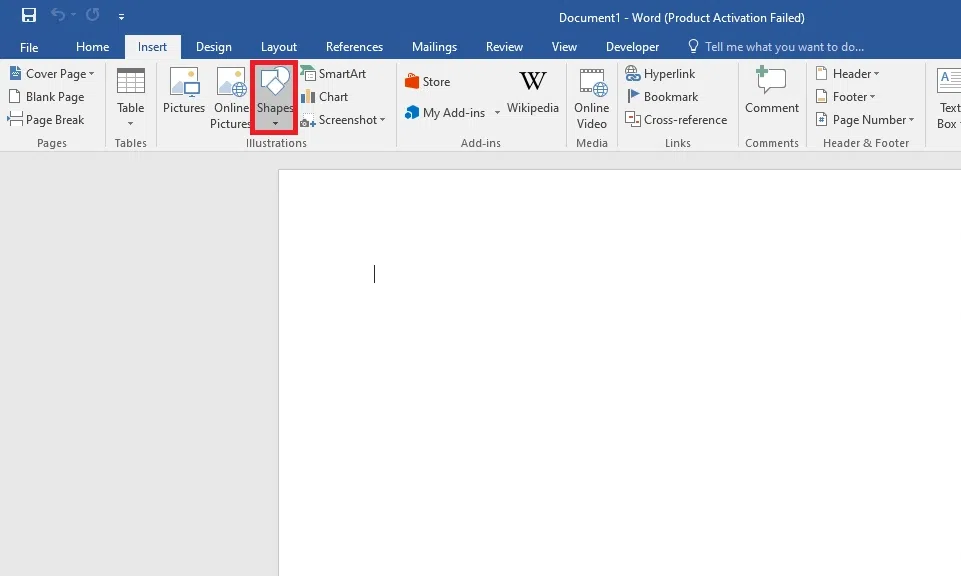
Step 2: Access the Shapes Tool
Go to the Insert tab and click Shapes. A menu will appear with various shapes that are commonly used in flowcharts, such as rectangles, diamonds, and arrows.
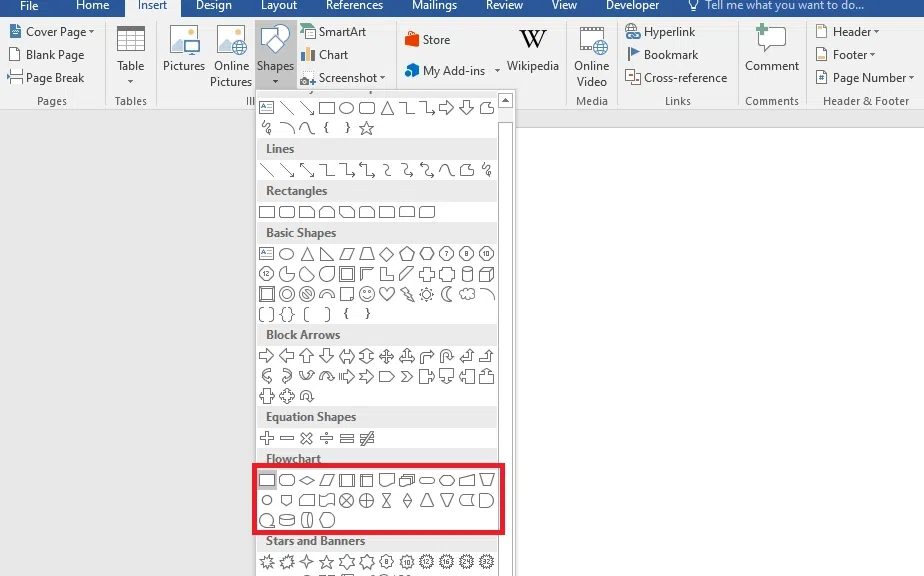
Step 3: Draw Your Flowchart Shapes
Choose a shape (e.g., rectangle for processes, diamond for decisions) and click and drag on the page to create it. Add more shapes as needed to represent each step.
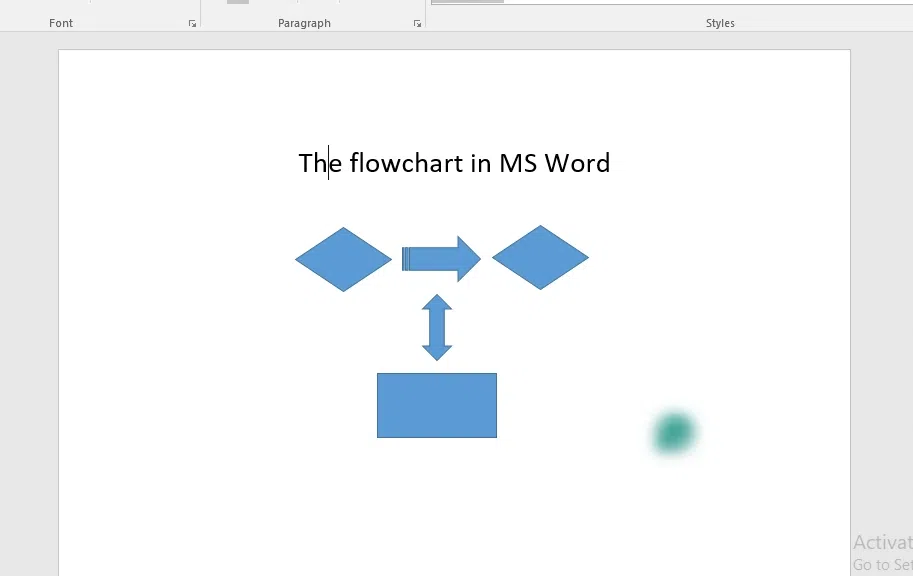
Step 4: Connect the Shapes
Return to the Shapes menu and select a line or arrow. Draw connectors between the shapes to show the flow of the process.
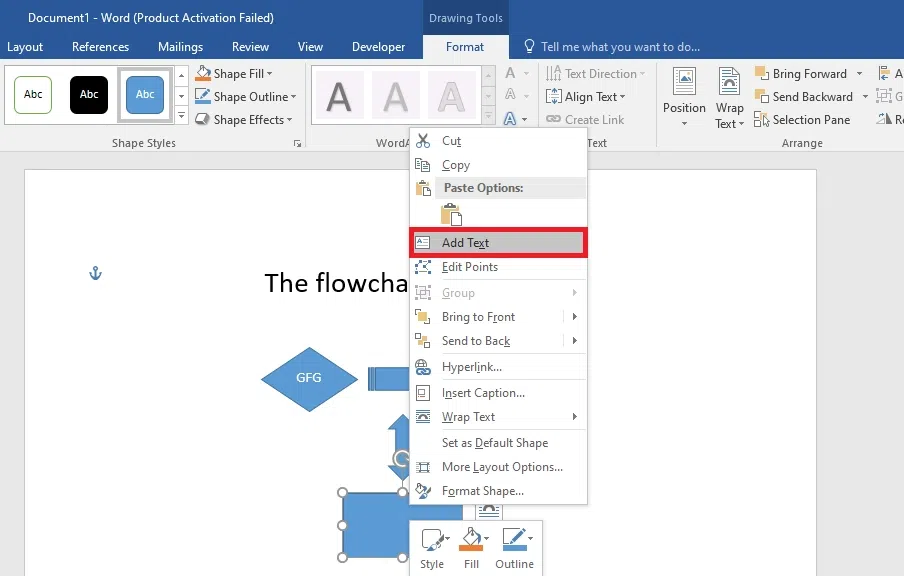
Step 5: Add Text to the Shapes
Click on each shape and type the relevant text or description of the process. You can adjust the font size, style, and alignment using the ribbon.
Step 6: Customize the Flowchart Design
Use the Format tab to change the color, border, and style of shapes and connectors, making your flowchart visually appealing.
Step 7: Save and Share
Once your flowchart is complete, save the document by clicking File > Save As. You can also export it as a PDF or print it for presentations or distribution.
For Older Versions of Word
If you're using older versions of Word, the process remains the same, but the Shapes tool and formatting options may appear slightly different. However, the basic functionality of creating a flowchart is still available.
To know how to build a flowchart in word using Smart Art follow the steps given below:
Step 1: Open a Blank Document
Launch Microsoft Word and create a new blank document where you want to insert your flowchart.
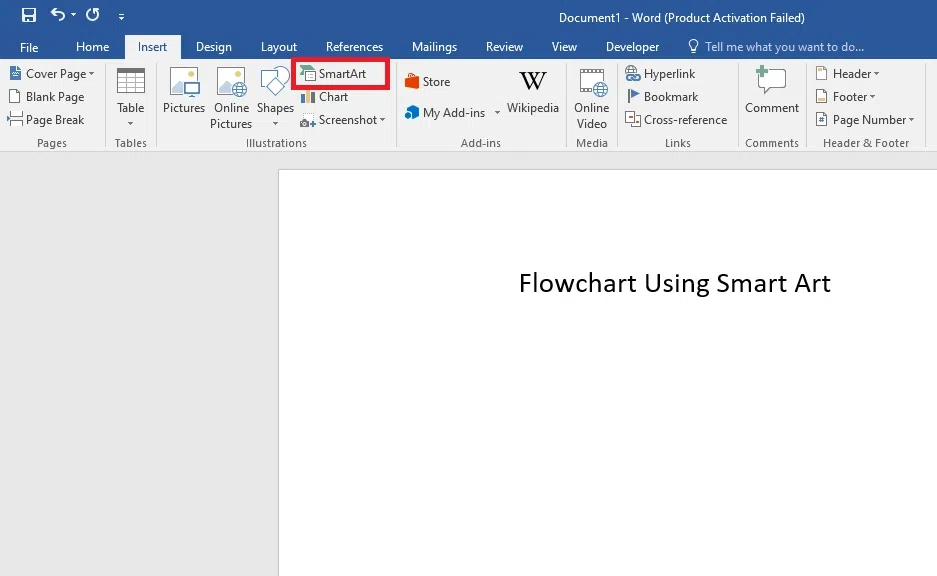
Step 2: Go to the Insert Tab and Choose SmartArt
Click on the Insert tab in the ribbon at the top of the screen. In the Illustrations section, click on SmartArt. This opens the Choose a SmartArt Graphic dialog box.
Step 3: Select a Flowchart Layout
In the dialog box, select Process from the list on the left. Choose a flowchart design (such as Basic Process or Process Arrows) that best suits your needs. Click OK to insert it into the document.
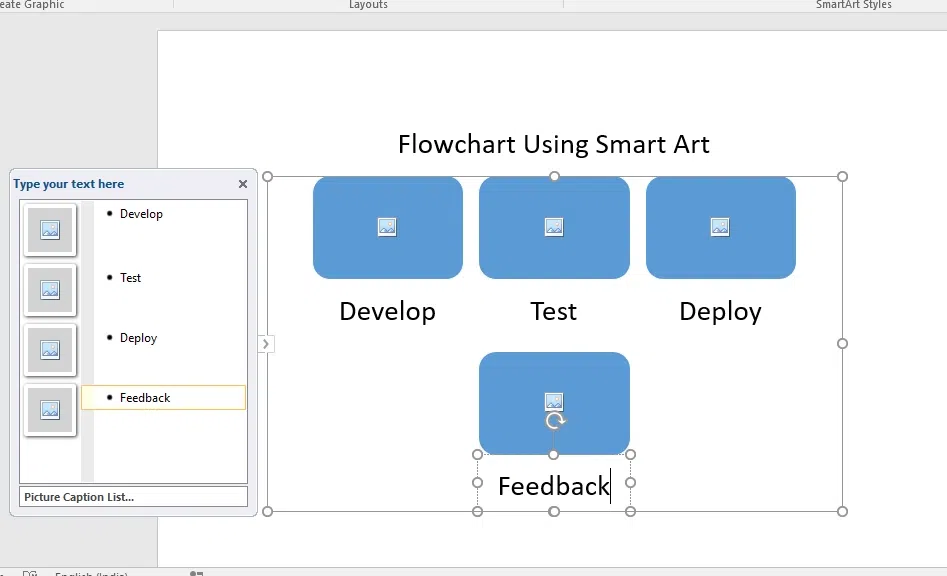
Step 4: Add Text to Each Shape
Click on each shape within the flowchart and type the relevant text, such as steps, processes, or decisions.
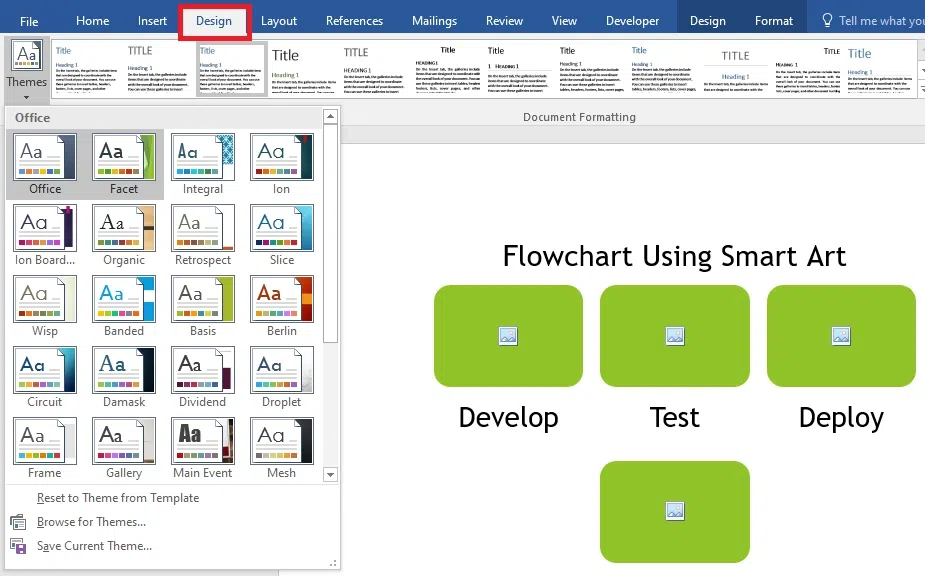
Step 5: Customize the Flowchart
Use the SmartArt Tools on the ribbon to customize the design. Under the Design tab, you can change the layout, colors, and styles to better match your needs. You can also resize and reposition the shapes for better organization.
Step 6: Save and Share
Once your flowchart is complete, save the document by selecting File > Save As. You can also export it as a PDF or print it for presentations or meetings.
Make your flowcharts stand out with these Microsoft Office flowchart tools and advanced tips:
Enable gridlines to ensure precise placement of shapes:
Apply consistent colors and styles for clarity:
These advanced tips ensure your shapes and designs are both professional and easy to interpret.