 |
VOOZH | about |
|
VOOZH | about |
Edge detection is a technique used in image processing to identify and highlight the boundaries of objects within an image. By detecting edges, we can extract important features and simplify the image for analysis. Edges are areas where there is a sharp change in brightness or color, often representing the outlines of objects. This process is widely used in applications like object recognition, facial detection, and robotics. Popular methods for edge detection include algorithms like Canny, Sobel, and Prewitt, which help computers “see” and understand images by focusing on the most significant parts—the edges. In this article, you will get to know about edge detection and ways to extract the edges from images.
Edge detection is a technique in image processing and computer vision used to identify the boundaries of objects within images. It works by detecting discontinuities in brightness, which often correspond to edges, contours, or significant changes in color or texture. Common edge detection algorithms include Sobel, Canny, Prewitt, and Laplacian of Gaussian (LoG). These methods help in tasks like object recognition, image segmentation, and feature extraction.
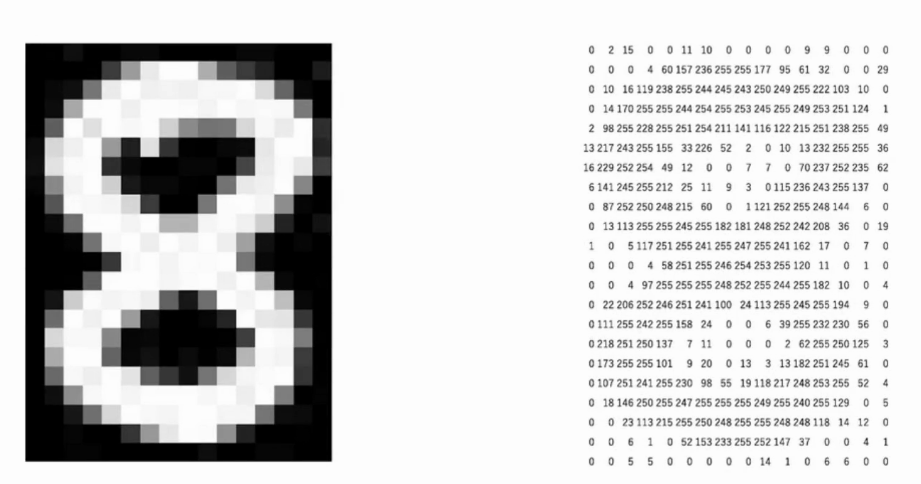
Once we have the idea of the edges, now let’s understand how can we extract the edges from an image. Say, we take a small part of the image. We can compare the pixel values with its surrounding pixels, to find out if a particular pixel lies on the edge.
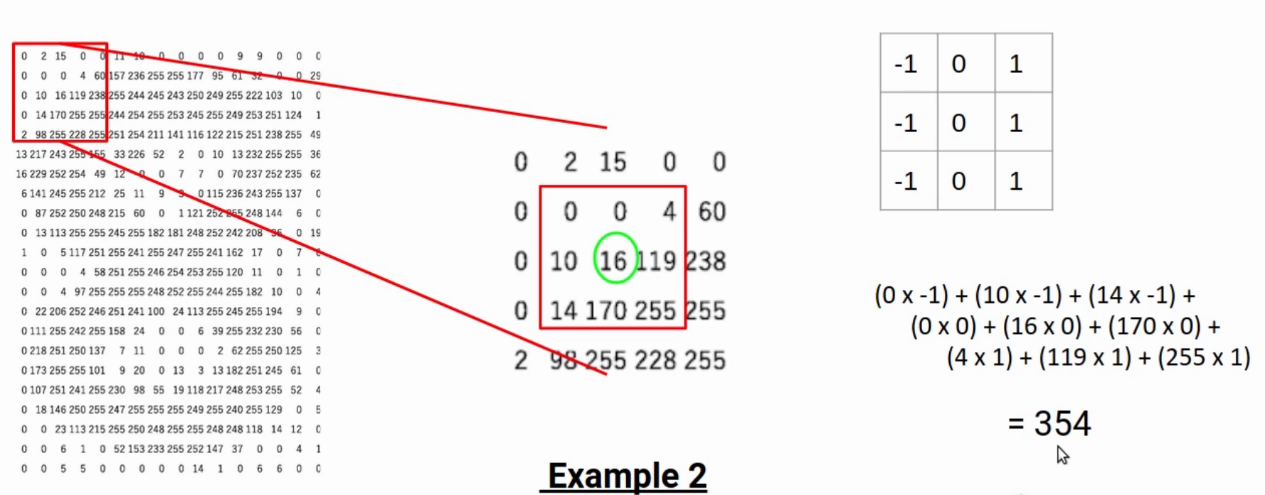
For example, if I take the target pixel 16 and compare the values at its left and right. Here the values are 10 and 119 respectively. Clearly, there is a significant change in the pixel values. So, we can say the pixel lies on the edge.
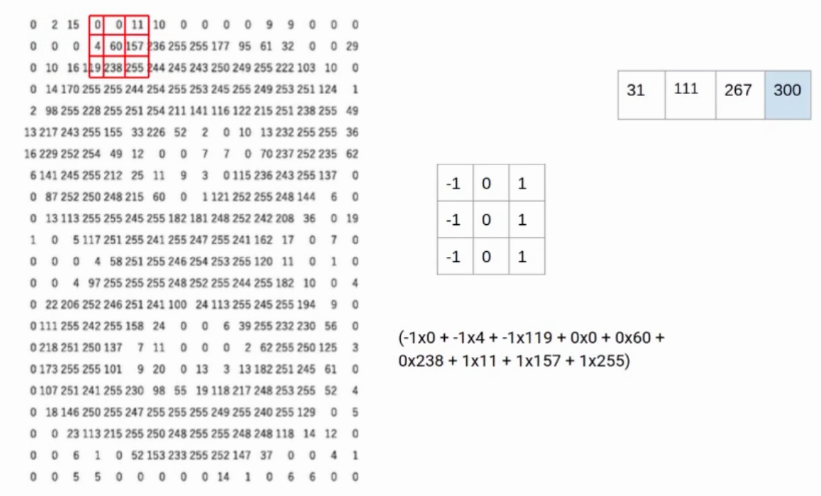
Whereas, if you look at the pixels in the following image. The pixel values to the left and the right of the selected pixel don’t have a significant difference. Hence we can say that this pixel is not at the edge.
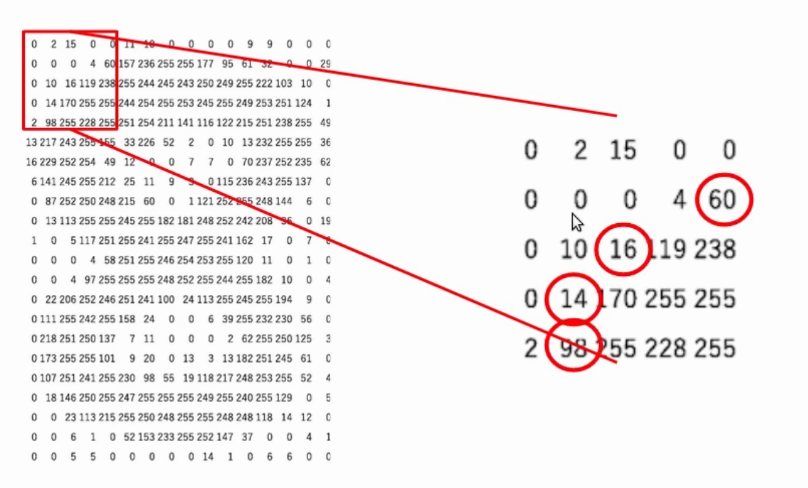
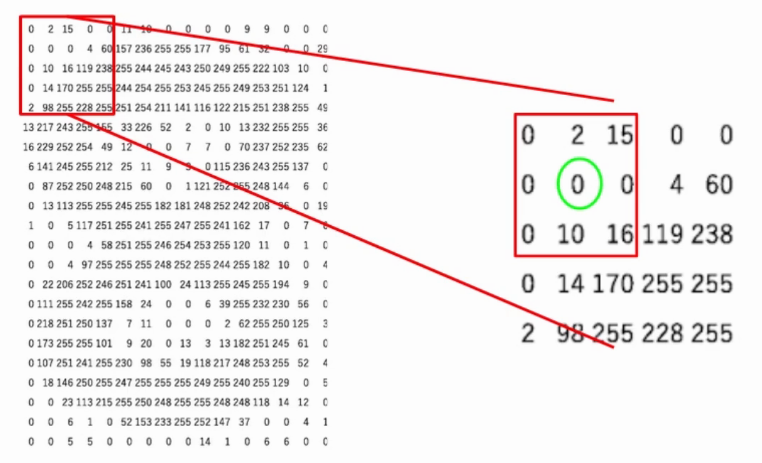
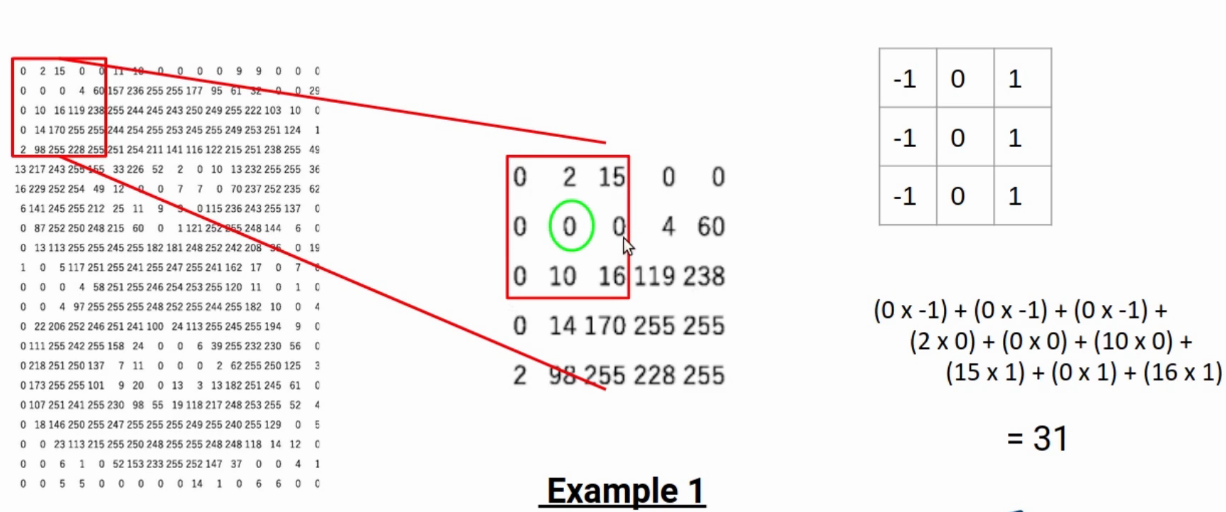
Now the question is do we have to sit and manually compare these values to find the edges. Well, obviously not. For the task, we can use a matrix known as the kernel and perform the element-wise multiplication.
Also, you can check about this article all about the image segmentation you want to know
Let’s say, in the selected portion of the image, I multiply all the numbers on left with -1, all the numbers on right with 1. Also all the numbers in the middle row with 0. In simple terms, I am trying to find the difference between the left and right pixels. When this difference is higher than a threshold, we can conclude it’s an edge.
In this example, the result is 354 which is significantly high. Hence, we can say that the given pixel lies on edge. Here in this video you can check the how to extract edges from an images.
This matrix, that we use to calculate the difference is known as the filter or the kernel. This filter slides through the image to generate a new matric called a feature map. The values of the feature map tell, the particular pixel lies on the edge or not.
The kernel we used in the above example is called the Prewitt kernel in the X-direction. Since it compares the values on the horizontal axis. Similarly, have a Prewitt kernel in Y-direction. Also, we have the Sobel kernel in X and Y directions.
In the case of Sobel kernels, higher importance is given to the pixel values right next to the target pixel.
To summarize, Pixels on the edge have a significant difference in values. We can compare neighboring pixel values to find the edge. Also, a matrix or a kernel is used to compare the values. The higher the difference between the right and left pixels, the target is closer to the edge. Similarly, Lower the difference- pixel is not at the edge.
If you are looking to kick start your Data Science Journey and want every topic under one roof, your search stops here. Check out Analytics Vidhya’s Certified AI & ML BlackBelt Plus Program
Shipra is a Data Science enthusiast, Exploring Machine learning and Deep learning algorithms. She is also interested in Big data technologies. She believes learning is a continuous process so keep moving.
GPT-4 vs. Llama 3.1 – Which Model is Better?
Llama-3.1-Storm-8B: The 8B LLM Powerhouse Surpa...
A Comprehensive Guide to Building Agentic RAG S...
Top 10 Machine Learning Algorithms in 2026
45 Questions to Test a Data Scientist on Basics...
90+ Python Interview Questions and Answers (202...
8 Easy Ways to Access ChatGPT for Free
Prompt Engineering: Definition, Examples, Tips ...
What is LangChain?
What is Retrieval-Augmented Generation (RAG)?
Edit
Resend OTP
Resend OTP in 45s