 |
VOOZH | about |
|
VOOZH | about |
This article was published as a part of the Data Science Blogathon
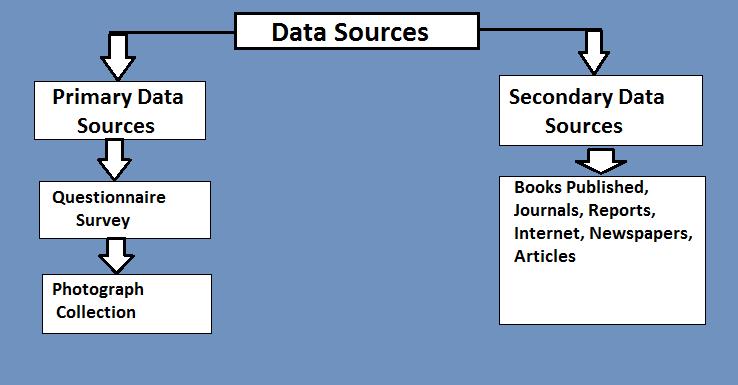
Data is often defined as raw facts. Information refers to any amounts or quantities of data that have undergone processing and holds more value than the raw facts themselves. The key difference is that decisions can be taken, and actions made, based upon the studying of Information- You should not base decisions and actions on data, Only information.
Source: StudiousGuy
Following our previous article on Computer Vision, we are now going to further explore the world of Computer Vision in the Python Programming Language, using the OpenCV Python package. This article will show us how to perform a few more of the many operations offered by OpenCV in the Python Programming Language. In the previous article, we examined the below block of code and will now look at a few more aspects to it, in this article.
Python Code:
import cv2
import imutils

img = cv2.imread('image.png')
cv2.imshow('img',img)
cv2.waitKey(0)
cv2.destroyAllWindows()Source: Medium
As you may have seen, in our previous article, we have read (loaded) the OpenCV Logo image into our system memory, using the OpenCV library’s built-in method, imread(). Upon utilizing this method, we passed in two arguments, namely, a filename and a flag. The filename specified the name and location of the file on your personal computer, while the flag could be seen as the color setting for the image. Upon recollection, we remember that we read the image into our memory in a GRAYSCALE color format.
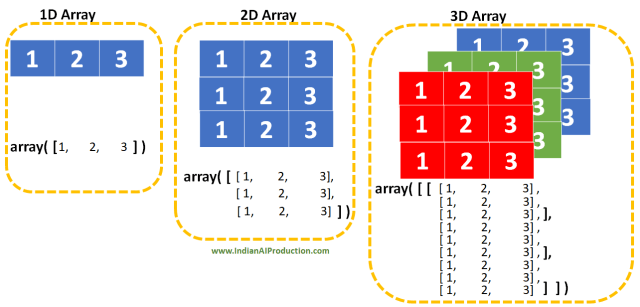
Images are data. When you use the OpenCV imread() method, you are converting that raw image data into another datatype. The new datatype is one that all of us on Analytics Vidhya are very familiar with and that is . Each element in the array represents pixel color intensity and may have one or more elements within it. Since we have loaded our array in GRAYSCALE color format, one will find that each pixel is represented as a single value that may take on a value equal to, and ranging from, zero (0) to two-hundred and fifty-five (255). As one moves from 0 to higher values, the intensity of a specific pixel increases, hence making it more striking to the eye.
0 = The Color Black.
255 = The Color White.
Essentially what I am trying to convey is as below(I have omitted the source as it is the same as the previous article, and also to allow for the flow of information):
We started with the image below:
Next, we returned the image in GRAYSCALE and obtained the image in a new format as below:
Now, we shall print the contents of the variable which is storing our GRAYSCALE image:
# variable image stored our GRAYSCALE image
print(image)
-we receive output to the above code as follows:
Now, we shall print the type of the variable image:
print(type(image))
The output will be seen as follows:
Fundamentally, OpenCV has transformed our image into a NumPy array, in which there are values from 0 to 255 representing pixel intensity, that correspond to the colors we see in the GRAYSCALE image. Remember GRAYSCALE images will always return an array in which each pixel has a single value that ranges from 0 (Black) to 255 (White).
Let us print the shape of the NumPy array to the console.
print(image.shape)
The output will be seen as follows:
Our array has 600 rows and 487 columns. In image terminology, one would say that the image has the dimensions 600 pixels (height), by 487 pixels (width).
Since OpenCV has transformed our image pixels into a NumPy array with integers, we may perform NumPy operations on the array containing image pixel values, and manipulate the array.
Our array is 2-Dimensional. This means it has rows and columns. Let us perform a bit of indexing and slicing on the array, and return the contents.
cv2.imshow("AV", image[0:100])

cv2.waitKey()

cv2.destroyAllWindows()
If one is familiar with the technique of indexing and slicing, one will be able to see that we are attempting to slice a portion of our image (NumPy) array. Again, it is crucial to understand and be conscious of the fact that OpenCV Library in Python Programming Language represents its images and associated objects as NumPy nd-Arrays.
Source: Indian AI Production.
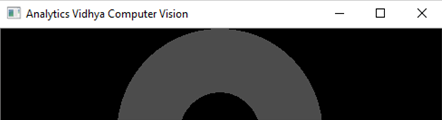
The imshow() method is used to display an image to the screen employing a GUI. However, in this particular instance we passed in a name for the GUI window, and only a portion of the pixel array, using slicing. Specifically, we wish to return the first 100 rows (height) from the image.
cv2.waitKey()
This will wait infinitely for the GUI window to be closed- i.e., user action/interaction will close this window. You may pass an integer value as an argument representing the duration (in milliseconds), the GUI window should wait before terminating automatically.
cv2.destroyAllWindows()
The above line of code will terminate all active/open OpenCV GUI windows. You may pass in the name of a specific GUI window to terminate as a string.
The output will be seen as follows:
Thus, we have successfully returned the first 100 rows of pixels from our image. Feel free to experiment with the image, and look at whether the pixel at a particular position, matches that of the color found on the image itself.
This concludes my article on Computer Vision With Python. I do hope that you enjoyed reading through this article, and have learned a new concept.
Please feel free to connect with me on LinkedIn.
Thank you for your time.
GPT-4 vs. Llama 3.1 – Which Model is Better?
Llama-3.1-Storm-8B: The 8B LLM Powerhouse Surpa...
A Comprehensive Guide to Building Agentic RAG S...
Top 10 Machine Learning Algorithms in 2026
45 Questions to Test a Data Scientist on Basics...
90+ Python Interview Questions and Answers (202...
8 Easy Ways to Access ChatGPT for Free
Prompt Engineering: Definition, Examples, Tips ...
What is LangChain?
What is Retrieval-Augmented Generation (RAG)?
Edit
Resend OTP
Resend OTP in 45s