 |
VOOZH | about |
|
VOOZH | about |
Gradio is a Python library that allows us to quickly create interactive user interfaces (UIs) for your AI models without needing any front-end development skills. Whether you’ve built a model for image classification, text generation or speech recognition, Gradio lets you turn it into a web-based app in just a few lines of code.
In this article, we’ll walk you through how to use Gradio to build clean and functional UIs for your AI models using Python.
Gradio can be installed in multiple ways depending on your setup. Here’s how to install it using different methods:
1. Open your Command Prompt or PowerShell (Windows) and Terminal (macOS/Linux).
2. Create Environment using below command:
python -m venv gradio_env
3. Activate virtual environment
gradio_env\Scripts\activate
4. Run the following command to install Gradio:
pip install gradio
If you're using Anaconda, you can install Gradio from conda-forge channel.
1. Open Anaconda Prompt (Windows) or terminal (macOS/Linux)
2. Create environment
conda create -n gradio_env python=3.10
3. Activate environment
conda activate gradio_env
4. Run the command to install, then press y to confirm:
conda install -c conda-forge gradio
After installing Gradio, you can check if it was installed correctly by running following code in python:
If Gradio is installed successfully, this will display the installed version number.
To effectively use Gradio, it's helpful to understand a few foundational building blocks:
The Interface class connects your Python function with input and output components to build an interactive UI. Once set up, Gradio automatically generates a clean and responsive interface based on your specifications.
Gradio provides a wide range of built-in components (30+ and growing) that act as input and output elements. These include:
Each component allows users to interact with your app in a structured and intuitive way.
Functions are the core logic behind your Gradio app. They take input from the user, process it and return the result. This can be something simple like a greeting or as complex as a machine learning prediction.
Example:
def greet(name):
return f"Hello, {name}!"
Once interface is defined, calling .launch() runs the app. By default, it opens a local web server. To make it available publicly (e.g., to share with teammates or clients), you can add share=True, which creates a temporary public link via an SSH tunnel.
demo.launch(share=True)
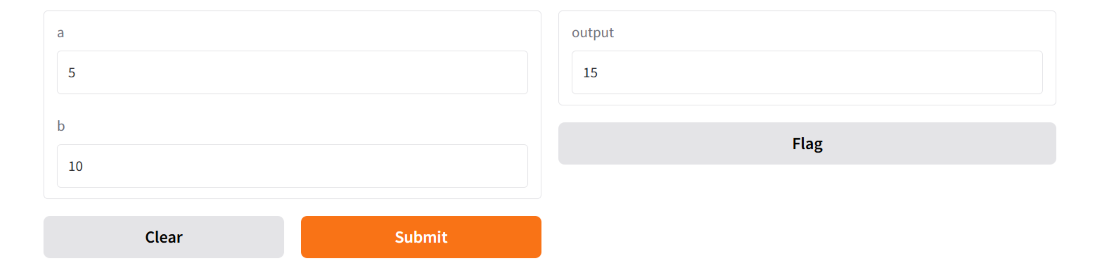
Let’s see all the above concepts in action with a basic example. This app takes two numbers as input and returns their sum using a Gradio interface. Here:
Output
When building apps with Gradio, we spend most of our time using components that define how users interact with our interface. Gradio components are building blocks of our interface. They’re divided into:
These allow users to send data to your Python function. Some commonly used input components include:
Output components show the results after processing input. Common ones include:
Note: Number of Gradio input components must match number of function arguments and number of output components must match number of values the function returns.
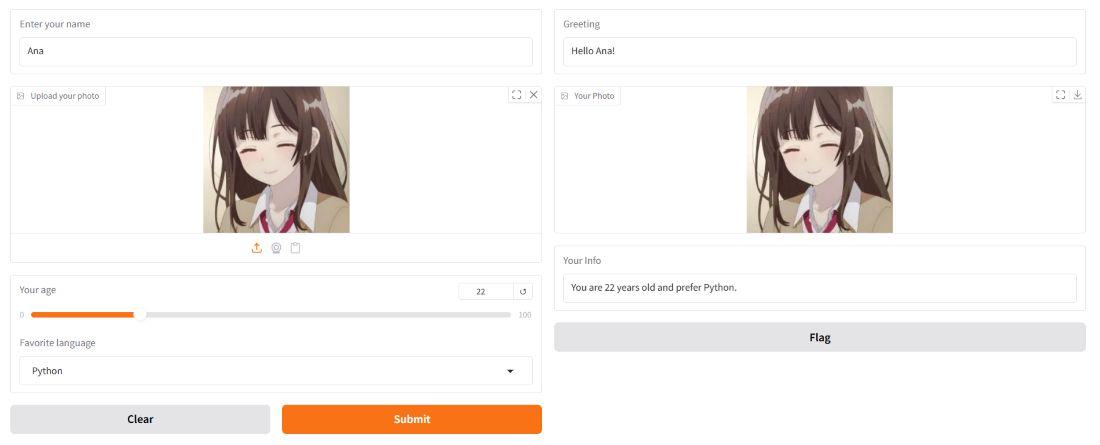
In this example, we have build a simple app that collects user details like name, photo, age and favorite language and then displays a personalized message along with uploaded photo.
Output
gr.Interface() is great for quick UIs, but for more control over layout, events and interactivity, gr.Blocks are more reliable. It is a flexible layout system in Gradio that allows developers to:
It acts as a "do-it-yourself" mode, giving more control over UI structure and interactivity.
In this example, a structured layout is created where the user enters their name and receives a greeting only upon clicking a button.
Output
In Gradio, event handling allows to control how and when certain actions are triggered like clicking a button, changing a slider or submitting a form. Instead of automatically running a function when input changes, you can tie your logic to specific events, giving you more control over the flow of your app.
Here are some common event types you can use:
Note: Event handling methods like .click(), .change(), .submit() and .input() only work when using gr.Blocks layout. These events are not supported in gr.Interface.
In this example, event handling is demonstrated by updating the output automatically when the user changes the slider value.
Output
When building AI apps with Gradio, you might want to get data from external sources like weather, news or chatbot APIs. This is done using external APIs. In simple terms, API (Application Programming Interface) is a set of rules that lets one software communicate with another to send or receive data or perform actions.
This example shows how to connect to an external API in a Gradio app. When button is clicked, it fetches and displays a random joke from an online API.
Output
Let’s now build user-friendly interfaces for two simple real-world tasks using LLMs. These examples show how you can connect your Python function powered by a large language model (LLM) to a web interface using Gradio.
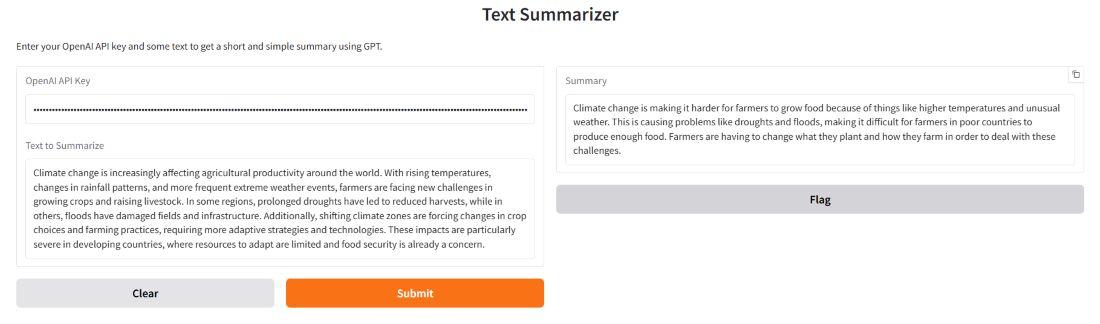
This example builds a simple Text Summarizer app using OpenAI’s GPT model. It takes a paragraph or article as input and returns a short, clear summary, making it useful for tasks like quick reading, note-taking or report preparation.
Step 1: Define Summarizer Function
Step 2: Build the Interface
Output
Note: This approach is acceptable for demo purposes. For production, API keys should be stored using environment variables instead of exposing them in the UI.
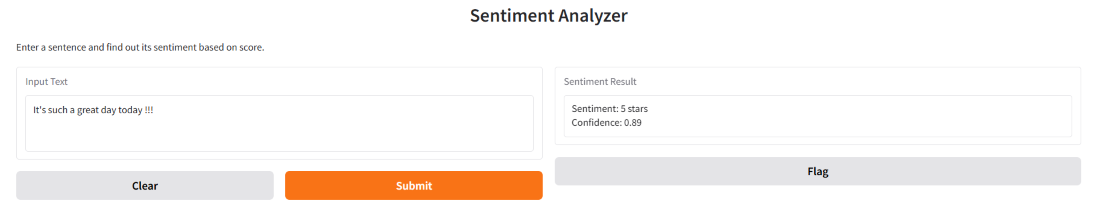
This example demonstrates how to build a user interface for an LLM-based model using Gradio. It uses a Hugging Face sentiment analysis pipeline to analyze text input and display the sentiment with confidence score. Here:
Output
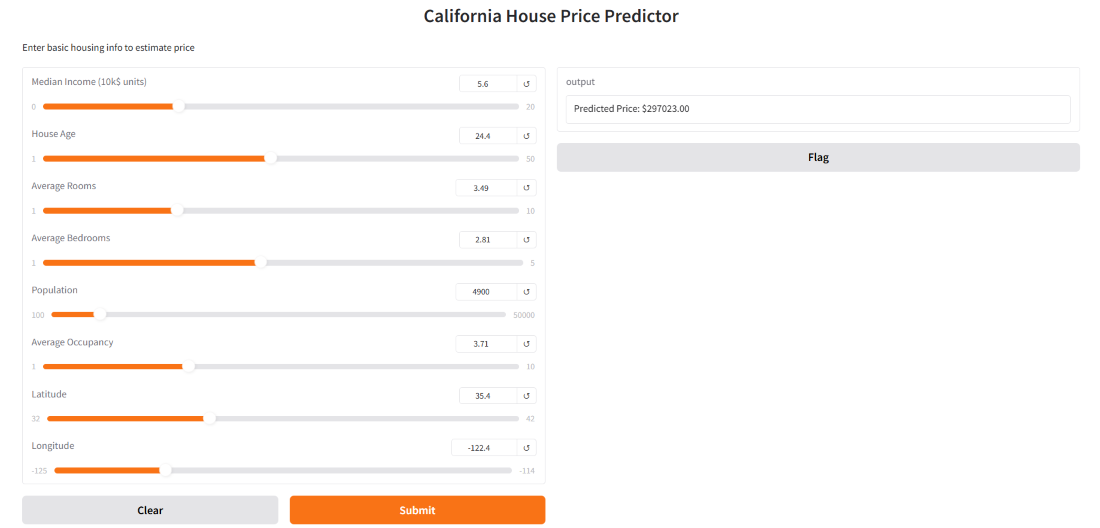
Let’s now create a user interface for a classic regression problem predicting house prices based on basic features. This is a simple example to understand how ML + UI works together. We’ll use famous California Housing dataset available from Scikit-learn.
Create a new folder (e.g., house_price_ui) and inside that, create a Python file called app.py. Make sure you install following dependencies (use virtual env if needed):
pip install scikit-learn gradio pandas
This function:
It builds interface for predict_house_price function with eight sliders for housing features. The predicted price is shown as text output. The interface includes a title, description and is launched with a public shareable link.
Output:
You’ll need 3 files in your project folder:
1. app.py
Save your code in a file called app.py. This is the main app file. Hugging Face Spaces will run this file to launch your Gradio UI.
2. requirements.txt
This file tells Hugging Face what Python libraries are needed to run your app. Create a requirements.txt file with this content:
gradio
pandas
scikit-learn
Hugging Face installs these packages in the background. If you miss one, your app might crash!
3. README.md (Optional)
It is a project description for Hugging Face viewers. Add a README.md with a short intro to your app. Example:
California House Price Predictor
This Gradio app predicts the median house price in California based on features like income, age, rooms, etc.
Built using: - Scikit-learn
- Gradio
- California Housing Dataset
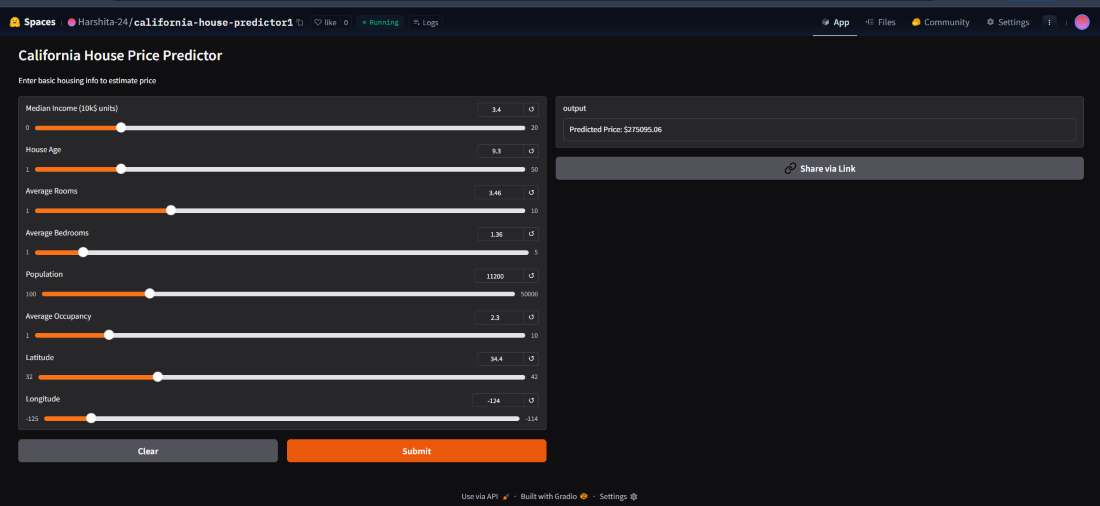
Go to Hugging Face Space and click on “Create new Space”.
Fill the details:
You’ll be taken to the Space repo view. Now:
Once files are uploaded:
After a few seconds to minutes, your app will be live in the browser!
When building apps with Gradio, following best practices helps create faster, cleaner and more user-friendly interfaces. Here are 6 key tips: