 |
VOOZH | about |
|
VOOZH | about |
Firebase is a mobile and web application development platform. It provides services that a web application or mobile application might require. Firebase provides email and password authentication without any overhead of building the backend for user authentication. Google Sign-In is a secure way to authenticate users in your apps. It reduces the hassle of dealing with and handling those extra passwords by the user to get authenticated to the app. Firebase offers a great number of options to implement Login in your app like Email, Phone number, Google, Facebook, etc.
To create a new project in Android Studio please refer to How to Create/Start a New Project in Android Studio.
Note that select Java as the programming language.
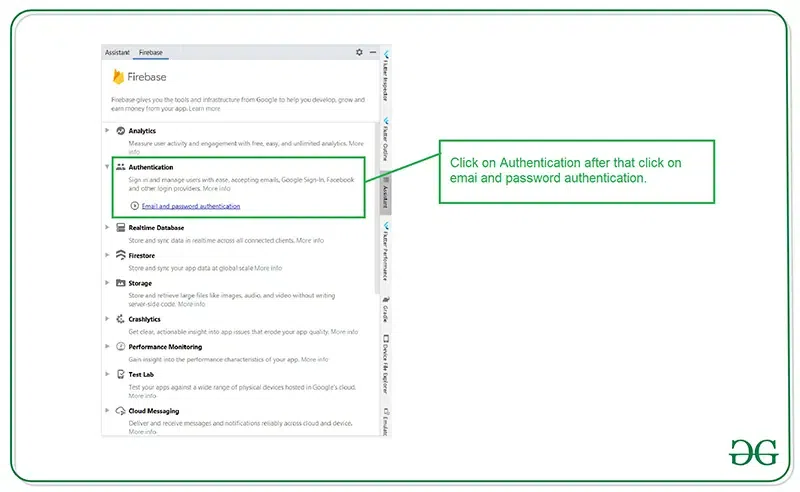
After creating a new project in Android Studio. Connect your app to Firebase. For connecting your app to firebase. Navigate to Tools on the top bar. After that click on Firebase. A new window will open on the right side. Inside that window click on Authentication and then email and password authentication.
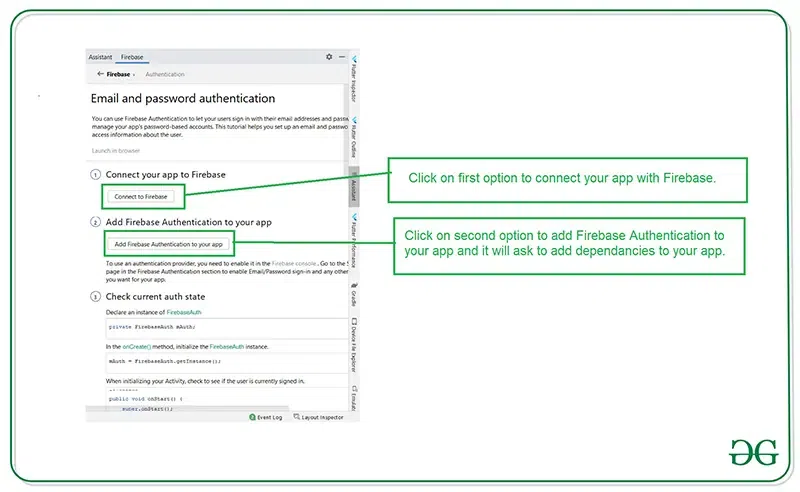
After clicking on email and password authentication you will get to see the below screen. Inside this screen click on the first option connect to firebase and after that click on the second option to add Firebase authentication to your app.
Add the following dependencies if it is not already present there.
dependencies {
 ...
 implementation ("com.google.firebase:firebase-auth:23.2.0")
 implementation ("com.google.android.gms:play-services-auth:21.3.0")
}
Click on the Google method in Sign-in Method again, scroll down and under Web SDK configuration copy the Web client id and add it in strings.xml file
<resources>
 ...
 <string name="default_web_client_id">add your web client id</string>
</resources>
Now, in the Firebase Console, navigate to the project settings by selecting on the Gear icon on the top-left corner of the screen. Then, under General, scroll down and under Your apps, select Add fingerprint and paste both the keys one by one.
In the same section as the previous step, there is an option to download the google-services.json file. After the downloading is complete, paste the file in your android studio project inside the app folder under Project section.
Navigate to the app > res > layout > activity_main.xml and add the below code to that file. Below is the code for the activity_main.xml file.
Go to the MainActivity.kt file and refer to the following code. Below is the code for the MainActivity.kt file. Comments are added inside the code to understand the code in more detail.
Please refer to Create New Activity in Android Studio and name the activity as DashboardActivity.
Go to the activity_dashboard.xml file and refer to the following code. Below is the code for the activity_dashboard.xml file. Create a Button which when clicked, logs out the user from the app.
Go to the DashboardActivity.kt file and refer to the following code. Below is the code for the DashboardActivity.kt file. Comments are added inside the code to understand the code in more detail.