 |
VOOZH | about |
|
VOOZH | about |
In Flutter applications, the Flutter BLoC (Business Logic Component) is used to manage the state. It helps separate business logic from UI. It ensures that the user interface is not strongly liaison with the business logic, making the app more versatile. It is powerful since it allows the creation of all kinds of applications. For instance, the Flutter bloc is appropriate in both production and learning environments.
Create a new Flutter application using the command Prompt. To create a new app, write the following command and run it.
flutter create app_nameTo know more about it refer this article: Creating a Simple Application in Flutter
To add the dependency to the pubspec.yaml file, add flutter_bloc as a dependency in the dependencies part of the pubspec.yaml file, as shown below:
Now, run the below command in the terminal.
flutter pub getOr
Run the below command in the terminal.
flutter pub add flutter_blocTo use the BLoC in your Flutter application, follow the given steps.
Install the following bloc extension in VSCode.
Note: If You are not using Vs Code or Don't want to automate the folder structure then, Skip this step and do it manually by creating every file.
It will helps you to generate the boilerplate code and folder structure automatically, for that follow the steps to below.
-
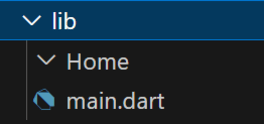
After installing the VSCode extension, create a new folder inside the lib folder and name it Home.
-
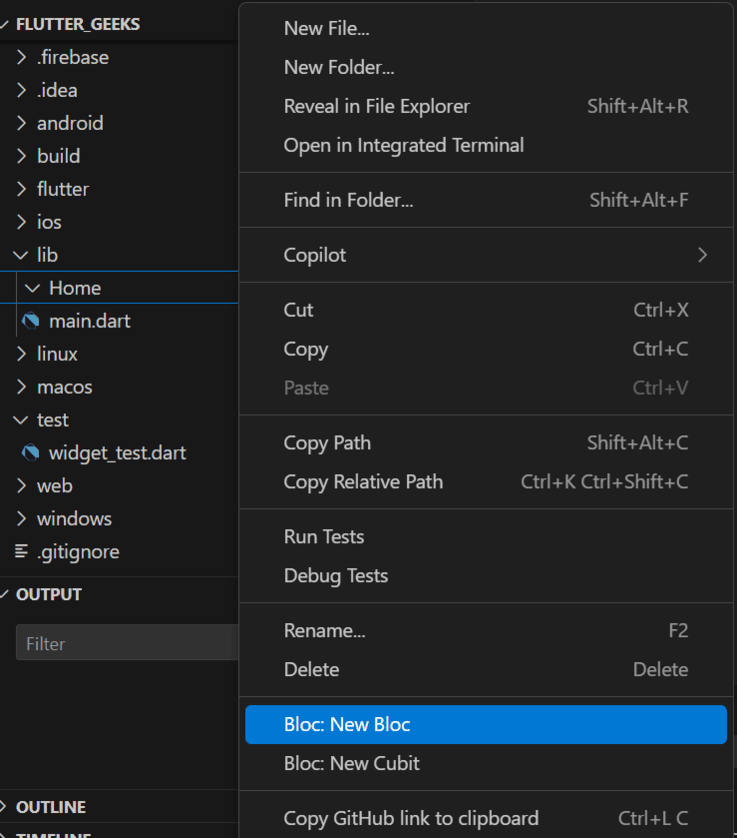
Now, Right click on Home folder, it will display a option named 'Bloc: New Bloc' select that option.
-
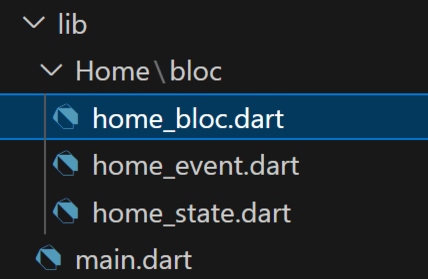
After selecting New Bloc, it will ask for the name of the Bloc. Enter the New Bloc name as 'Home' and click on Enter!.
Then, it will create a new folder in your Home folder named bloc with all required files as image below.
Note: If you are not following step1 create a folder structure manually as the image located above the Step 2.
Here we only have one event, CounterIncrementPressed to code, and that contains a parameter count because we need to pass the previous state before updating the state.
home_event.dart:
Here, also we only have one state to code and it also have one parameter counter because it is used to update state and emit to UI.
This class (HomeBloc) catches the triggered event (CounterIncrementPressed) with some previous state (event parameter in CounterIncrementPressed ) and updates it and emits through the state (CounterState(counter: event.counter + 1)) to UI.
home_bloc.dart:
We develop a simple counter app UI with a FloatingActionButton and Text widget wrapped with Center to display the count.
-: Wrap the home class CounterPage() with BlocProvider, it is used initialize the state i.e, here the counter value '0' in home_bloc.dart.
- : Used to access events in home_event.dart to perform the trigger.
- : Wrap the Scaffold with BlocBuilder that contains builder as a parameter with (context, state), and here 'state' is used to get the updated state to UI throw "." operation, for example (state.count).
main.dart:
When the App started with the help of the counter value was '0'.
BlocProvider(
 create: (context) => HomeBloc(),
 .....
)
As we are calling HomeBloc() class in home_bloc.dart and that calling CounterState( counter: 0) with '0' as counter value as below:
HomeBloc() : super(CounterState( counter: 0)) {
...
}
When it come to UI after that, catching that state i.e, counter value '0' and it will display Zero at starting of the app.
BlocBuilder<HomeBloc, CounterState>(
 // Rebuilding the UI based on the current state of HomeBloc
 builder: (context, state) {
 return Scaffold(
 ....
 body: Text('Counter: ${state.counter}',
.....
When the user taps on the FloatingActionButton, it triggers the event.
FloatingActionButton(
 onPressed: () {
 // Dispatching an event to increment the counter
 counterBloc.add(CounterIncrementPressed(counter: state.counter));
 },
 child: Icon(Icons.add),
 ),
Then it is taking current counter value and going to home_bloc.dart and searches for right on catch(on<CounterIncrementPressed>), if it finds then it will emit the state like CounterState(counter: event.counter +1 ), here with the event parameter we can easily access the previous state(event.counter) i.e, counter value and it implicitly updating the counter value and after that it is emitting that to UI.
on<CounterIncrementPressed>((event, emit) {
 emit(CounterState(counter: event.counter + 1));
 });
Then, in the main.dart catching that updated state and displaying it in the UI.
BlocBuilder<HomeBloc, CounterState>(
 // Rebuilding the UI based on the current state of HomeBloc
 builder: (context, state) {
 return Scaffold(
 ....
 body: Text('Counter: ${state.counter}',
.....
This is what is happening in the whole code.