 |
VOOZH | about |
|
VOOZH | about |
Flutter is based on Widgets and Widget Trees. If you are new to Flutter, imagine Widgets as structures of Data or Classes of Data. And to create a flutter application we nest these Widgets within one another.
Just like in Native android we can view the blueprint of our app and its properties with the help of the .xml file, Flutter provides a tool called Flutter Inspector which can help you to visualize the blueprint and properties of different widgets in your Flutter Application. Along with visualization, the Inspector tool also helps in diagnosing Widget layout issues.
Note: The flutter inspector tool is currently available only on Android Studio IntelliJ IDEA.Tools included in Flutter Inspector:
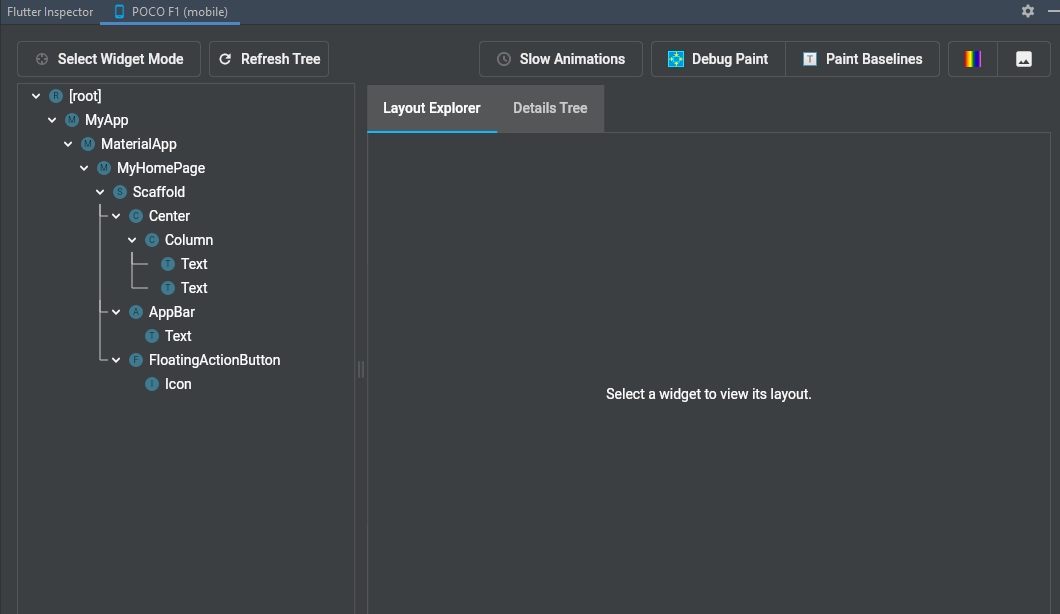
1. Select Widget Mode:
With the help of this button, you can select different widgets from your app and inspect them one at a time.
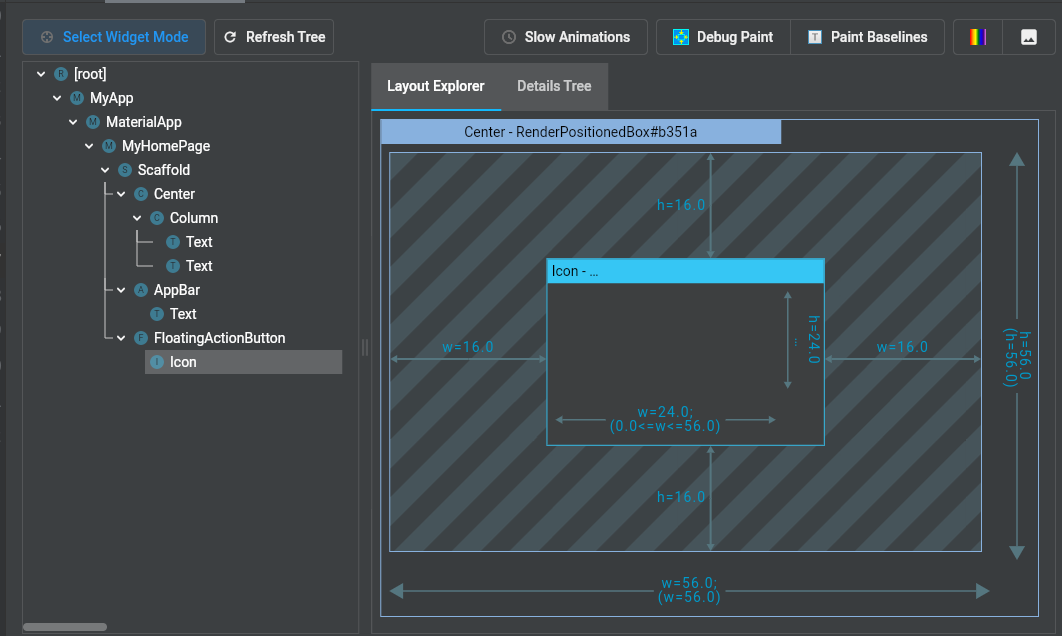
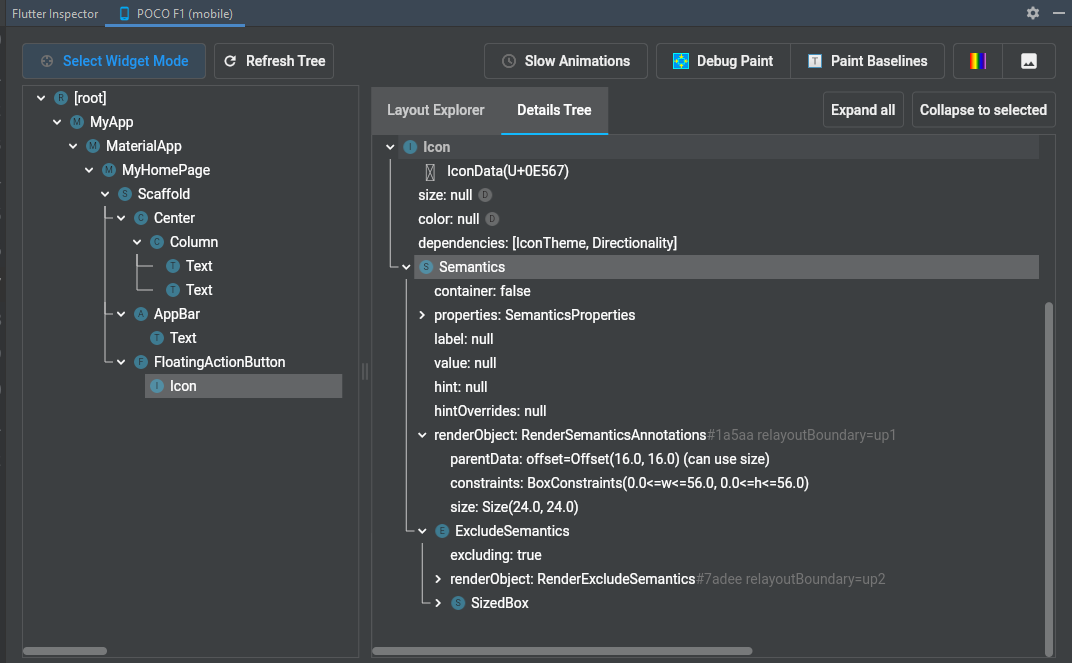
After selecting any Widget from the Widget Tree you can view the blueprint of that Widget with the help of the Layout Explorer tab, or you can check different properties and nested widgets of the selected Widget with the help of the Details Tree tab.
Example:
Over here we've selected the Icon Widget
Note: You can also select different Widgets with the help of the search icon which
  will appear on your device screen when you activate the Select Widget Mode.
2. Refresh Tree:
Whenever you make changes in your app, and you hot reload those changes are not immediately reflected in your Flutter Inspector tool. To visualize the changes you will have to click the Refresh Tree button.
3. Slow Animation:
Reduces the speed of animation between layouts.
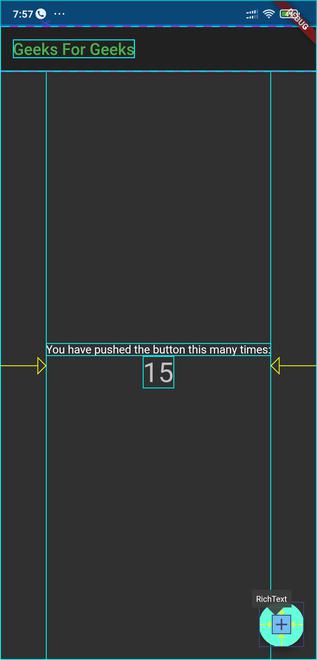
4. Debug Paint:
When activated it creates a border around each widget currently present on your screen. In short, shows a blueprint of the whole layout.
5. Paint BaseLines:
It draws baselines for all the texts and icons currently present on the screen.
6. Repaint Rainbow:
When activated it creates a border around the widgets that are changing. So It's a great tool to check/debug widgets that are changing.
For example, over here we have our homepage which is a stateful widget, so whenever there are changes inside this widget the whole widget will be repainted which is indicated by those rainbow-colored borders.
7.Invert Oversized Image:
This tool helps in identifying images of large size. Whenever developers create an application they want it to run as fast as possible, but when images with high Resolution and greater size are included in the app, the performance of the app is affected (to be more precise speed and size of the app is affected)
Example:
Over here we've added two images to the app.
When invert Oversized Image is activated the second image is inverted (colors as well as image) and the first image remains unaffected.
For more about Flutter: Flutter tutorial